
Flowable7.x学习笔记(四)SpringBoot3.2.0集成Flowable7.1.0

前言
此前,我已经在vue3的工程中集成了bpmnjs这个开源的前后端分离的流程设计器,那现在的问题就是需要后端支持将流程xml文件保存,发布流程,发起流程,审批,查看审批进度等等功能了,这些都需要后端支持,接下来我就要创建一个新服务整合Flowable来逐步实现,本篇文章我先来实现整合操作。
需要注意的是,请注意我使用的各技术栈的版本号,我会在使用的时候标明,初学时请与我保持一致,等熟悉之后再另行尝试扩展。
步骤一:确认父工程POM依赖
我是在我的脚手架的基础上增加的模块,如果各位和我一样已经有脚手架了可以像下面的图中一样添加依赖,如果使用我的脚手架那么可以参照下面完整的POM文件,文章末尾后记我也会附随上后端工程的gitee地址,是完全开源的,代码可以都看到,如果有哪里不明白的请留下评论我看到都会回复的。
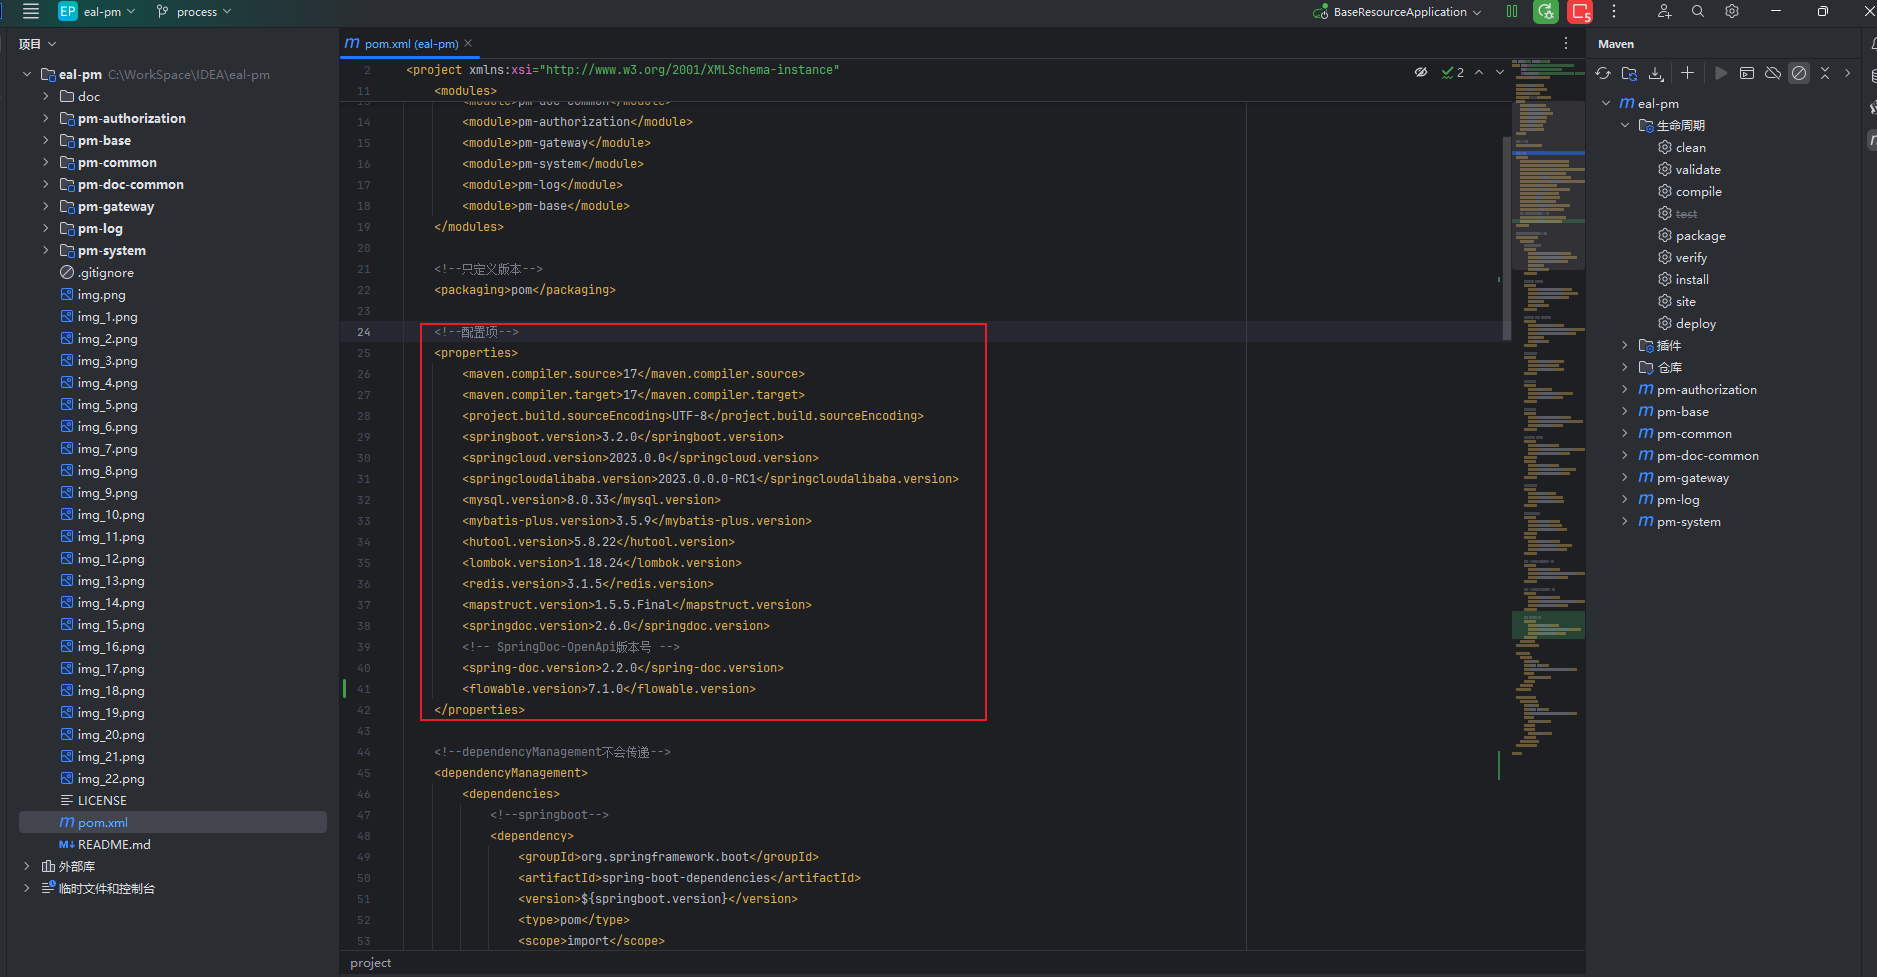
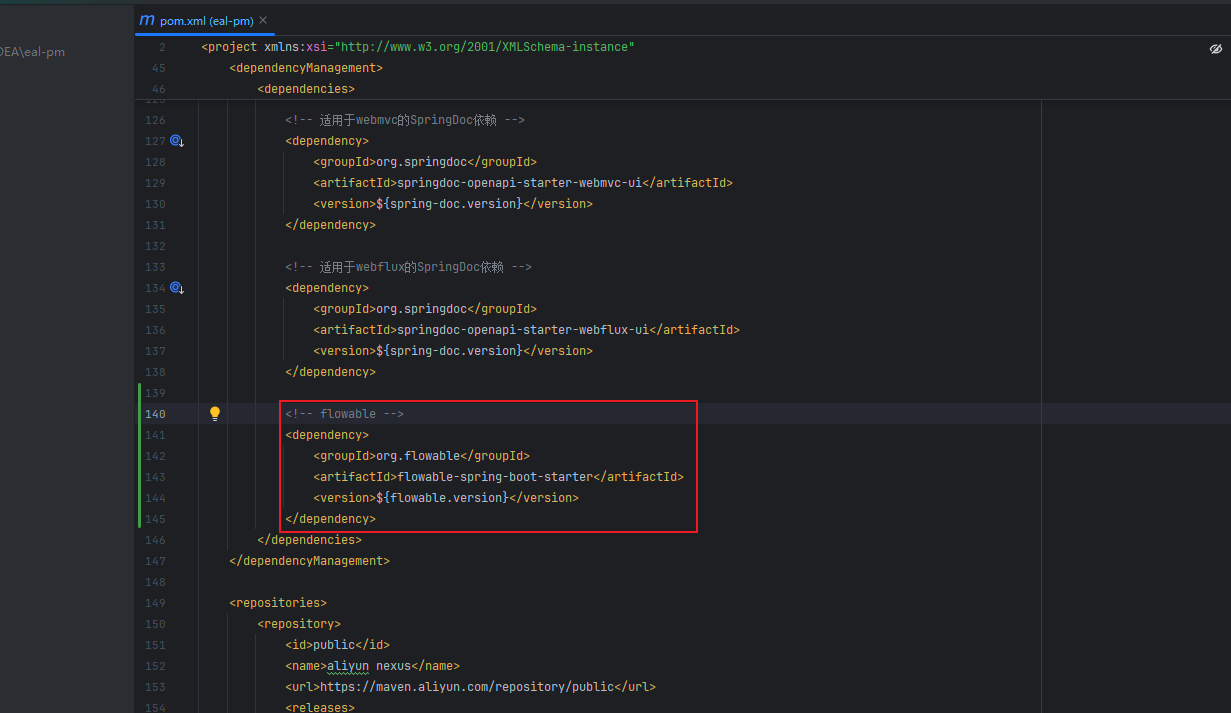
完整父POM文件如下
    4.0.0
    com.ceair
    eal-pm
    1.0.0
    父工程,定义依赖

        pm-common
        pm-doc-common
        pm-authorization
        pm-gateway
        pm-system
        pm-log
        pm-base


    pom


        17
        17
        UTF-8
        3.2.0
        2023.0.0
        2023.0.0.0-RC1
        8.0.33
        3.5.9
        5.8.22
        1.18.24
        3.1.5
        1.5.5.Final
        2.6.0

        2.2.0
        7.1.0


                org.springframework.boot
                spring-boot-dependencies
                ${springboot.version}
                pom
                import


                org.springframework.cloud
                spring-cloud-dependencies
                ${springcloud.version}
                pom
                import


                com.alibaba.cloud
                spring-cloud-alibaba-dependencies
                ${springcloudalibaba.version}
                pom
                import


                org.projectlombok
                lombok
                ${lombok.version}


                mysql
                mysql-connector-java
                ${mysql.version}


                org.springframework.boot
                spring-boot-starter-data-redis
                ${redis.version}


                com.baomidou
                mybatis-plus-spring-boot3-starter
                ${mybatis-plus.version}


                com.baomidou
                mybatis-plus-jsqlparser
                ${mybatis-plus.version}


                cn.hutool
                hutool-all
                ${hutool.version}


                org.mapstruct
                mapstruct
                ${mapstruct.version}


                org.mapstruct
                mapstruct-processor
                ${mapstruct.version}


                org.springdoc
                springdoc-openapi-starter-webmvc-ui
                ${spring-doc.version}


                org.springdoc
                springdoc-openapi-starter-webflux-ui
                ${spring-doc.version}


                org.flowable
                flowable-spring-boot-starter
                ${flowable.version}


            public
            aliyun nexus
            https://maven.aliyun.com/repository/public

                true


            public
            aliyun nexus
            https://maven.aliyun.com/repository/public

                true


                false
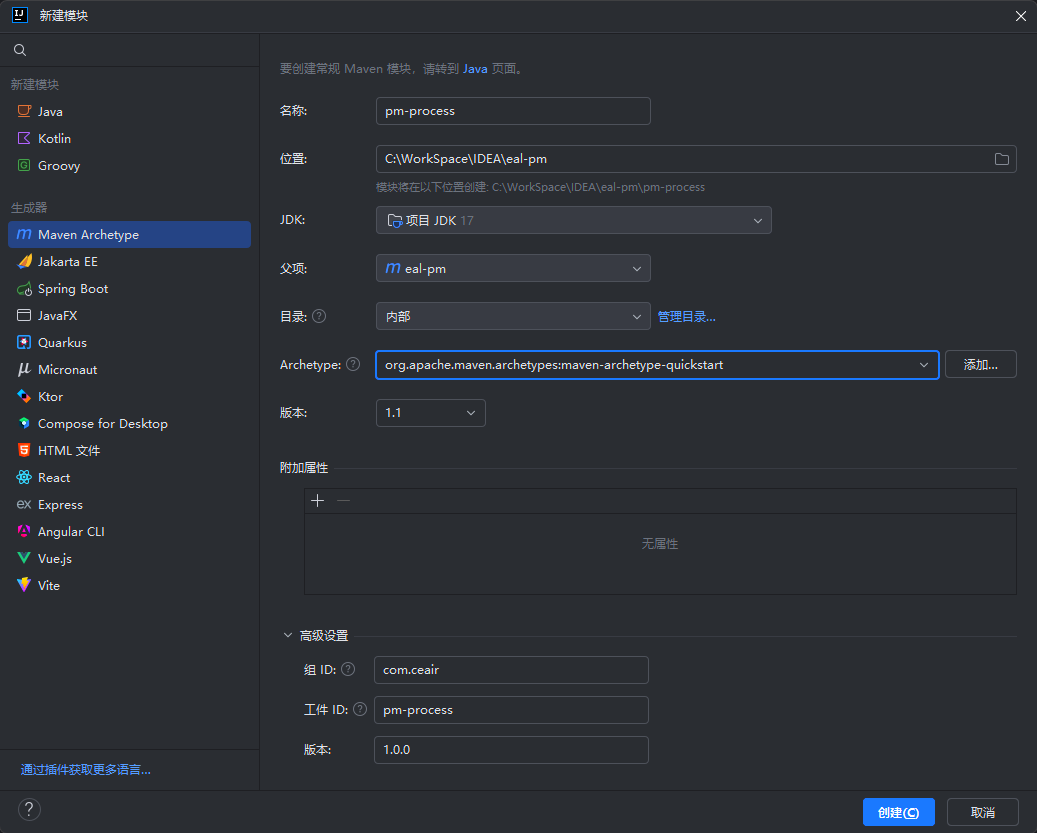
步骤二:创建新模块(pm-process)
2.1 创建大模块
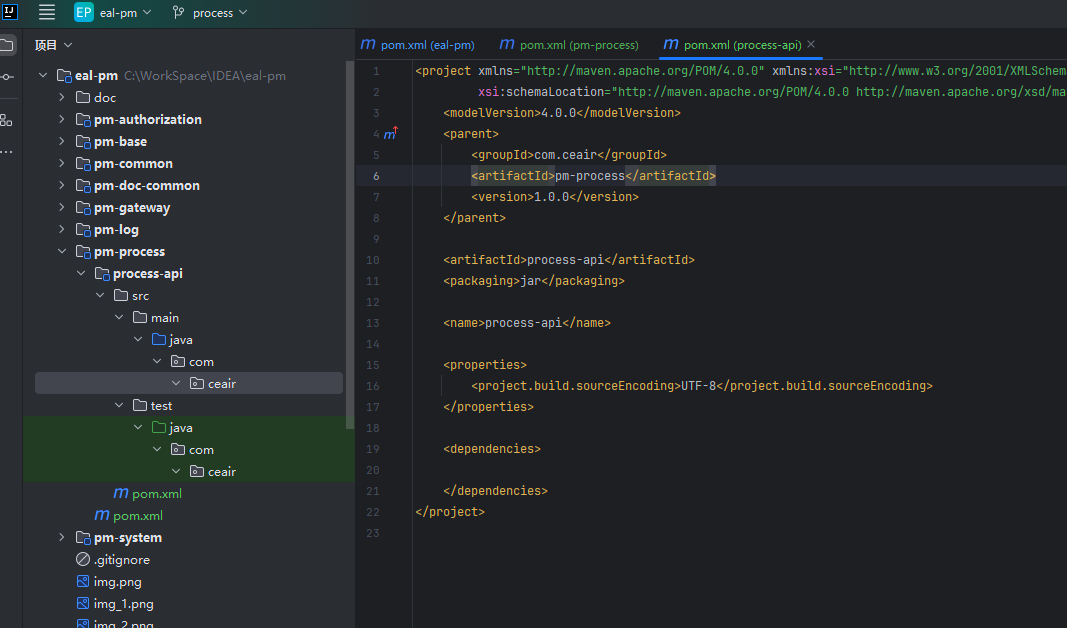
创建完成后将src包删除,因为需要在这个大模块下再创建 process-api和process-server两个子模块。
2.2 创建 process-api 小模块
创建完成后清理默认的代码,保留空壳留待后续需要的时候补充

2.3 创建 process-server 小模块
创建完成后清理默认的代码
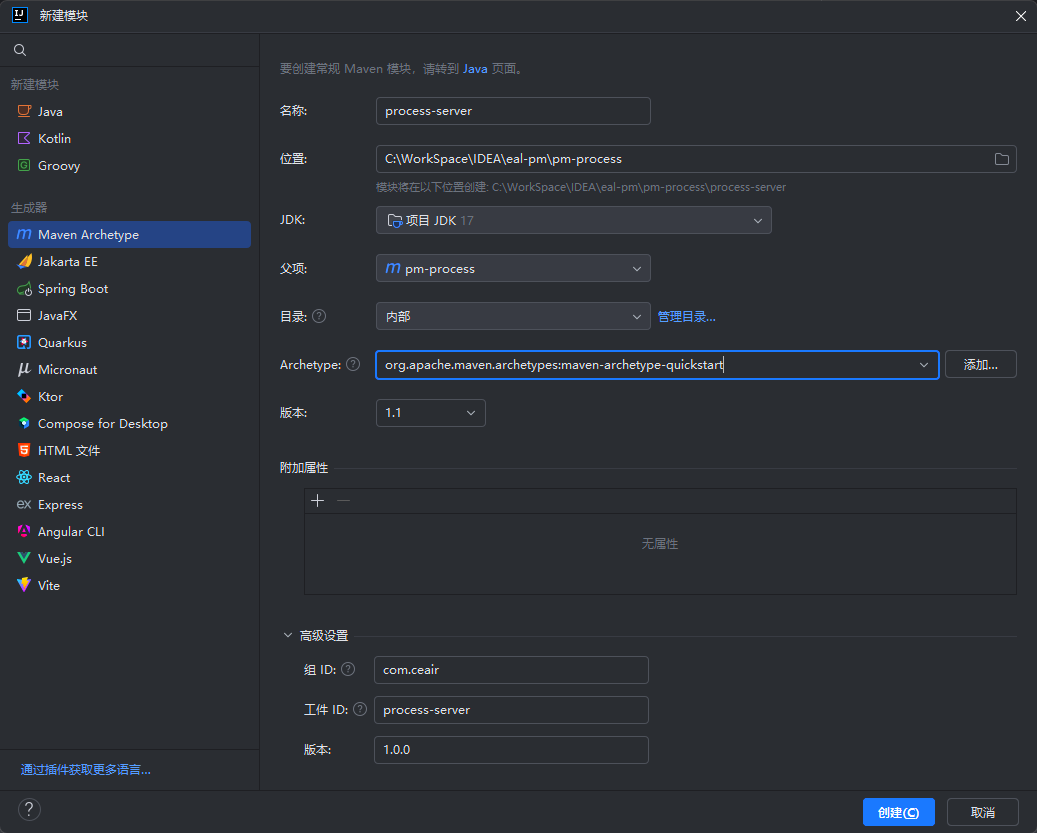
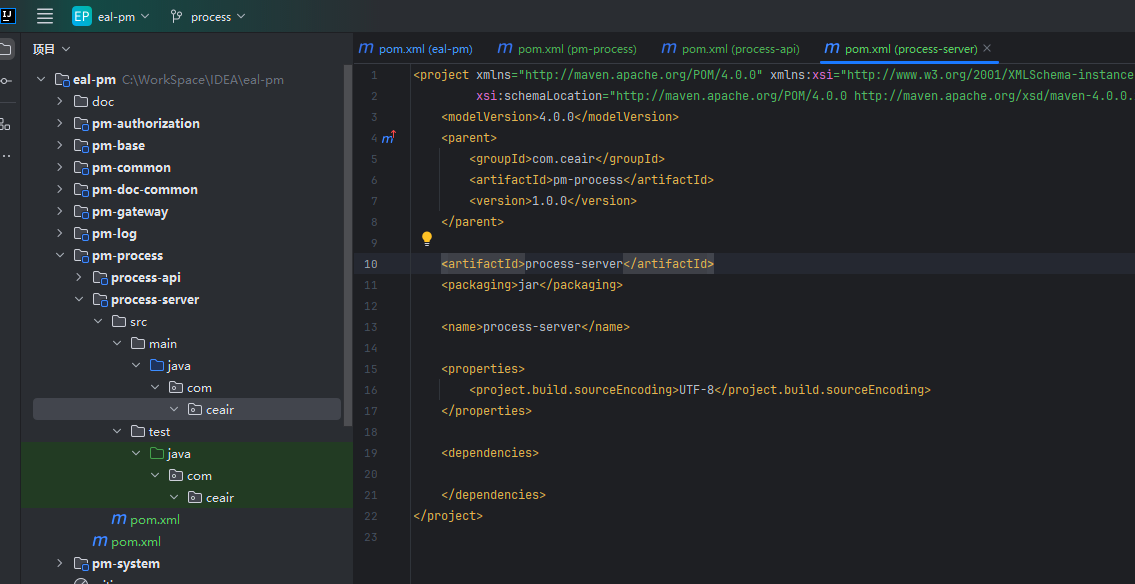
2.3.1 添加POM
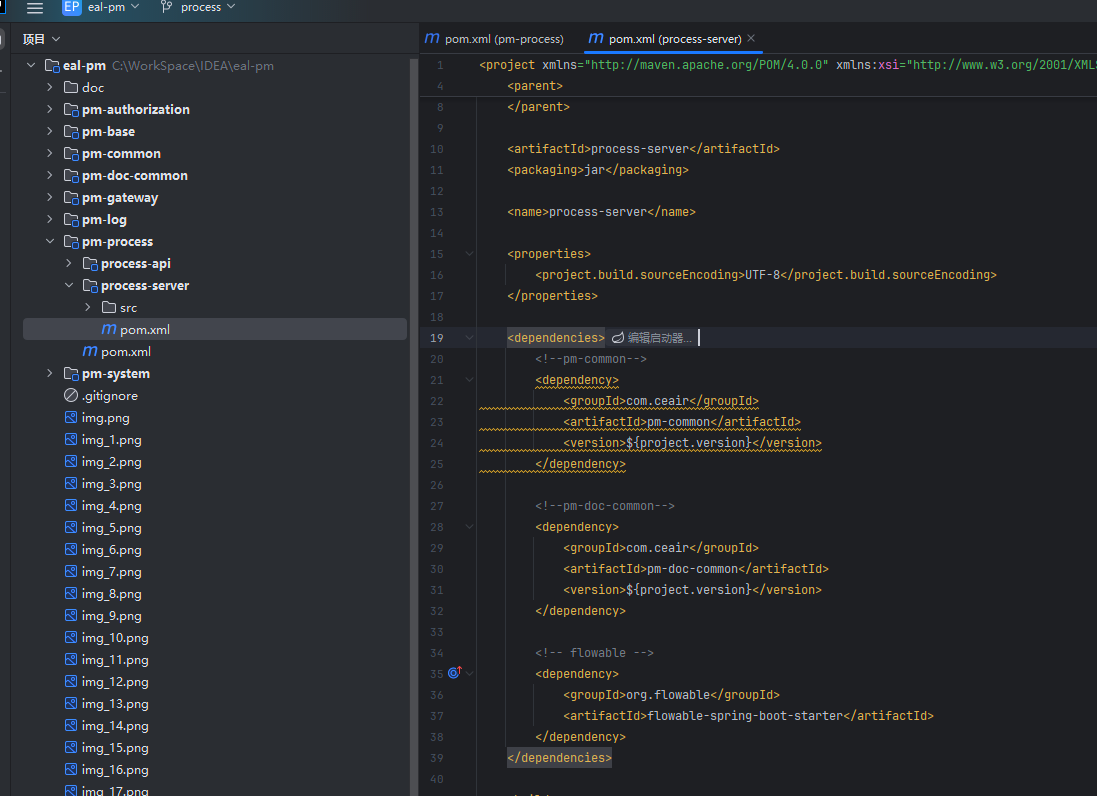
代码如下:
    com.ceair
    pm-common
    ${project.version}


    com.ceair
    pm-doc-common
    ${project.version}


    org.flowable
    flowable-spring-boot-starter
此处需要解释一下【pm-common/pm-doc-common】这两个依赖,这是我的脚手架的一个基础工程,【pm-common】(提供了mysql,mongodb,Spring Authorization Server资源服务配置,springcloud相关配置,kafka,mybatis-plus,日志aop等基础应用的配置)和【pm-doc-common】(Springdoc接口文档配置),以及一些基础的统一封装类和异常类,还有一些常用的工具类。
由于这一点,所以我们需要先打包【pm-common】和【pm-doc-common】确保您的仓库中有这个包,不然会导致下游服务打包异常或功能异常,详细的启动教程请查看仓库中的README。
pm-common的POM明细如下:
    4.0.0

        com.ceair
        eal-pm
        1.0.0

    pm-common
    jar
    pm-common

        UTF-8


            org.springframework.boot
            spring-boot-starter-web


            org.projectlombok
            lombok


            cn.hutool
            hutool-all


            com.baomidou
            mybatis-plus-spring-boot3-starter


            com.baomidou
            mybatis-plus-jsqlparser


            org.springframework.boot
            spring-boot-starter-data-redis


            com.fasterxml.jackson.datatype
            jackson-datatype-jsr310


            org.springframework.session
            spring-session-data-redis


            org.springframework.boot
            spring-boot-starter-oauth2-resource-server


            org.mapstruct
            mapstruct


            org.mapstruct
            mapstruct-processor


            org.springdoc
            springdoc-openapi-starter-webmvc-ui


            com.alibaba.cloud
            spring-cloud-starter-alibaba-nacos-discovery


            org.springframework.cloud
            spring-cloud-starter-openfeign


            org.springframework.cloud
            spring-cloud-starter-loadbalancer


            org.springframework.cloud
            spring-cloud-starter-bootstrap


            mysql
            mysql-connector-java


            org.springframework.kafka
            spring-kafka


            org.springframework.boot
            spring-boot-starter-data-mongodb


            org.springframework.boot
            spring-boot-starter-test
            test
pm-doc-common的POM明细如下:
    4.0.0

        com.ceair
        eal-pm
        1.0.0

    pm-doc-common
    jar
    pm-doc-common

        UTF-8


            org.projectlombok
            lombok
            ${lombok.version}


            org.springdoc
            springdoc-openapi-starter-webmvc-ui
            true


            org.springdoc
            springdoc-openapi-starter-webflux-ui
            true
2.3.2 添加依赖
① 先在main包下创建 resource 目录
② 在 resource 目录下创建 bootstrap.xml 配置文件,配置文件中需要修改的地方我注释说明了
server:
  # 设置资源服务器端口
  port: 9002
spring:
  profiles:
    active: dev
  application:
    name: pm-process
# 本地开发配置
---
spring:
  config:
    activate:
      on-profile: dev
  datasource:
    driver-class-name: com.mysql.cj.jdbc.Driver
    # 这里需要配置你自己的数据库连接信息
    url: jdbc:mysql://192.168.30.129:3306/pm-process?serverTimezone=UTC&userUnicode=true&characterEncoding=utf-8
    username: root
    password: 123456
  data:
    redis:
      # 这里需要配置你自己的缓存连接信息
      host: 192.168.30.129
      port: 6379
      password: 123456
    mongodb:
      # 这里需要配置你自己的数据库连接信息
      uri: mongodb://root:123456@192.168.30.129:27017/pm-process?authSource=admin
  security:
    oauth2:
      # 资源服务器配置
      resourceserver:
        jwt:
          # Jwt中claims的iss属性,也就是jwt的签发地址,即认证服务器的根路径
          # 资源服务器会进一步的配置,通过该地址获取公钥以解析jwt
          issuer-uri: http://127.0.0.1:8080
  cloud:
    nacos:
      # 这里需要配置你自己的nacos连接信息
      serverAddr: 192.168.30.129:8848
      username: nacos
      password: nacos
      discovery:
        namespace: af54b638-b927-4d97-bfc5-e9f127dd92df
  kafka:
    # 这里需要配置你自己的mq连接信息
    bootstrap-servers: 192.168.30.129:9092
    producer:
      key-serializer: org.apache.kafka.common.serialization.StringSerializer
      value-serializer: org.apache.kafka.common.serialization.StringSerializer
# Mybatis-Plus 配置
mybatis-plus:
  # 扫描mapper文件
  mapper-locations:
    - classpath:mapper/*.xml
  configuration:
    log-impl: org.apache.ibatis.logging.stdout.StdOutImpl
#kafka消息相关
syslog:
  kafka:
    topic: sys-log-topic
# ------------以下内容可改为公共配置------------
# SpringDoc自定义配置
custom:
  info:
    title: ${spring.application.name}-api
    version: 1.0.0
    description: 这是一个使用SpringDoc生成的在线文档.
    terms-of-service: http://127.0.0.1:5173
    gateway-url: http://127.0.0.1:9999/${spring.application.name}
  license:
    name: Apache 2.0
  security:
    name: Authenticate
    token-url: http://127.0.0.1:8080/oauth2/token
    authorization-url: http://127.0.0.1:8080/oauth2/authorize
#flowable配置
flowable:
  # 异步执行器主要用于处理那些耗时的任务,例如发送电子邮件、生成报告、调用外部服务等。这些任务可以在后台线程池中异步执行,而不会阻塞主线程或影响用户的响应时间
  async-executor-activate: false
  # 是否开启数据库自动升级
  database-schema-update: true
# sit测试配置
---
spring:
  config:
    activate:
      on-profile: sit
  datasource:
    driver-class-name: com.mysql.cj.jdbc.Driver
    # 这里需要配置你自己的数据库连接信息
    url: jdbc:mysql://192.168.30.129:3306/pm-process?serverTimezone=UTC&userUnicode=true&characterEncoding=utf-8
    username: root
    password: 123456
  data:
    redis:
      # 这里需要配置你自己的缓存连接信息
      host: 192.168.30.129
      port: 6379
      password: 123456
    mongodb:
      # 这里需要配置你自己的数据库连接信息
      uri: mongodb://root:123456@192.168.30.129:27017/pm-process?authSource=admin
  security:
    oauth2:
      # 资源服务器配置
      resourceserver:
        jwt:
          # Jwt中claims的iss属性,也就是jwt的签发地址,即认证服务器的根路径
          # 资源服务器会进一步的配置,通过该地址获取公钥以解析jwt
          issuer-uri: http://192.168.30.129:8080
  cloud:
    nacos:
      # 这里需要配置你自己的nacos连接信息
      serverAddr: 192.168.30.129:8848
      username: nacos
      password: nacos
      discovery:
        namespace: af54b638-b927-4d97-bfc5-e9f127dd92df
  kafka:
    # 这里需要配置你自己的mq连接信息
    bootstrap-servers: 192.168.30.129:9092
    producer:
      key-serializer: org.apache.kafka.common.serialization.StringSerializer
      value-serializer: org.apache.kafka.common.serialization.StringSerializer
# Mybatis-Plus 配置
mybatis-plus:
  # 扫描mapper文件
  mapper-locations:
    - classpath:mapper/*.xml
#kafka消息相关
syslog:
  kafka:
    topic: sys-log-topic
# ------------以下内容可改为公共配置------------
# SpringDoc自定义配置
custom:
  info:
    title: ${spring.application.name}-api
    version: 1.0.0
    description: 这是一个使用SpringDoc生成的在线文档.
    terms-of-service: http://192.168.30.129:5173
    gateway-url: http://192.168.30.129:9999/${spring.application.name}
  license:
    name: Apache 2.0
  security:
    name: Authenticate
    token-url: http://192.168.30.129:8080/oauth2/token
    authorization-url: http://192.168.30.129:8080/oauth2/authorize
#flowable配置
flowable:
  # 异步执行器主要用于处理那些耗时的任务,例如发送电子邮件、生成报告、调用外部服务等。这些任务可以在后台线程池中异步执行,而不会阻塞主线程或影响用户的响应时间
  async-executor-activate: false
  # 是否开启数据库自动升级
  database-schema-update: true
步骤三:创建主启动类
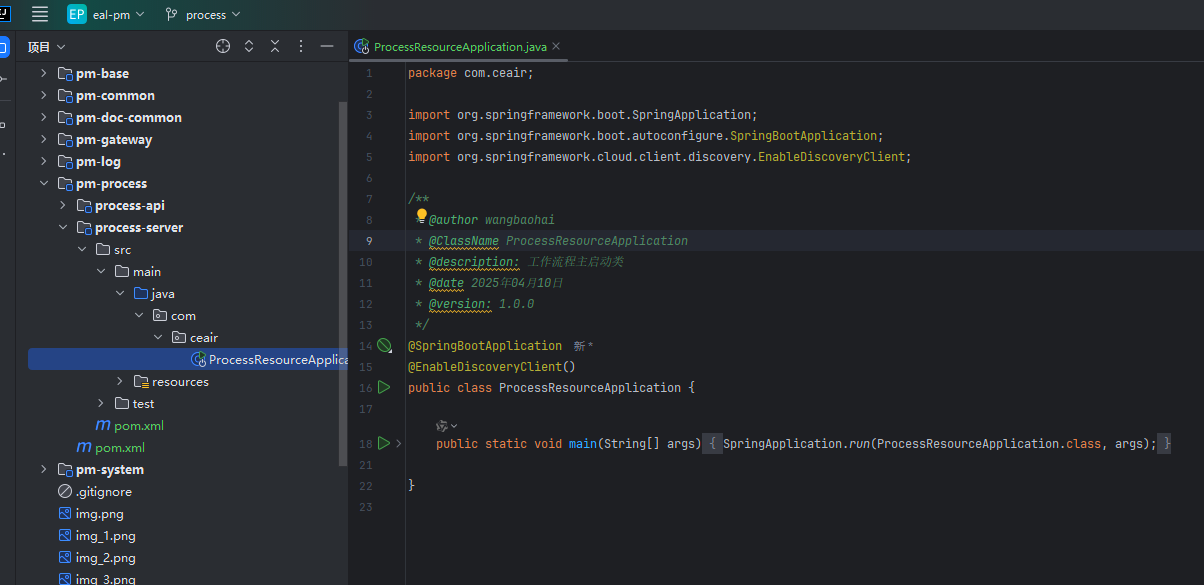
package com.ceair;
import org.springframework.boot.SpringApplication;
import org.springframework.boot.autoconfigure.SpringBootApplication;
import org.springframework.cloud.client.discovery.EnableDiscoveryClient;
/**
 * @author wangbaohai
 * @ClassName ProcessResourceApplication
 * @description: 工作流程主启动类
 * @date 2025年04月10日
 * @version: 1.0.0
 */
@SpringBootApplication
@EnableDiscoveryClient()
public class ProcessResourceApplication {
    public static void main(String[] args) {
        SpringApplication.run(ProcessResourceApplication.class, args);
    }
}
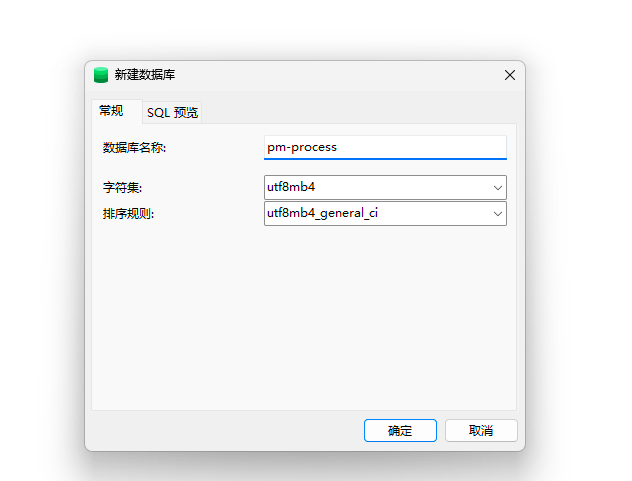
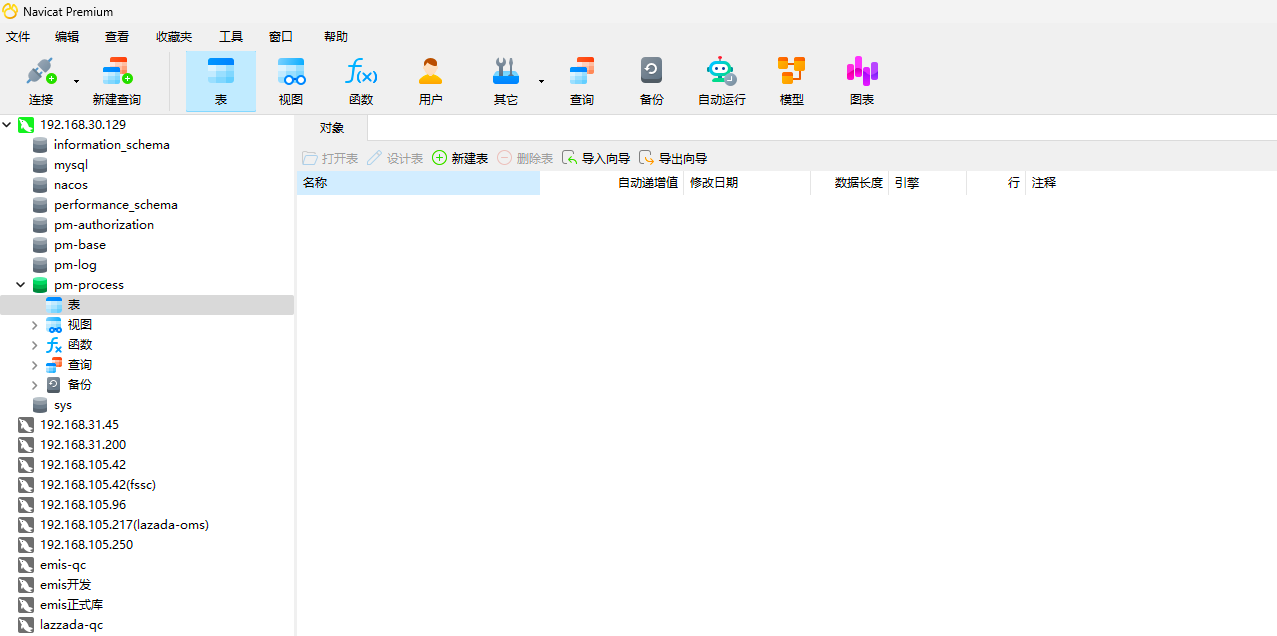
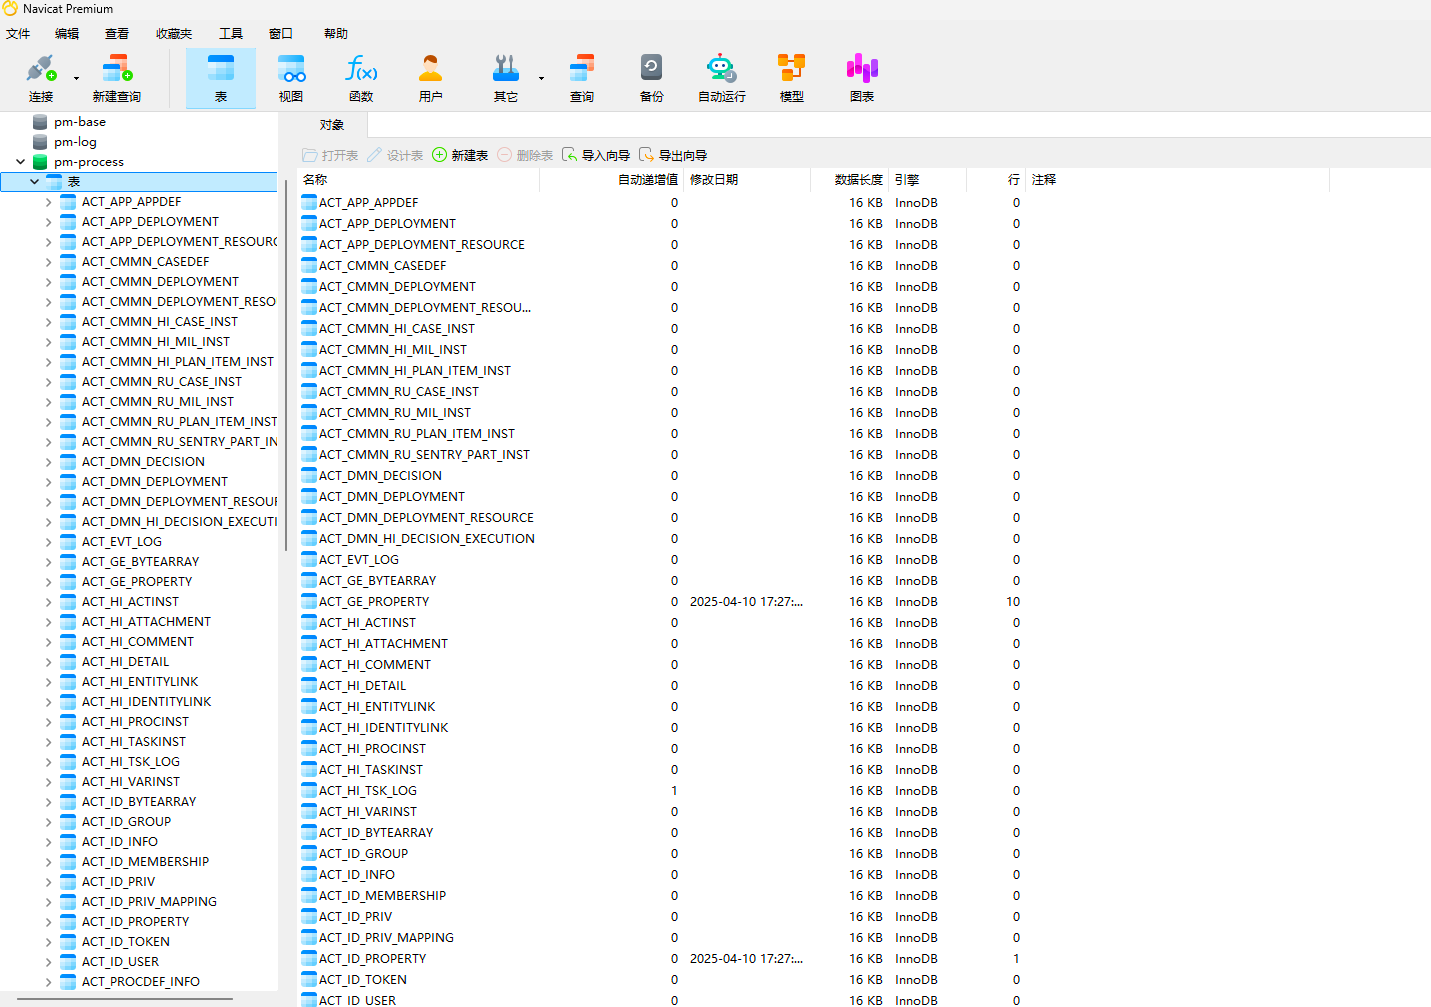
步骤四:创建数据库 pm-process
步骤五:创建其他基础环境
由于我这边已经都建好了,各位按需根据 README 创建吧,这里没有什么特别的都好弄,如果有问题就留言吧,我看到会帮大家解决的。
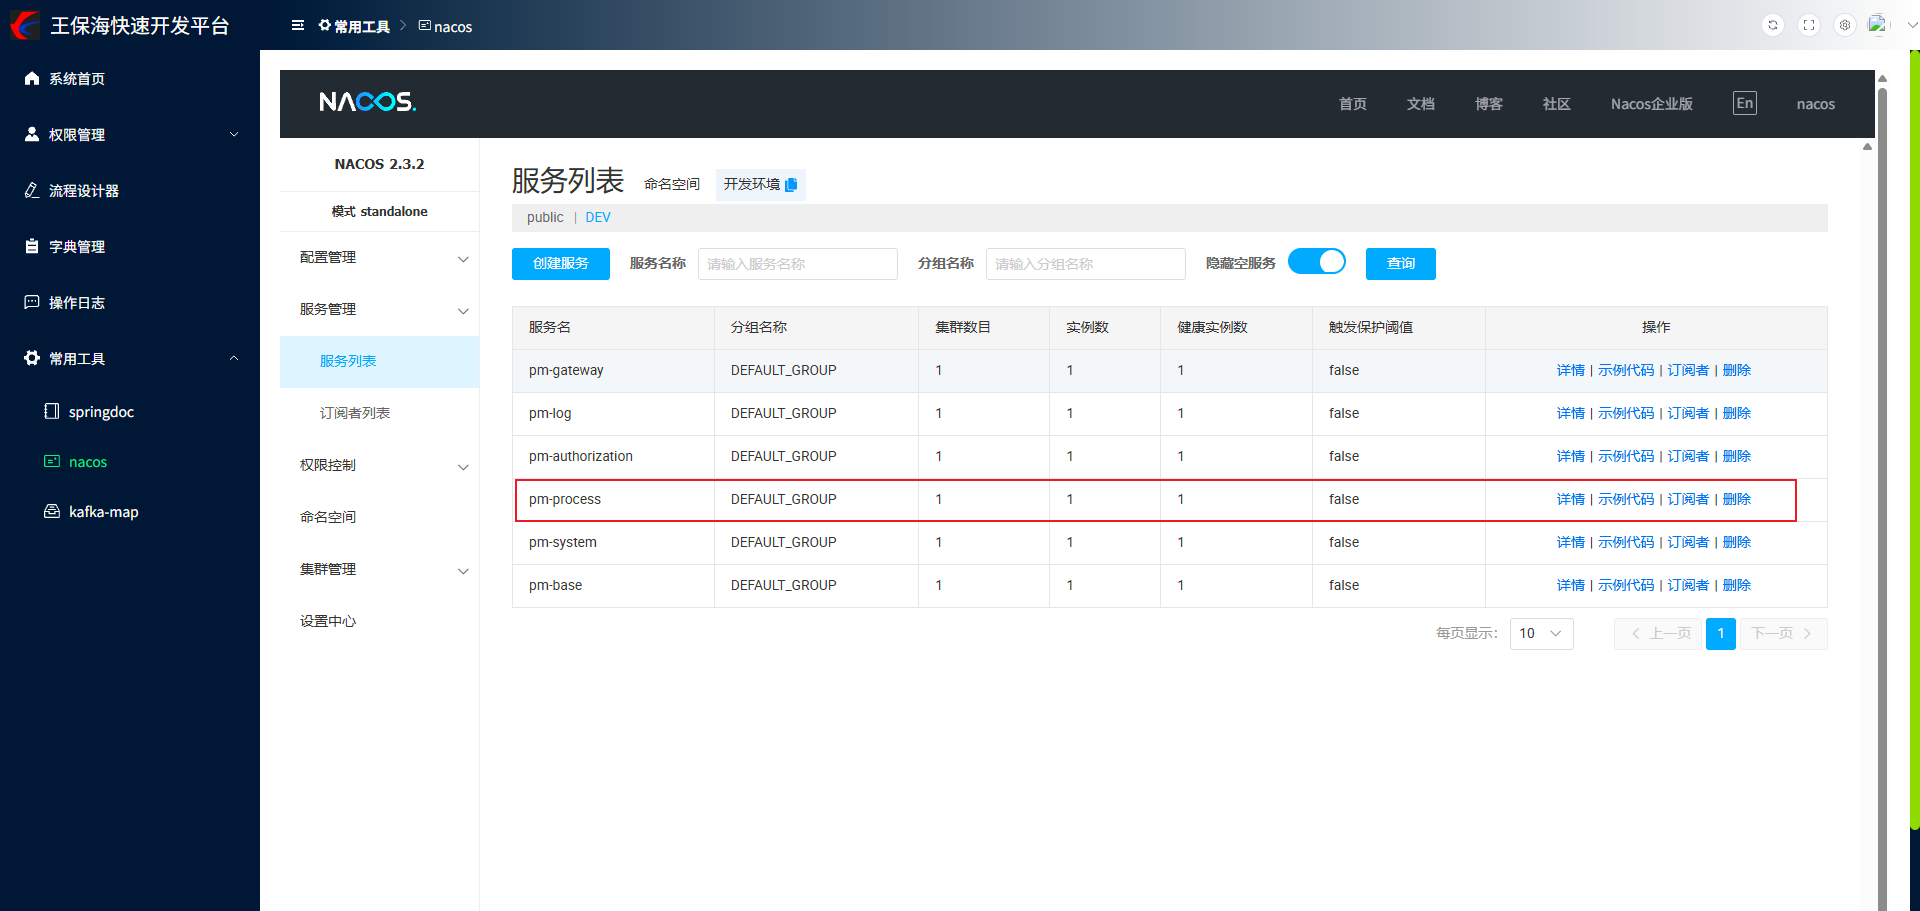
步骤六:编译启动服务&验证
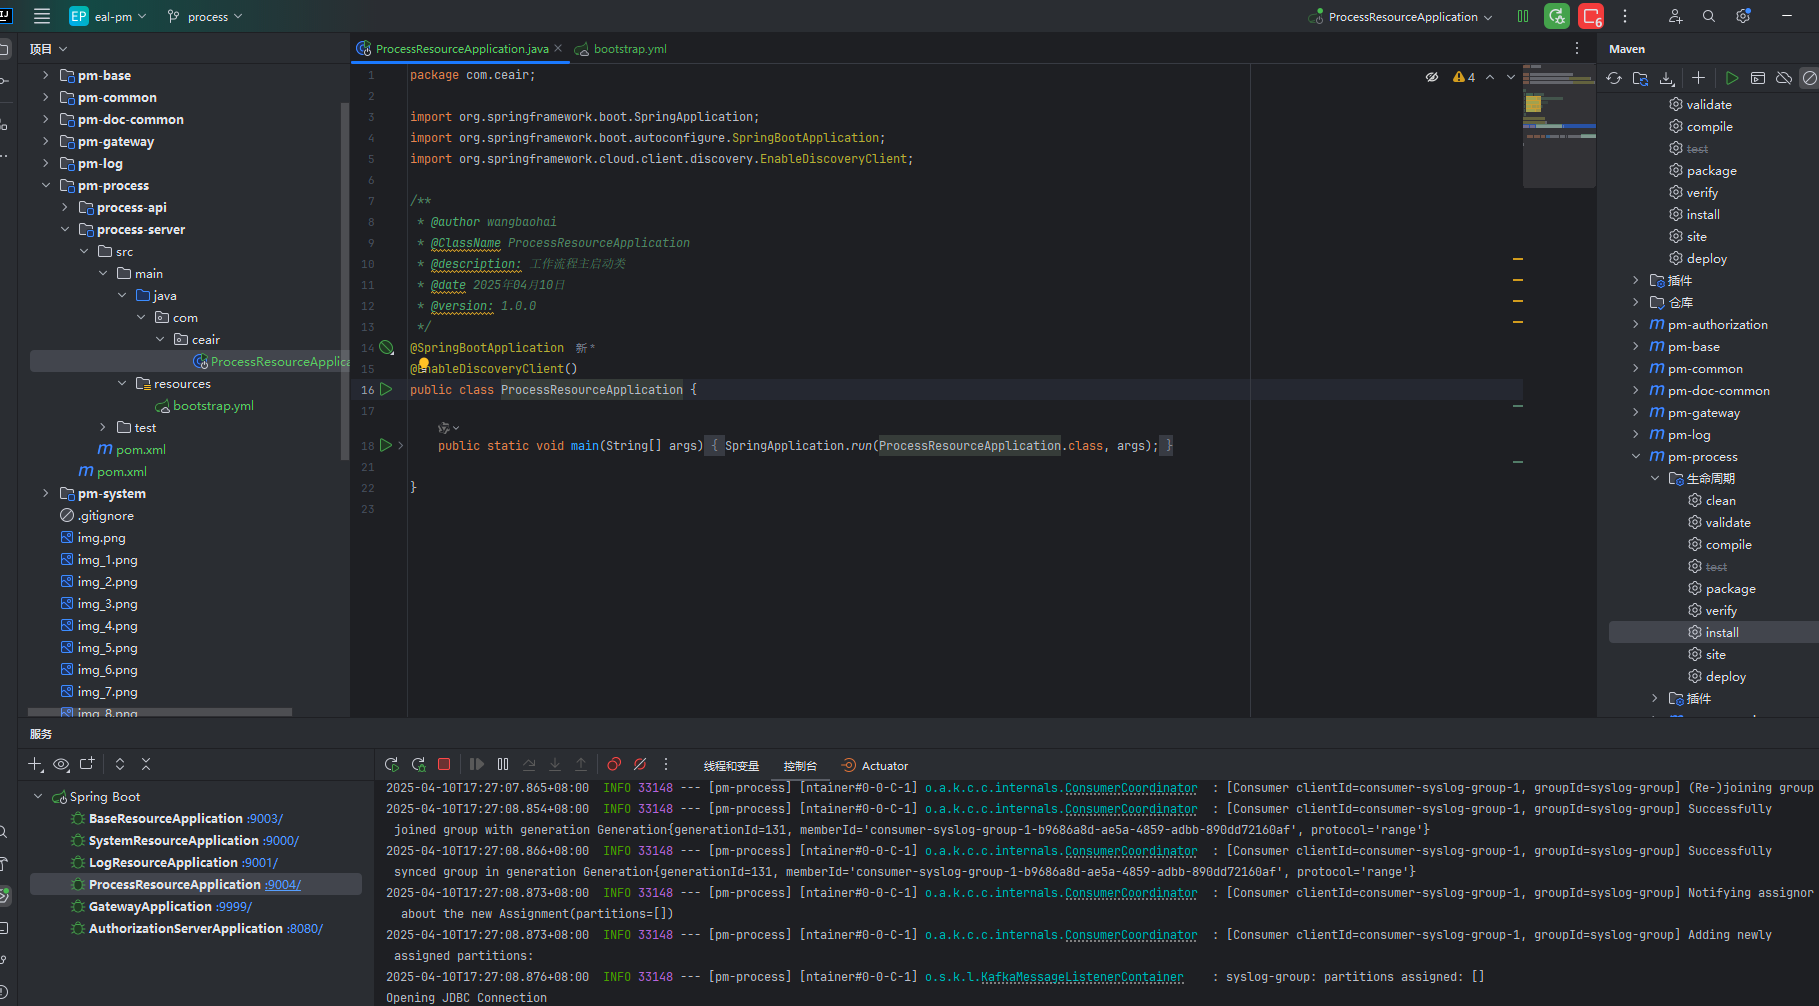
步骤七:验证
需要验证的有服务注册是否成功和数据库表是否自动创建成功
后记
完整仓库地址请查看专栏第一篇文章
本篇文章的后端仓库分支名:process


