
Spring Boot + MyBatis-Plus 的现代开发模式

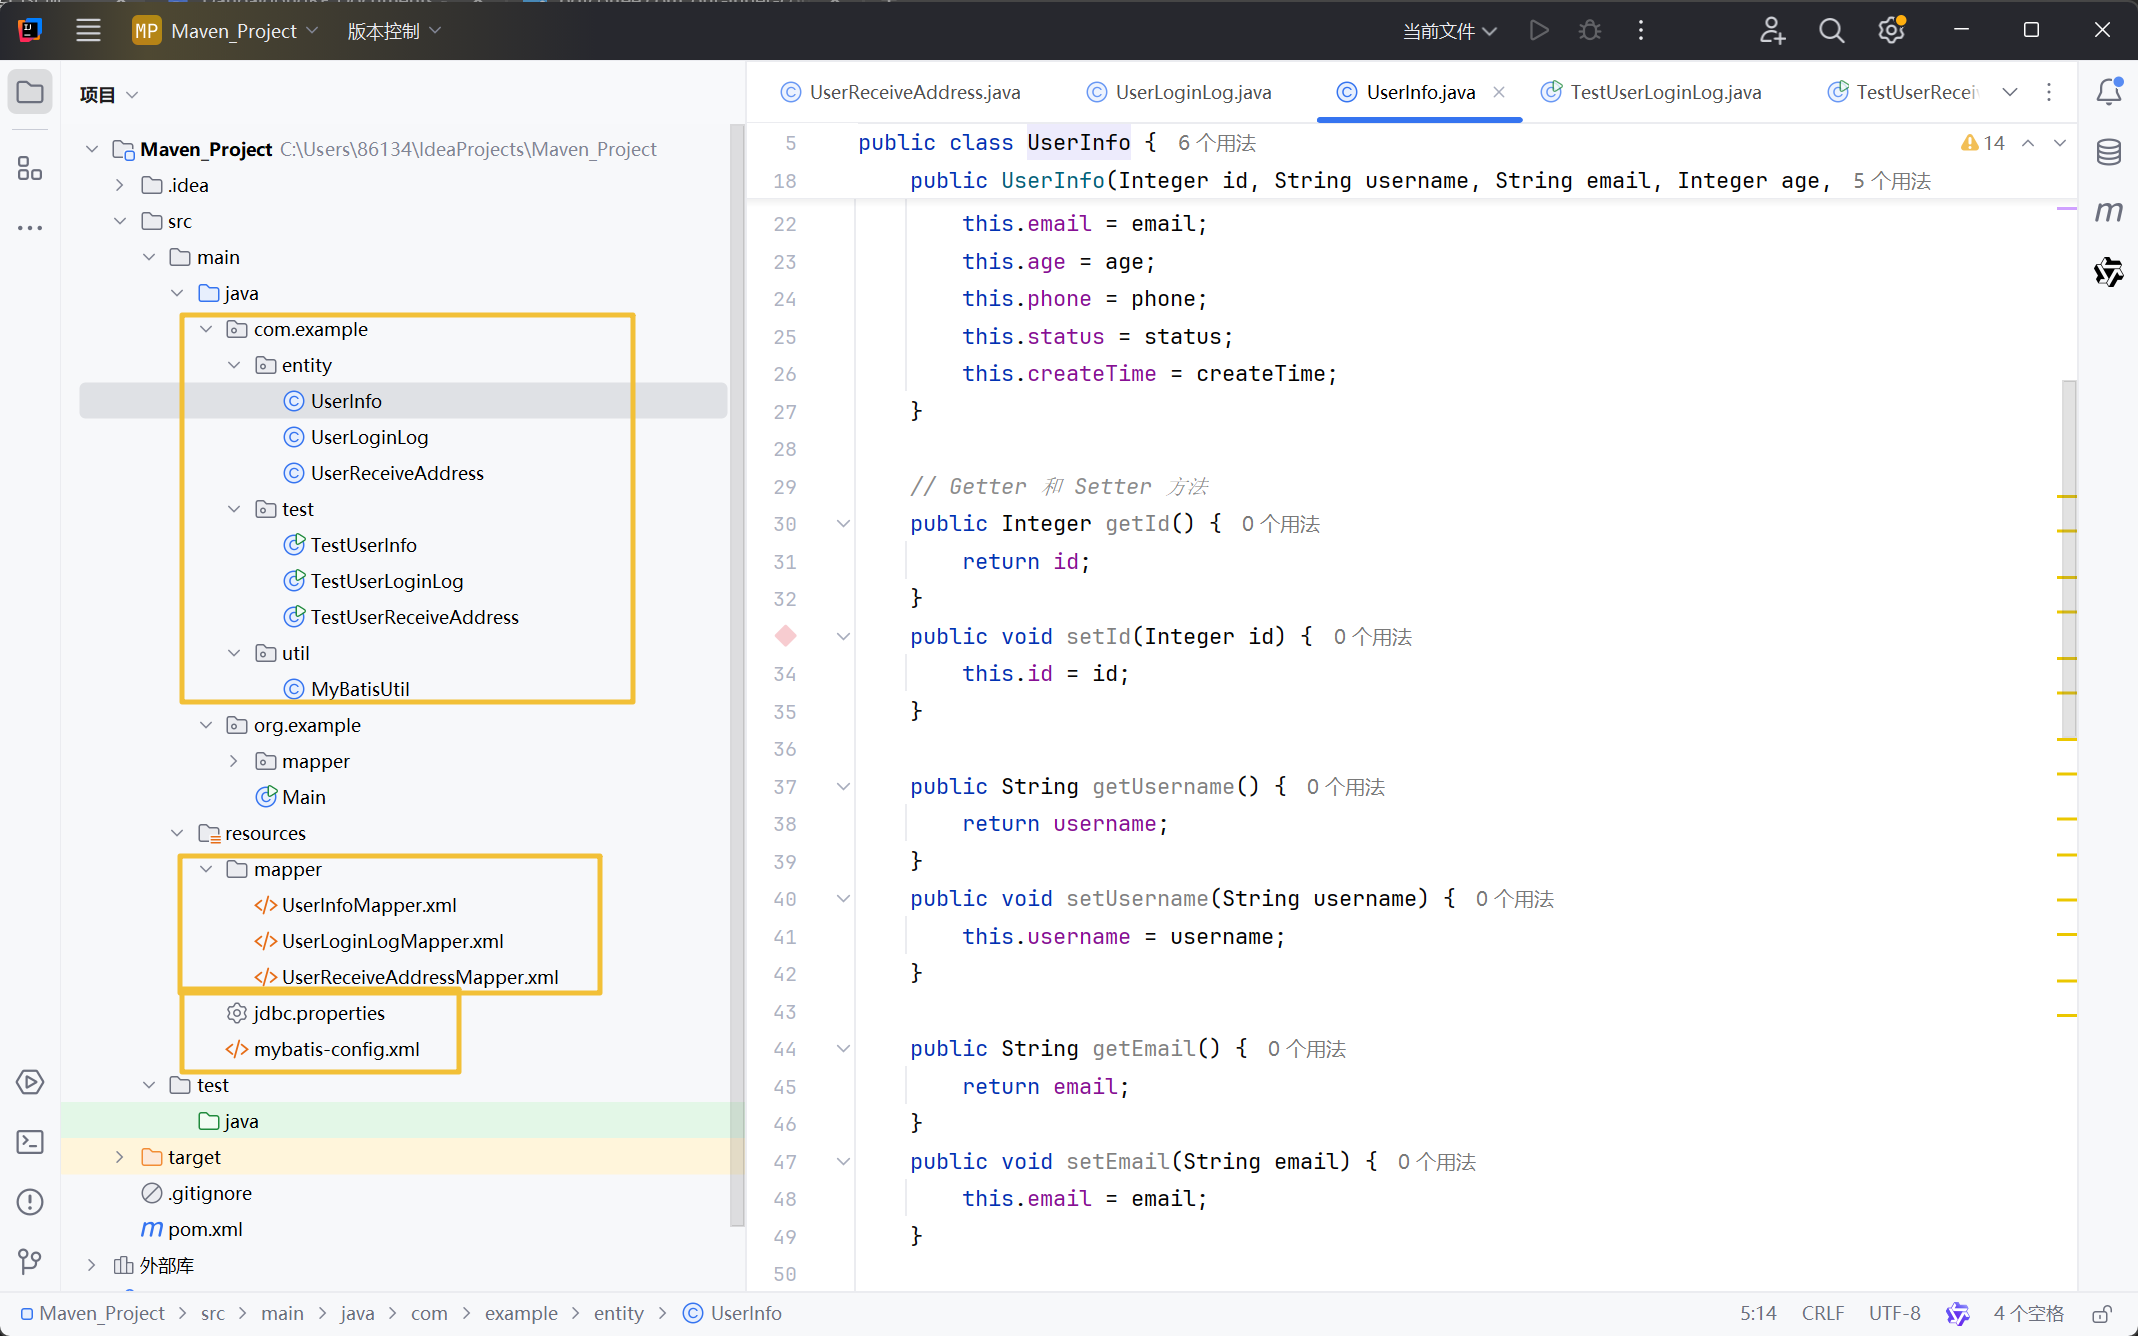
之前的Maven项目和本次需要的环境配置并不一样
之前使用的是:
-
传统的 MyBatis 框架(非 Spring Boot 环境)
-
手动管理 SqlSession
-
使用了 .xml 的 Mapper 映射文件
-
没有 Spring 容器管理(没有 @Service / @RestController 等)
-
没有看到分页插件配置,也没有 REST 接口入口
项目结构对比 你现在的项目 实验要求的项目 框架风格 手动搭建的原生 MyBatis Spring Boot 自动化集成 Mapper 类型 接口 + XML 接口继承 BaseMapper(少量或无 XML) SqlSession 手动获取和关闭 Spring 管理,自动注入 Mapper 事务控制 手动 commit 使用 Spring 的 @Transactional 管理 分页插件 没有集成插件 要集成 MyBatis-Plus 分页插件 接口风格 控制台输出 使用 @RestController 提供 REST API 调试方式 控制台 + main 方法测试 使用 Postman 测试 API 接口 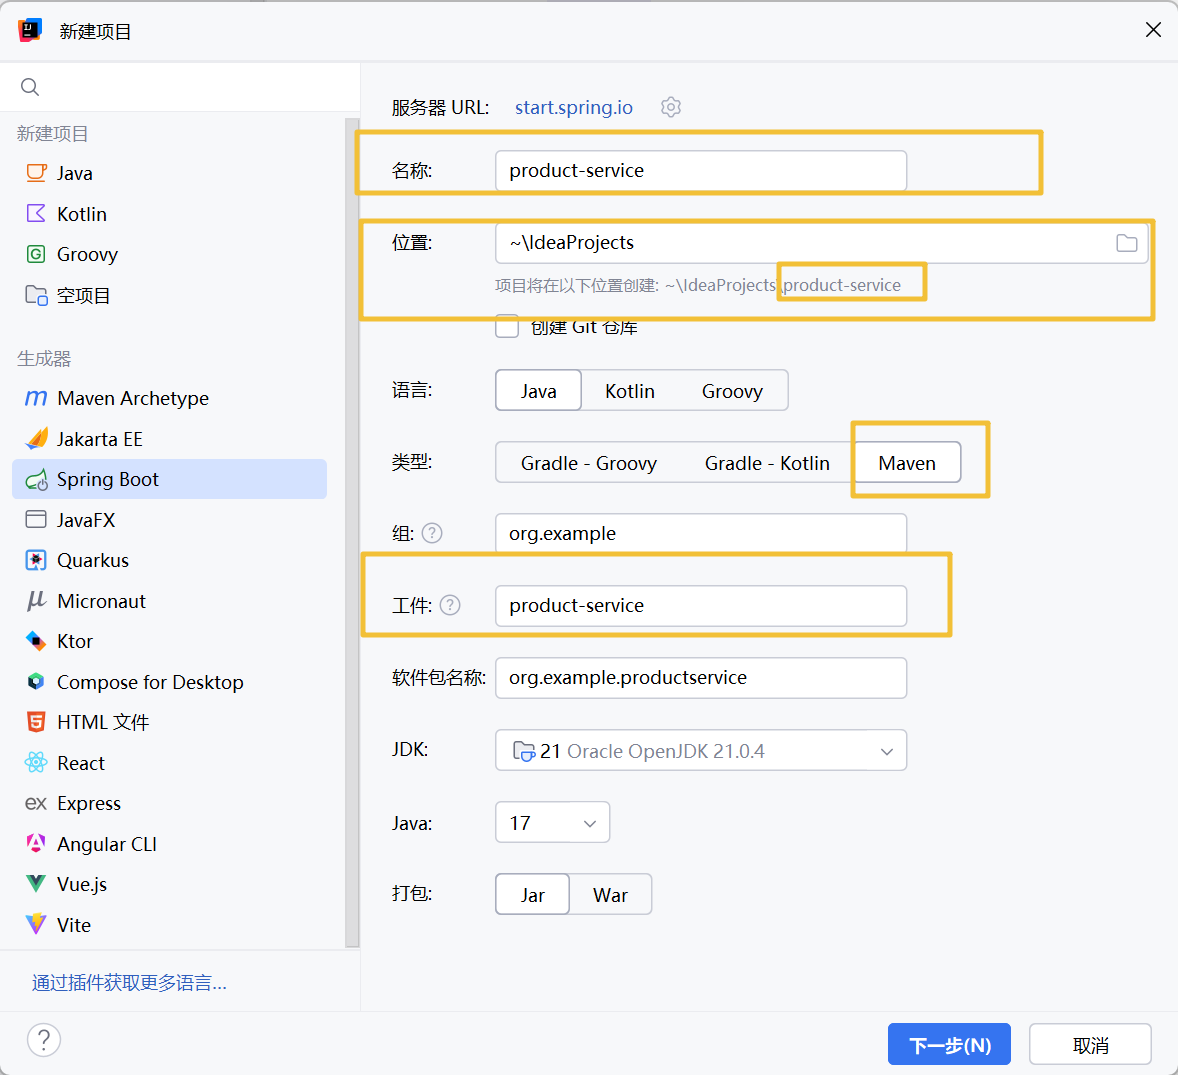
添加 依赖项
依赖名称 作用 Spring Web 用来写 REST API 接口,也就是你要用 Postman 调的接口 MyBatis Plus 是 MyBatis 的增强版,提供了分页插件、条件构造器、简化 DAO 写法 MySQL Driver 数据库驱动,让 Java 项目能连接你本地的 MySQL 数据库 Lombok 简化实体类写法,比如 @Data 自动生成 getter/setter,不用手写 
MyBatis Plus会发现并没有找到
可能用的是 国内 Spring Initializr 镜像站(start.spring.io 国内版),它没集成 MyBatis-Plus 官方模块。这时我们用手动方式加上去就行:
✅ 添加 MyBatis-Plus 的方式
完成创建项目后,在 pom.xml 中手动添加以下依赖:
com.baomidou
mybatis-plus-boot-starter
3.5.3.1
添加后点击 IDEA 右上角的 Maven 小象图标 → Reimport,让它下载依赖。

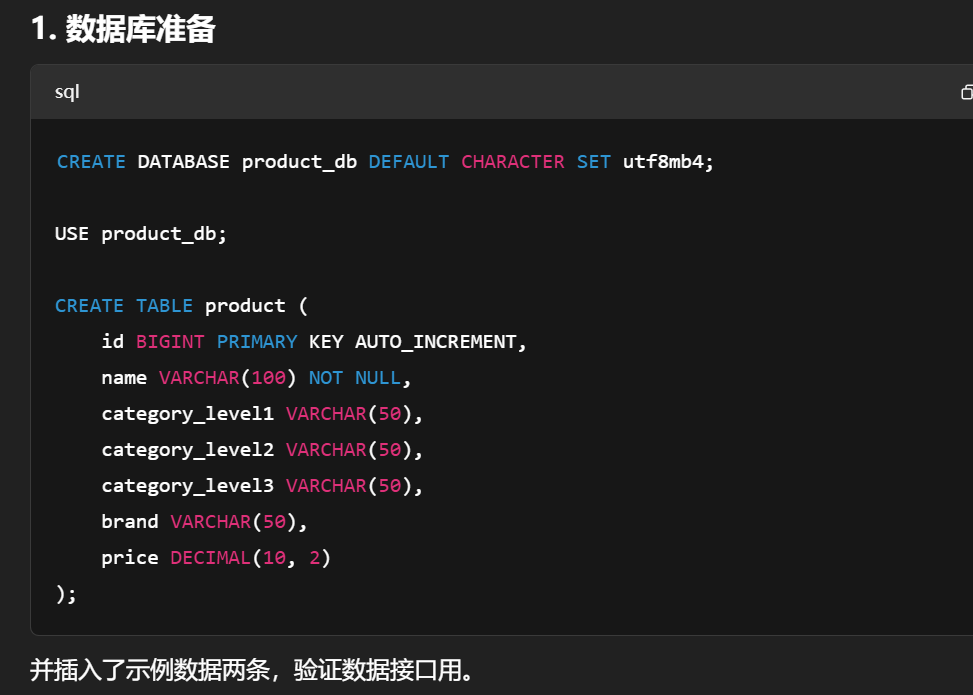
先MySQL中建立数据库
CREATE DATABASE product_db DEFAULT CHARACTER SET utf8mb4;
USE product_db;
CREATE TABLE product (
    id BIGINT PRIMARY KEY AUTO_INCREMENT,
    name VARCHAR(100) NOT NULL,
    category_level1 VARCHAR(50),
    category_level2 VARCHAR(50),
    category_level3 VARCHAR(50),
    brand VARCHAR(50),
    price DECIMAL(10, 2)
);
配置 application.properties
spring.application.name=product-service
#这个是 Spring Boot 给你的服务起个名字,比如后续你如果集成了日志系统、监控平台、微服务等,它就能显示“是谁”在运行。
#❗ 这个对本地调试没影响,可以留着,也可以删,不影响实验内容。
设置端口号
server.port=8080
表示你的服务启动后监听 http://localhost:8080,是 Postman 访问接口的基础。
数据库连接配置
spring.datasource.url=jdbc:mysql://localhost:3306/product_db?useSSL=false&serverTimezone=Asia/Shanghai
spring.datasource.username=root
spring.datasource.password=123456
spring.datasource.driver-class-name=com.mysql.cj.jdbc.Driver
MyBatis-Plus 设置
mybatis-plus.configuration.log-impl=org.apache.ibatis.logging.stdout.StdOutImpl
让你在控制台中看到执行的 SQL,非常适合调试查询条件对不对。
spring.application.name=product-service
server.port=8080
spring.datasource.url=jdbc:mysql://localhost:3306/product_db?useSSL=false&serverTimezone=Asia/Shanghai
spring.datasource.username=root
spring.datasource.password=123456
spring.datasource.driver-class-name=com.mysql.cj.jdbc.Driver
mybatis-plus.configuration.log-impl=org.apache.ibatis.logging.stdout.StdOutImpl
最后点击运行ProductServiceApplication.java----自动结束,运行失败
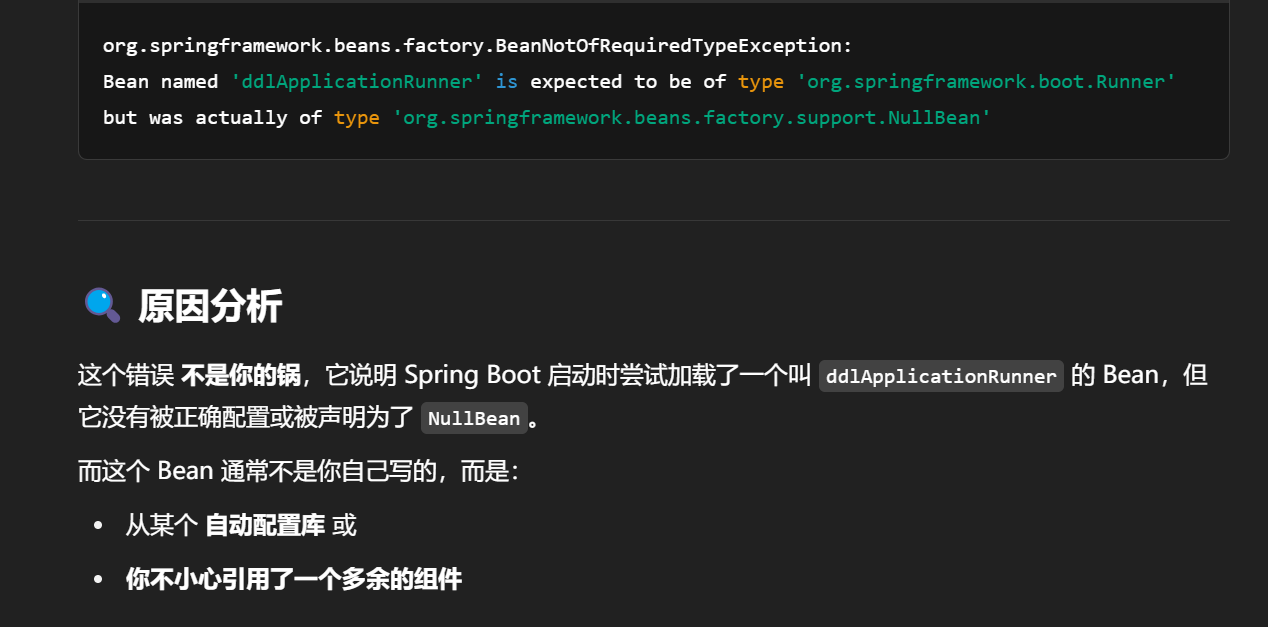
这个问题需要先处理一下------
-----------------------------------------------------------------------------------------全局搜索是Ctrl+Shift+N--
原因是mybatis的版本问题,换到3.5.5就不会出现这个bean的问题了
Started ProductServiceApplication in 1.199 seconds (process running for 1.539)
Application availability state ReadinessState changed to ACCEPTING_TRAFFIC
🧩 接下来要做的事(建议顺序)
🔧 第 1 步:实体类
-
Product.java → 映射数据库表字段
(便于 MyBatis-Plus 自动匹配)
-
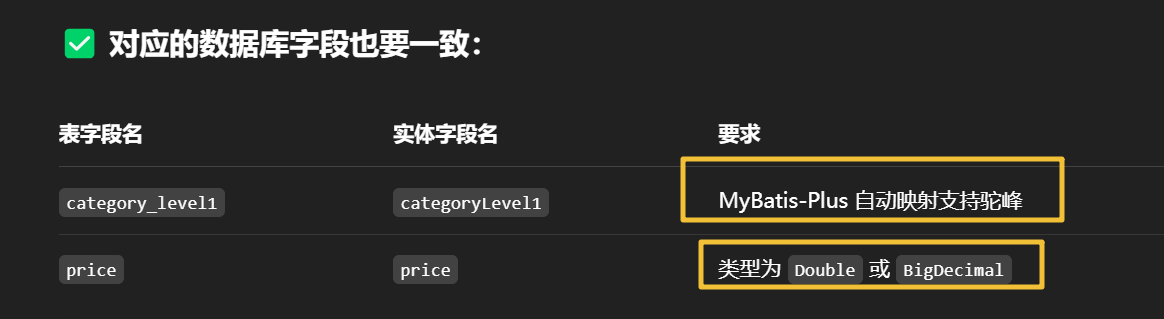
保持 Java 字段名和数据库字段名一致
-
如果不一致就用 @TableField 和 @TableId 明确指定
package org.example.productservice.entity;
import com.baomidou.mybatisplus.annotation.TableId;
import com.baomidou.mybatisplus.annotation.TableName;
import com.baomidou.mybatisplus.annotation.TableField;
import lombok.Data;
import java.math.BigDecimal;
@Data
@TableName("product")
public class Product {
    @TableId("id")
    private Long id;
    @TableField("name")
    private String name;
    @TableField("category_level1")
    private String categoryLevel1;
    @TableField("category_level2")
    private String categoryLevel2;
    @TableField("category_level3")
    private String categoryLevel3;
    @TableField("brand")
    private String brand;
    @TableField("price")
    private BigDecimal price;
}
配套说明:
-
@TableName("product"):绑定对应的表名
-
@TableField("xxx"):将 Java 命名风格(驼峰)映射到数据库的下划线字段
-
@TableId("id"):指定主键列
-
BigDecimal:更适合处理 DECIMAL(10, 2) 类型,避免精度丢失
🔧 第 2 步:Mapper 接口
-
ProductMapper.java → 使用 BaseMapper
package org.example.productservice.mapper; import com.baomidou.mybatisplus.core.mapper.BaseMapper; import org.apache.ibatis.annotations.Mapper; import org.example.productservice.entity.Product; @Mapper public interface ProductMapper extends BaseMapper { }-
extends BaseMapper
→ 让你继承了 MyBatis-Plus 提供的所有基础增删改查方法(包括分页、条件构造器)
-
@Mapper
→ 是 MyBatis 要求的注解,告诉 Spring 它是一个 Mapper 接口
-
不需要自己写 XML 映射文件了,MyBatis-Plus 自动帮你做了映射!

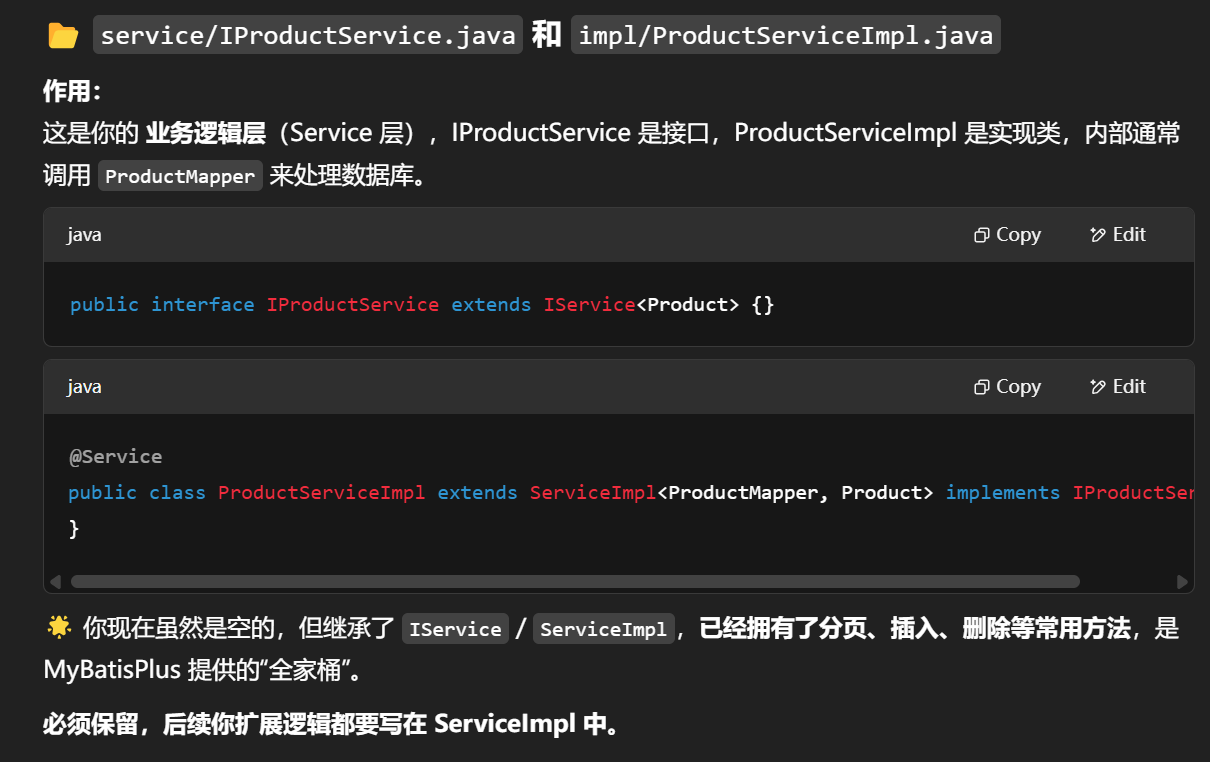
🔧 第 3 步:Service 层
-
IProductService.java(接口)
package org.example.productservice.service; import com.baomidou.mybatisplus.extension.service.IService; import org.example.productservice.entity.Product; public interface IProductService extends IService { }-
ProductServiceImpl.java(实现)
package org.example.productservice.service.impl;
import com.baomidou.mybatisplus.extension.service.impl.ServiceImpl;
import org.example.productservice.entity.Product;
import org.example.productservice.mapper.ProductMapper;
import org.example.productservice.service.IProductService;
import org.springframework.stereotype.Service;
@Service
public class ProductServiceImpl extends ServiceImpl implements IProductService {
}
原理说明:
-
IService 接口:
提供了更高层级的封装,比如 getById、save、removeById 等,默认自带 CRUD
-
ServiceImpl 实现类:
自动帮你实现这些方法,不用自己写 SQL
-----------------
后端结构已经扎实完整,马上就能提供接口服务了。
🔧 第 4 步:Controller 层
📁 路径:org.example.productservice.controller
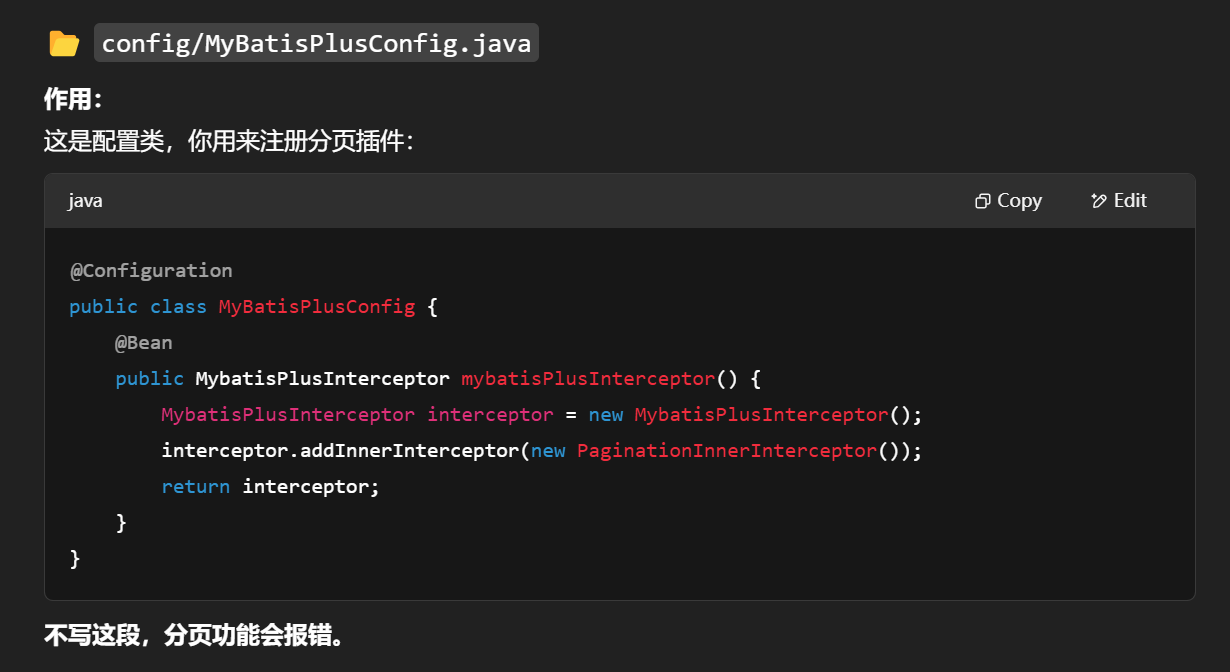
package org.example.productservice.controller;
import com.baomidou.mybatisplus.core.conditions.query.QueryWrapper;
import com.baomidou.mybatisplus.extension.plugins.pagination.Page;
import org.example.productservice.entity.Product;
import org.example.productservice.service.IProductService;
import org.springframework.beans.factory.annotation.Autowired;
import org.springframework.web.bind.annotation.*;
@RestController
@RequestMapping("/api/products")
public class ProductController {
    @Autowired
    private IProductService productService;
    @GetMapping("/page")
    public Page getProductPage(
        @RequestParam(defaultValue = "1") int page,
        @RequestParam(defaultValue = "10") int size,
        @RequestParam(required = false) String name
    ) {
        QueryWrapper queryWrapper = new QueryWrapper();
        if (name != null && !name.isEmpty()) {
            queryWrapper.like("name", name);
        }
        return productService.page(new Page(page, size), queryWrapper);
    }
}
🔧 第 5 步:分页插件配置
📁 创建一个配置类:MyBatisPlusConfig.java
路径:org.example.productservice.config
package org.example.productservice.config;
import com.baomidou.mybatisplus.extension.plugins.MybatisPlusInterceptor;
import com.baomidou.mybatisplus.extension.plugins.inner.PaginationInnerInterceptor;
import org.springframework.context.annotation.Bean;
import org.springframework.context.annotation.Configuration;
@Configuration
public class MyBatisPlusConfig {
    @Bean
    public MybatisPlusInterceptor paginationInterceptor() {
        MybatisPlusInterceptor interceptor = new MybatisPlusInterceptor();
        interceptor.addInnerInterceptor(new PaginationInnerInterceptor());
        return interceptor;
    }
}
----
此时先暂时尝试运行项目在idea中
现在虽然逻辑没写很多,但只靠你目前写的代码:
你已经拥有了分页、条件查询、自动封装结果、返回 JSON 的完整功能
运行后报错
Spring Boot 升级 3.2 报错 Invalid value type for attribute ‘factoryBeanObjectType‘: java.lang.String_invalid value type for attribute 'factorybeanobjec-CSDN博客
需要注意下 Maven 的坐标标识 是mybatis-plus-spring-boot3-starter,这点和SpringBoot 2 的依赖坐标mybatis-plus-boot-starter有所区别。
对于
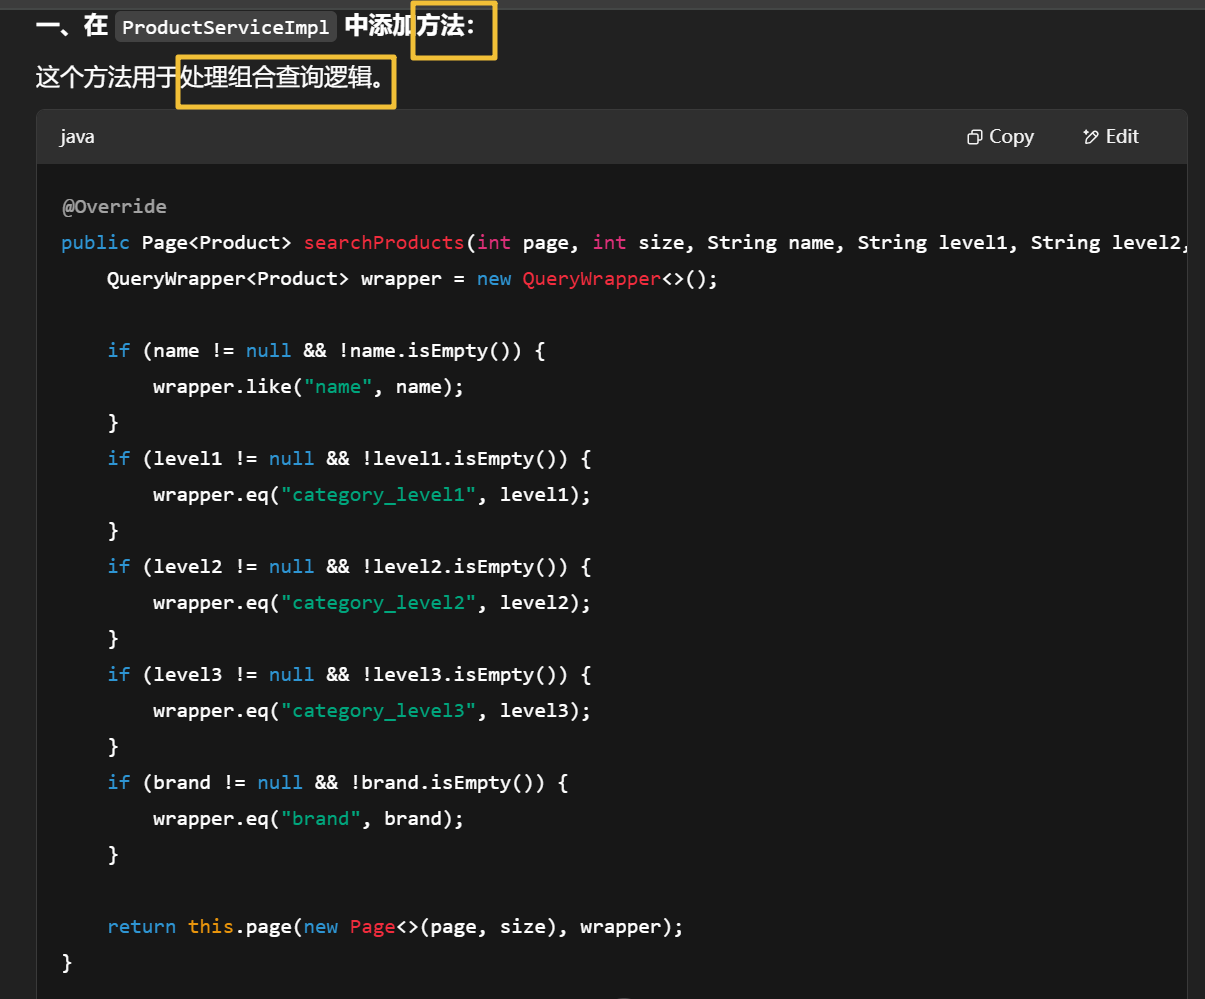
创建商品处理的业务接口实现类 ProductServiceImpl,完成按商品名称、多级类别、品牌查询商品
MyBatis-Plus 自带的是“基础查询”,但你要做复杂查询逻辑(多条件),就得:
-
自己在 Controller 里组合 QueryWrapper
-
或者把逻辑抽出来写在 ServiceImpl 中(推荐,逻辑更清晰)
总结你现在做的是:
-
✅ REST 风格接口设计
-
✅ SpringBoot + MyBatisPlus 的现代开发方式
-
✅ 使用分层架构(Controller + ServiceImpl + Mapper + Entity)
所以你这叫遵循 REST 风格的分层 Web API 实现,并且是目前企业开发里非常标准的一种写法。
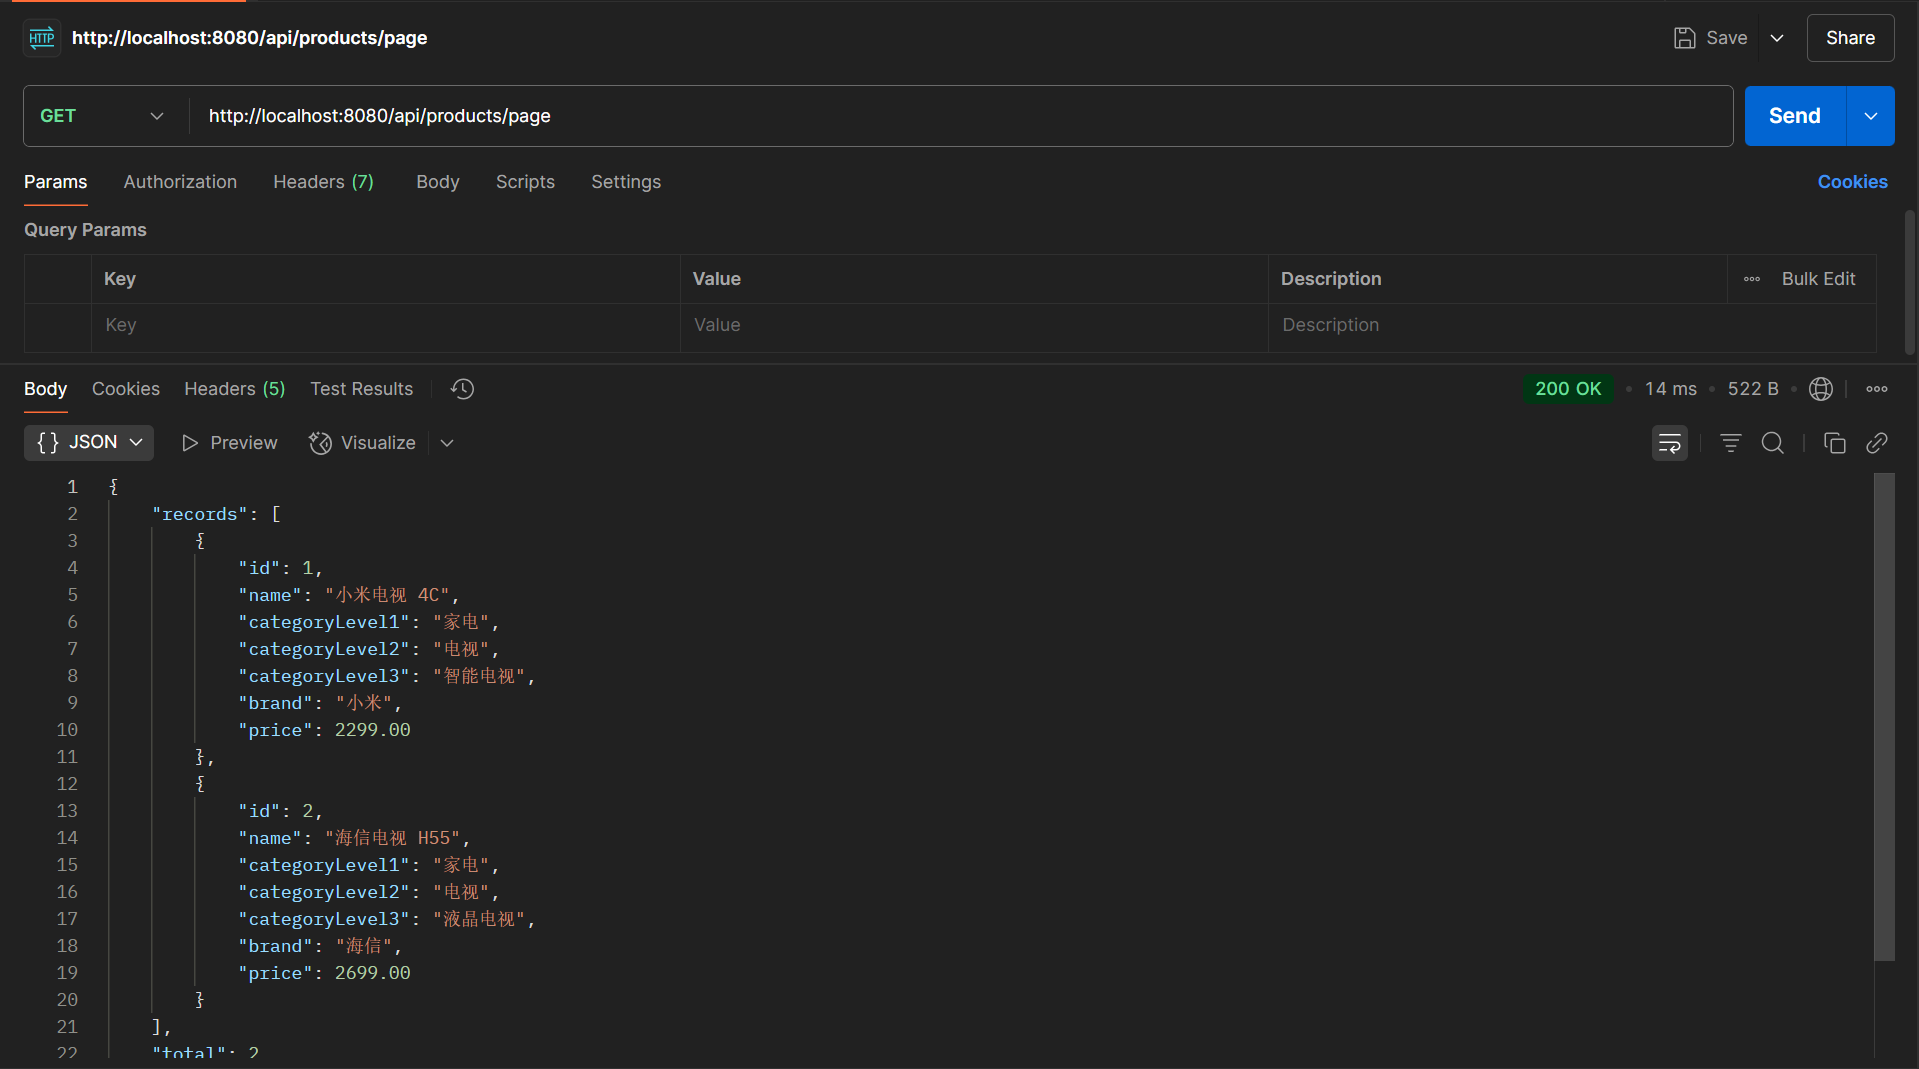
先暂时用游览器的url直接访问
postman暂时还是不方便

records 数组中是空对象 {},说明实体类字段没被序列化。

接口逻辑是对的,返回结构也有 total 等字段,说明查询成功。但 records 是空对象 {}
✅ 最可能原因:
你的 Product 实体类字段没有加上 getter/setter 或 Lombok 注解 @Data,导致无法被 Jackson 序列化为 JSON。
期望结果
{
  "records": [
    {
      "id": 1,
      "name": "小米电视 4C",
      "categoryLevel1": "家电",
      "categoryLevel2": "电视",
      "categoryLevel3": "智能电视",
      "brand": "小米",
      "price": 2299.00
    },
    {
      "id": 2,
      "name": "海信电视 H55",
      "categoryLevel1": "家电",
      "categoryLevel2": "电视",
      "categoryLevel3": "液晶电视",
      "brand": "海信",
      "price": 2699.00
    }
  ],
  "total": 2,
  "size": 10,
  "current": 1,
  "pages": 1
}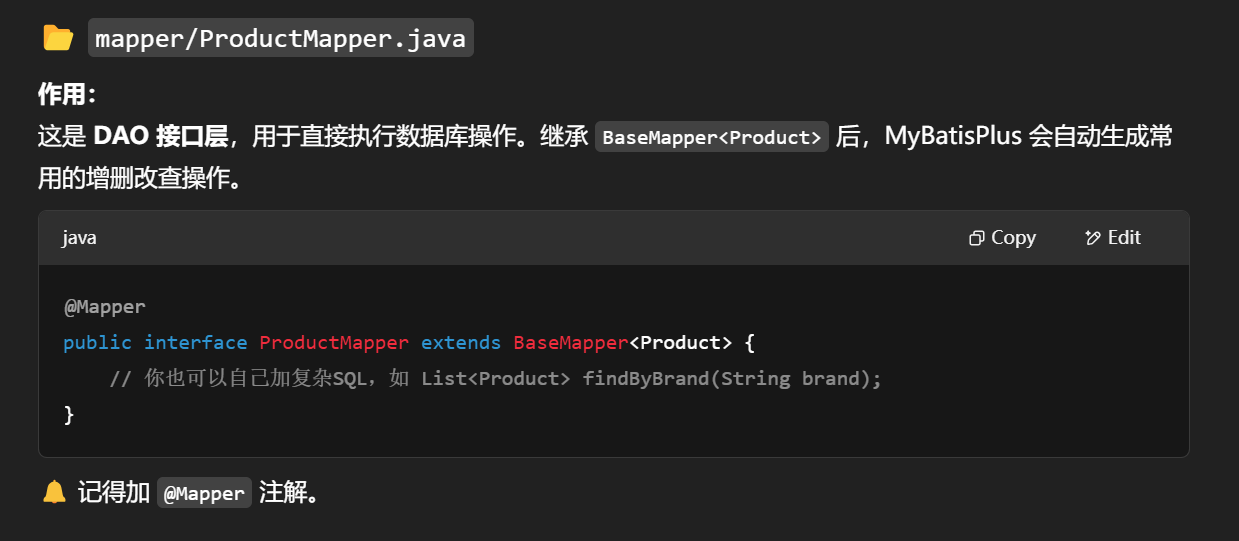
total, size, current, pages 是分页系统生成的,是 Page 本身的结构。
🔄 IService 提供的是分页机制
Page page = productService.page(new Page(page, size), queryWrapper);
的确是lombok的问题,全部手动设置构造函数就解决了
“按商品名称、多级类别、品牌查询商品”的业务逻辑。
需要修改的类是:ProductServiceImpl 和 ProductController
QueryWrapper 是 MyBatis-Plus 提供的条件构造器,用来拼接 SQL 查询语句。
wrapper.like("name", name) 是模糊查询(SQL 中的 LIKE '%关键词%')。
wrapper.eq(...) 是精确匹配(SQL 中的 = 值)。
this.page(...) 调用 MyBatis-Plus 提供的分页查询方法(自动生成 limit offset 分页语句)。
👉 为什么写在 ProductServiceImpl?
因为 Service 是 业务逻辑层,用于组织和处理“多个条件组合”的查询。控制器不直接处理数据拼接,而是委托给 Service 层。
✅ 二、IProductService:定义接口的契约
目的:明确 ProductService 应该提供哪些方法。
-
在 Java 中,通过接口来隔离调用者(Controller)与实现者(Impl)。
-
当 Controller 调用 searchProducts(...),它并不关心方法的具体实现是谁,只要接口定义存在即可。
👉 为什么要定义这个接口?
是为了松耦合:如果将来想换一个查询逻辑,只需更换 Impl 实现,不必改调用方(Controller)。
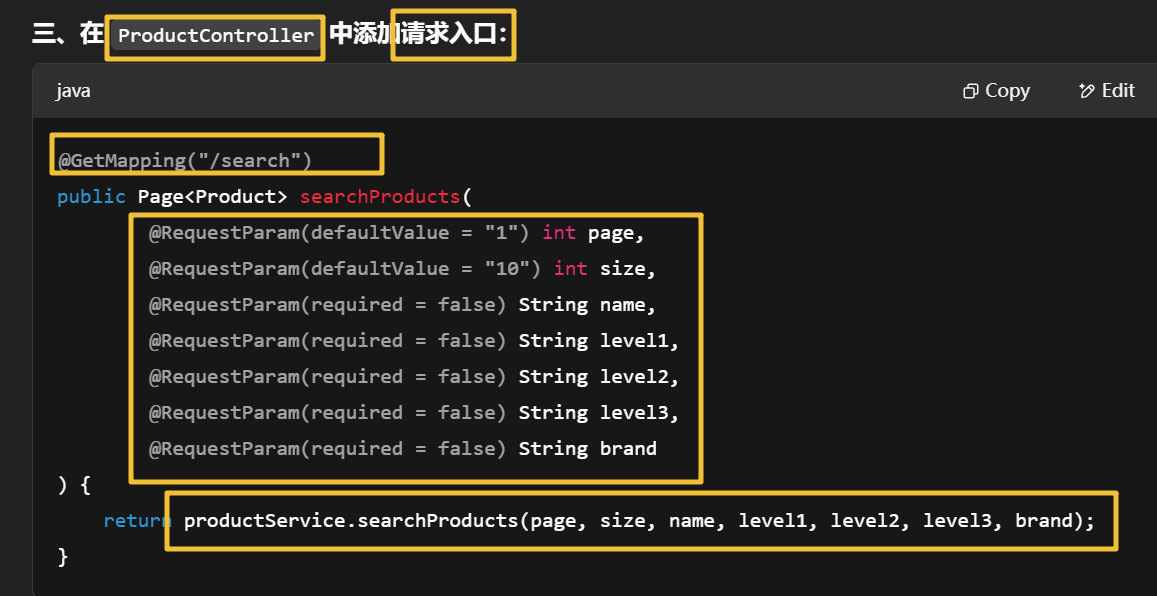
✅ 三、ProductController:暴露查询接口(给前端或 Postman 测试)
目的:将你定义的查询功能开放为一个 HTTP 请求入口。
-
@GetMapping("/search") 表示它是一个 GET 请求,路径为 /api/products/search
-
@RequestParam 是接收 URL 参数的注解,比如 ?name=电视
-
调用的是 productService.searchProducts(...),把参数传入,调用你刚实现的业务逻辑。
👉 为什么写在 Controller?
控制器是Web 层的入口,处理请求参数、调用服务、返回数据。它不直接写业务细节,而是只负责“调度”。
按 Alt + Enter 自动导入
使用你在 ProductServiceImpl 里自定义的 searchProducts 方法对商品进行 条件查询,不用默认的分页方法名 getProductPage
-----------
完成
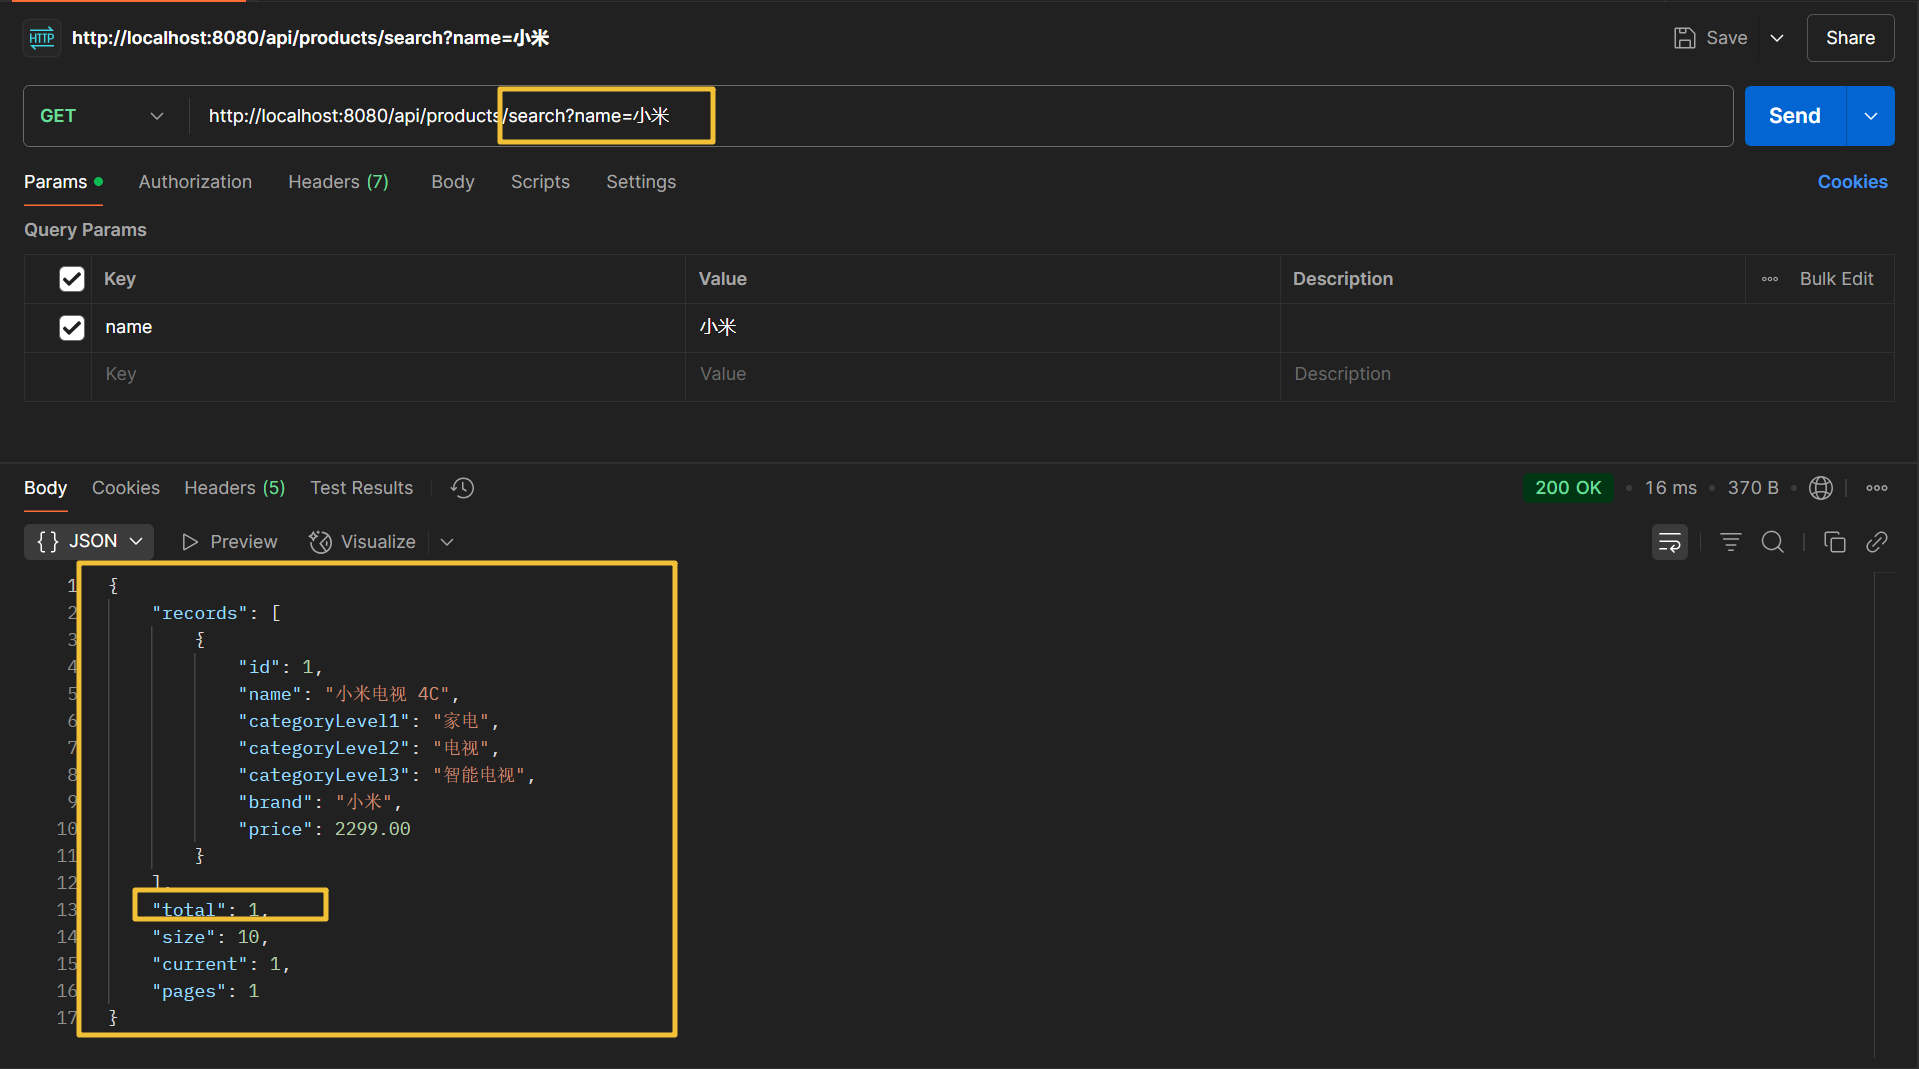
postman查询(游览器也可以,只不过也是这个更专业一点吧,,目前其实游览器直接输入都可以了)
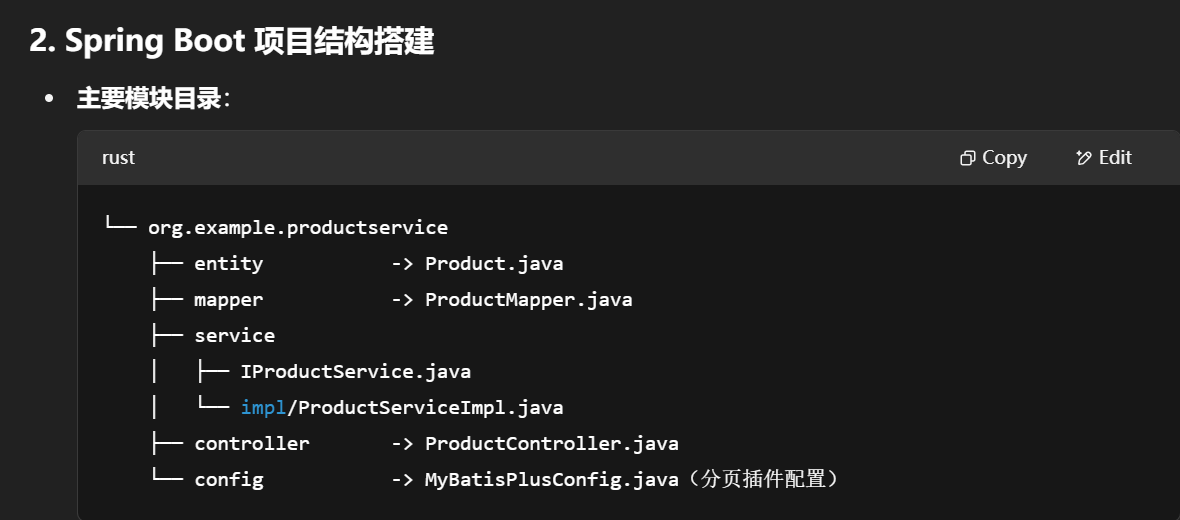
类名 作用 Product 实体类,对应数据库字段 ProductMapper Mapper接口,继承自 BaseMapper IProductService 服务接口,继承 IService,并声明 searchProducts 方法 ProductServiceImpl 服务实现,继承 ServiceImpl,实现自定义搜索逻辑 ProductController 控制器,定义 /page 与 /search 两个查询接口 重点接口功能
/api/products/page
-
基础分页查询,支持按 name 模糊搜索(如:?name=小米)
/api/products/search
-
高级组合条件查询:支持传入 name、category_level1、category_level2、category_level3、brand
-
-
-
-
-
-
-
-
-
-
-
-
-
-


