
通过Web 工具部署FusionCompute 8.7.0虚拟化平台(二、安装VRM及问题处理)

本实验演示如何通过Web 工具部署FusionCompute 8.7.0虚拟化平台,本文为安装VRM及问题处理。
前文请见:通过Web 工具部署FusionCompute 8.7.0虚拟化平台(一、部署Web安装工具和批量安装CNA)
一、安装VRM
1、继续前文下一步
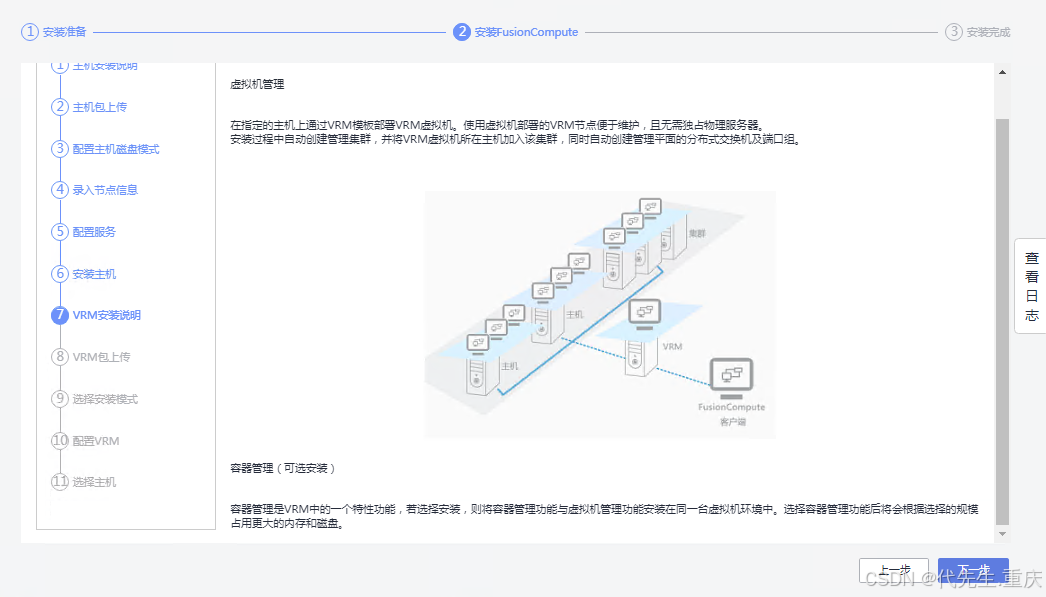
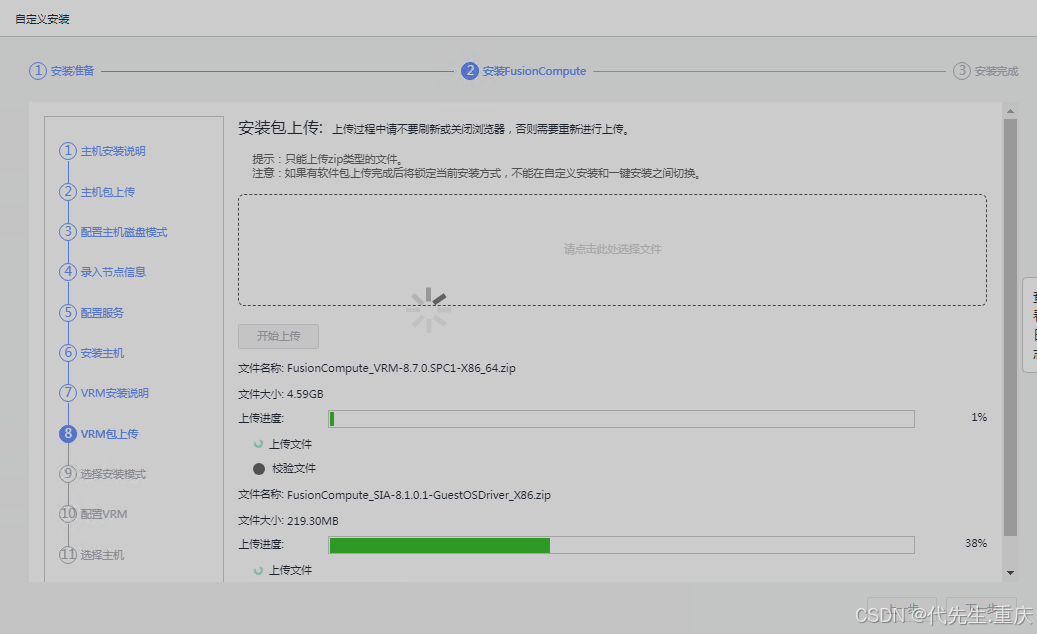
2、上传VRM相关软件包
3、同时校对CNA主机IP
此时可以手动修改主机IP为规划的固定IP (本来磁盘自动配置如果勾选了,自动安装程序配置的IP就是依序分配的62\63并固定设置的,本次因磁盘自动配置未勾选导致初次自动安装失败,返回后自动分配的65\64,和规划不一致了),需手动改回:
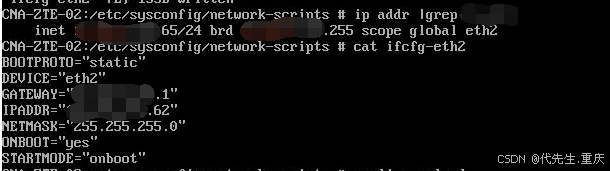
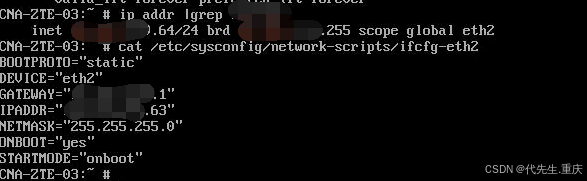
改回后重启网卡服务
4、完成安装包上传和校验
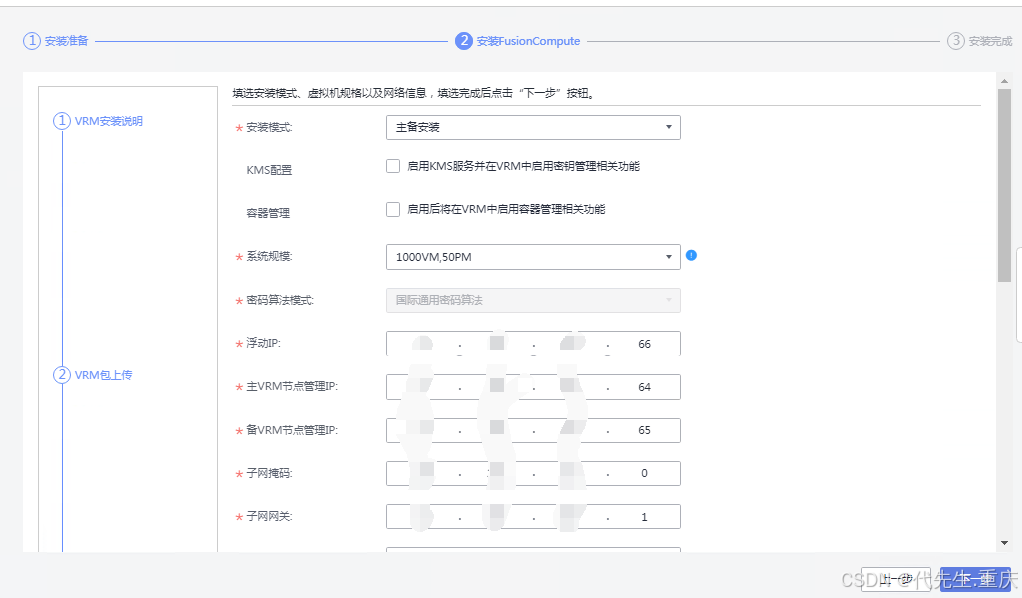
5、配置安装模式

6、设置VRM集群IP
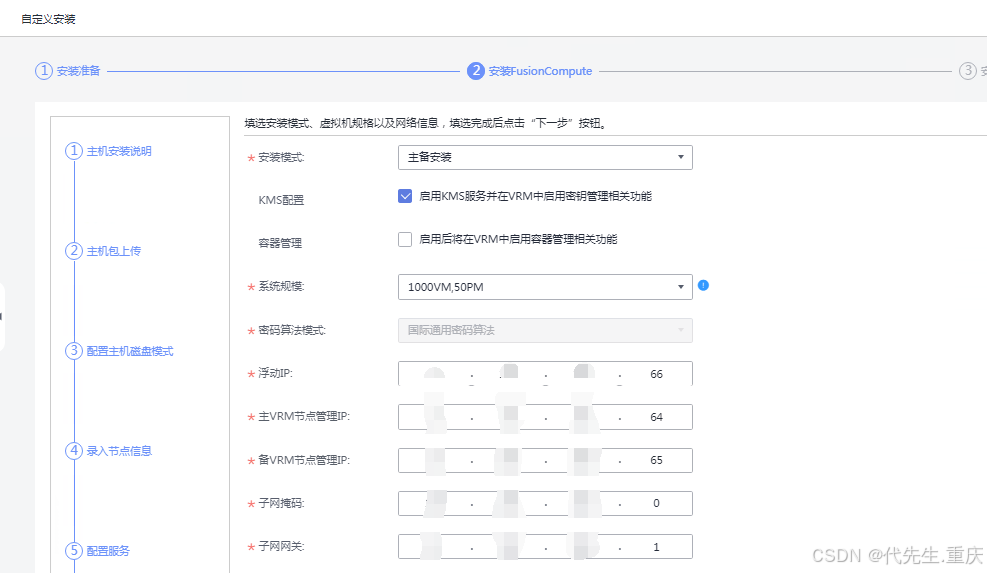 7、设置VRM相关密码
8、遇到问题1
此时发现可选择的主机为CNA主机初次安装失败后的第二次安装动态分配的IP,即64/65,选不到规划的IP,:-( 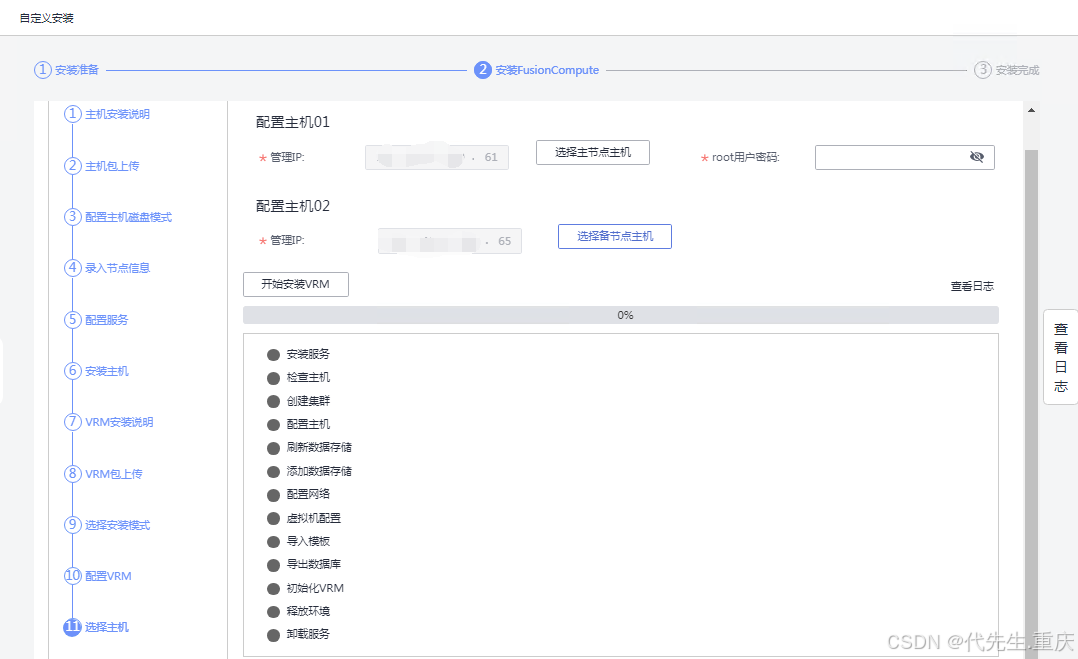
9、返回修改CNA主机IP

继续下一步,发现系统中注册的CNA主机IP还是第二次DHCP分配的IP,无法继续,退出安装程序 。
二、重新部署web安装工具,现次进行安装
1、重新部署web安装工具
退出Web安装工具页面,重新部署web安装工具
linux-apAlwB:/home/GalaX8800/FusionCompute-LinuxInstaller-8.7.0.SPC1-X86_64 # sh bin/webInstaller.sh uninstall
Progress:[##################################################] 100%
uninstall FusionCompute-Linux-Installer successfully.
linux-apAlwB:/home/GalaX8800/FusionCompute-LinuxInstaller-8.7.0.SPC1-X86_64 # sh bin/webInstaller.sh install
Progress:[##################################################] 100%
Portal: https://192.168.199.61:8080
install FusionCompute-Linux-Installer successfully.
linux-apAlwB:/home/GalaX8800/FusionCompute-LinuxInstaller-8.7.0.SPC1-X86_64 #
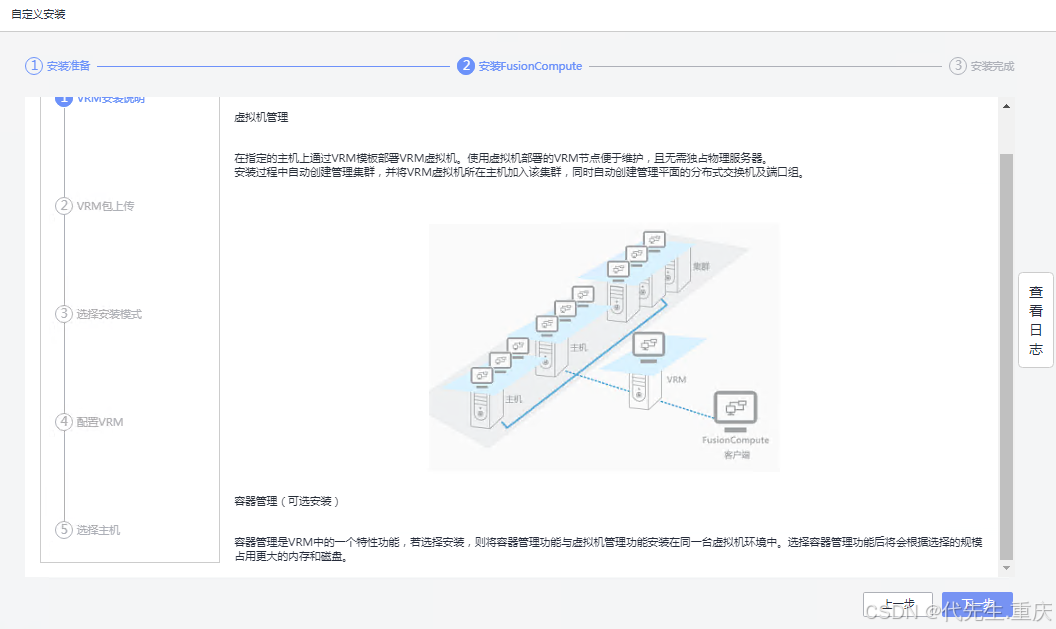
2、进入web安培装工具,本次仅选VRM

3、继续下一步
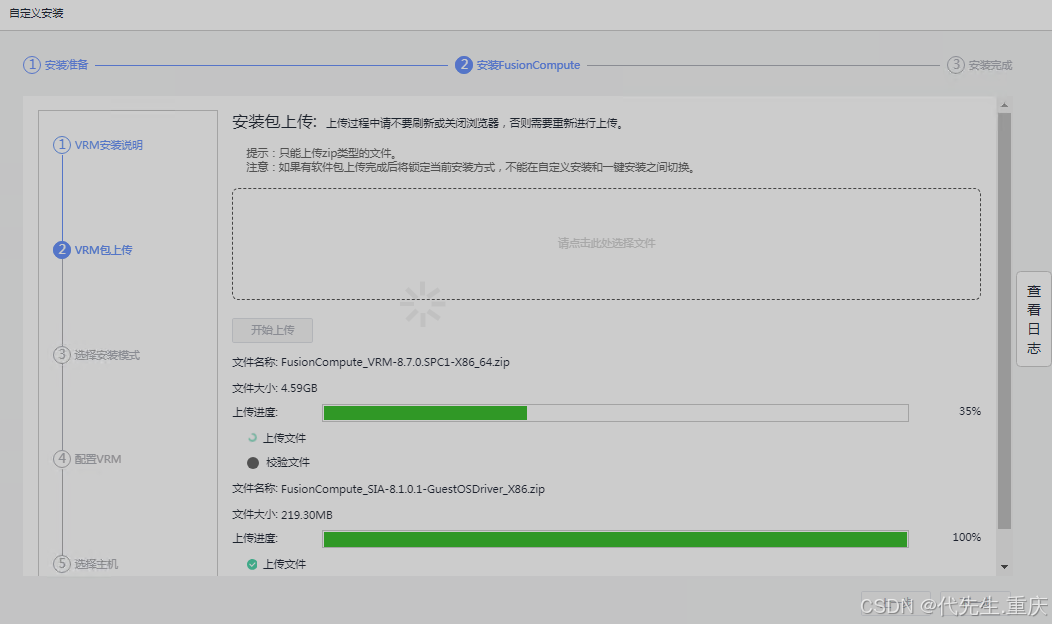
4、重新上传安装包
5、选择安装模式

6、配置VRM集群IP
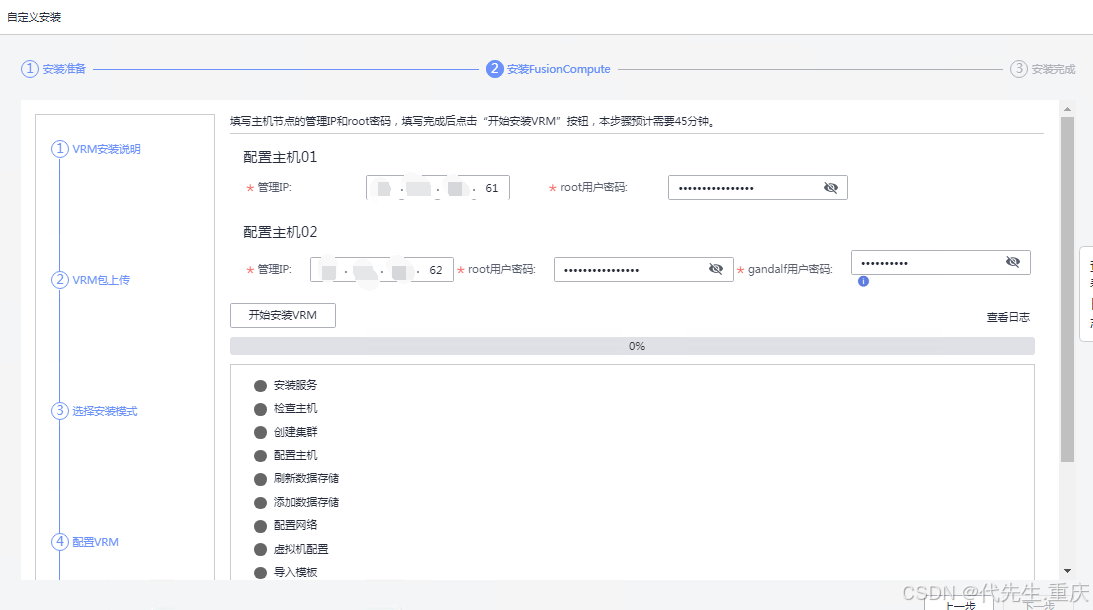
7、设置VRM相关密码
8、遇到问题2
此时主机01报加密模式不匹配,安装失败

9、查看报错日志
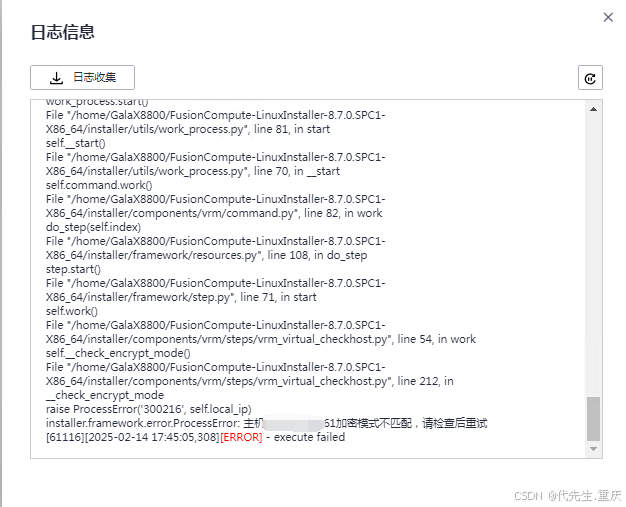
日志显示如下关键字
installer.framework.error.ProcessError: 主机X.X.X.X加密模式不匹配,请检查后重试
[61116][2025-02-14 17:45:05,308][ERROR] - execute failed
10、检查手工部署的CNA主机的加密模式
登录主机,用“cat /etc/vna-api/vna-api.conf |grep cipher_mode”命令检查加密模式

结果显示确实为空
11、初始化该主机的加密模式
linux-apAlwB:/ # cat /etc/vna-api/vna-api.conf |grep cipher_mode
[cipher_mode]
cipher_mode =
linux-apAlwB:/ # cnaInit
-----------------------------------
Start configuring the cipher mode!
Please input cipher mode: (0 for general, 1 for sm): 0
Cipher mode set succeed.
-----------------------------------
gandalf password set start!
The group GalaX8800 already exists
useradd: warning: the home directory /home/GalaX8800 already exists.
useradd: Not copying any file from skel directory into it.
Changing password for user gandalf.
New password:
Retype new password:
passwd: all authentication tokens updated successfully.
The gandalf user is set successfully.
The gandalf user's expiry date is set successfully.
-----------------------------------
Redis password set start!
Please input new password:
Please input new password again:
Redirecting to /bin/systemctl restart vna-redis.service
Redirecting to /bin/systemctl restart vna-system-volume.service
Redirecting to /bin/systemctl restart vna-scheduler.service
Redirecting to /bin/systemctl restart vna-worker.service
Redirecting to /bin/systemctl restart vna-backend.service
Redirecting to /bin/systemctl restart vna-beat.service
Redirecting to /bin/systemctl restart vna-api.service
Redirecting to /bin/systemctl restart vna-worker-monitor.service
Redirecting to /bin/systemctl restart vna-worker-scheduler.service
Redirecting to /bin/systemctl restart monitord.service
Redis password set succeed
-----------------------------------
add Multipath configuration items start!
adding configuration item [check_type              1]
adding configuration item [check_path_num_per_splice       2]
adding configuration item [marginal_path_double_failed_time     600]
adding configuration item [marginal_path_err_sample_time        600]
adding configuration item [marginal_path_err_rate_threshold     10]
adding configuration item [marginal_path_err_recheck_gap_time   600]
Redirecting to /bin/systemctl restart multipathd.service
Multipath configuration items added successfully
linux-apAlwB:/ #
点“开始安装VRM”继续 安装。
12、遇到问题3
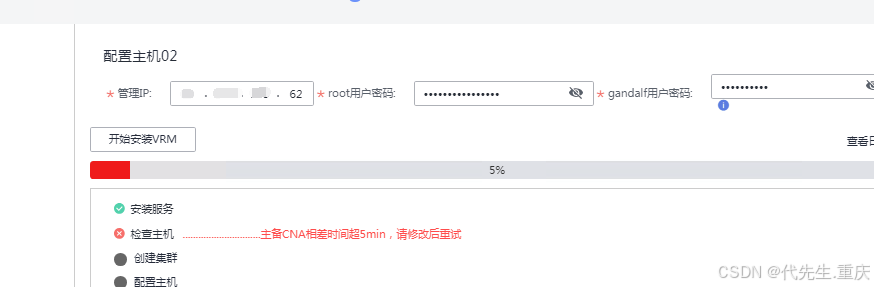
显示主备CNA相差时间超5min,安装中止。
13、配置时间同步
主机1启用同外部的时间同步
linux-apAlwB:/ # cat /etc/ntp.conf|grep server
# Permit association with pool servers.
# Use public servers from the pool.ntp.org project.
# Reduce the maximum number of servers used from the pool.
server 192.168.17.33
server 192.168.17.34
server 192.168.17.35
linux-apAlwB:/ # systemctl restart ntpd
linux-apAlwB:/ # systemctl status ntpd
● ntpd.service - Network Time Service
     Loaded: loaded (/usr/lib/systemd/system/ntpd.service; disabled; vendor preset: disabled)
     Active: active (running) since Mon 2025-02-17 09:58:29 CST; 2s ago
    Process: 2120758 ExecStart=/usr/sbin/ntpd -u ntp:ntp $OPTIONS (code=exited, status=0/SUCCESS)
   Main PID: 2120761 (ntpd)
      Tasks: 2 (limit: 1226555)
     Memory: 776.0K
     CGroup: /system.slice/system-hostos.slice/ntpd.service
             └─ 2120761 /usr/sbin/ntpd -u ntp:ntp -g
Feb 17 09:58:29 linux-apAlwB ntpd[2120761]: gps base set to 2024-12-01 (week 2343)
Feb 17 09:58:29 linux-apAlwB ntpd[2120761]: restrict 0.0.0.0: KOD does nothing without LIMITED.
Feb 17 09:58:29 linux-apAlwB ntpd[2120761]: restrict ::: KOD does nothing without LIMITED.
Feb 17 09:58:29 linux-apAlwB ntpd[2120761]: Listen normally on 0 lo 127.0.0.1:123
Feb 17 09:58:29 linux-apAlwB ntpd[2120761]: Listen normally on 1 eth2 192.168.18.61:123
Feb 17 09:58:29 linux-apAlwB ntpd[2120761]: Listen normally on 2 lo [::1]:123
Feb 17 09:58:29 linux-apAlwB ntpd[2120761]: Listening on routing socket on fd #19 for interface updates
Feb 17 09:58:29 linux-apAlwB ntpd[2120761]: kernel reports TIME_ERROR: 0x2041: Clock Unsynchronized
Feb 17 09:58:29 linux-apAlwB ntpd[2120761]: kernel reports TIME_ERROR: 0x2041: Clock Unsynchronized
Feb 17 09:58:29 linux-apAlwB systemd[1]: Started Network Time Service.
linux-apAlwB:/ #
主机2同时和主机1、外部时间服务器进行同步
CNA-ZTE-02:~ # cat /etc/ntp.conf|grep server
# Permit association with pool servers.
# Use public servers from the pool.ntp.org project.
# Reduce the maximum number of servers used from the pool.
server 192.168.18.61
server 192.168.17.33
CNA-ZTE-02:~ # systemctl restart ntpd
CNA-ZTE-02:~ # systemctl restart ntpd
14、待服务器时间同步后,再次开始安装VRM

15、安装完成
为避免密码丢失,建议本步按提示导出安装信息

在结束页面下方显示了VRM管理平台的登录页面链接,点“完成”会对安装工具的信息进行清理。
三、验证登录
通过VRM管理平台的登录页面链接进行访问
 可以看到FusionCompute 8.7.0虚拟化平台运行正常,此时可以进行添加主机,配置业务网等后续操作。


