
android studio——设计简单微信界面超详细教程

一、作业目标
本次作业开发的是微信APP的门户框架,UI布局为上中下结构。
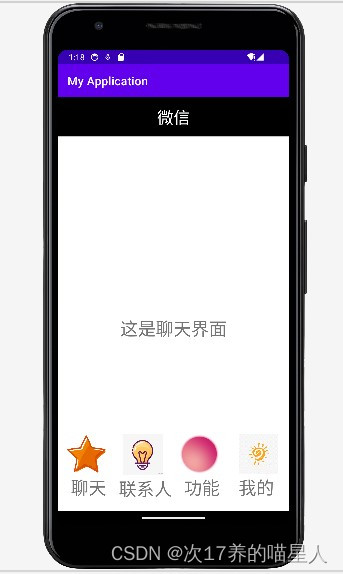
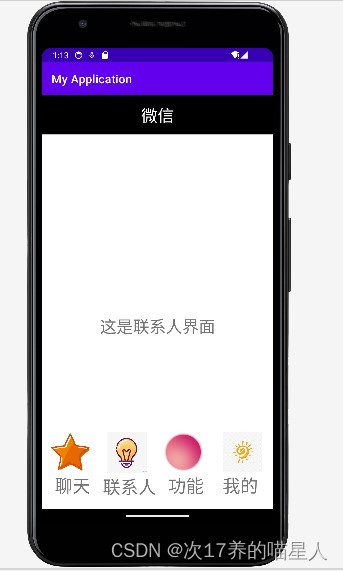
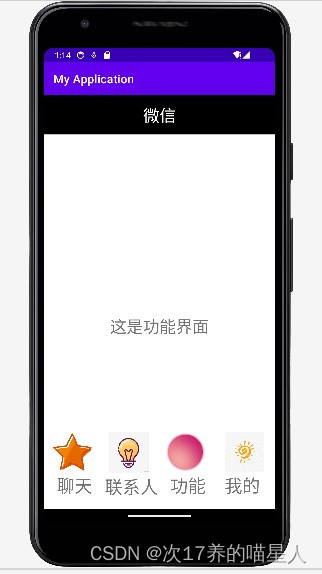
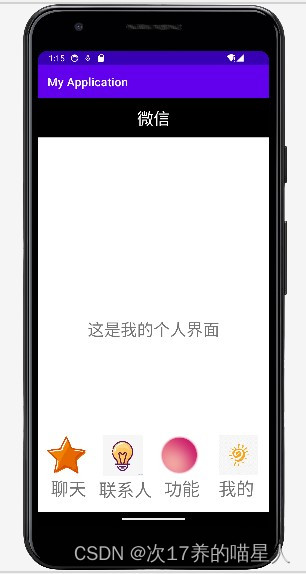
功能一:用户可通过点击底部导航栏切换四个板块进行切换,它们分别是“聊天”、“联系人”、“功能”、“我的”,每切换一个界面会有对应的文本提示。
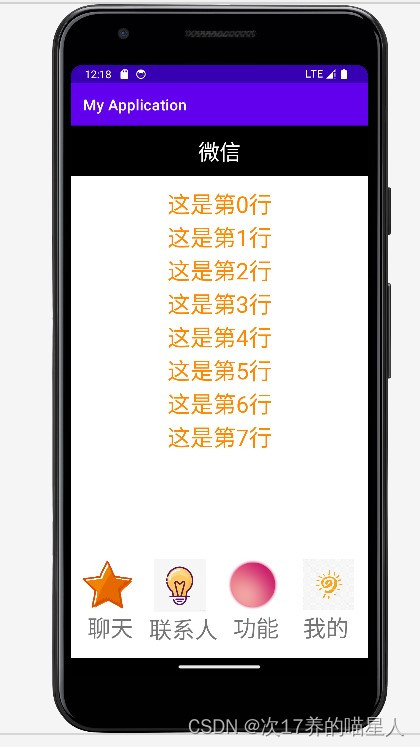
功能二:在每一tab页面实现列表效果。
(功能二的实现在功能一的前提下改进,详情可直接移步第四点的第3点)
二、设计流程
1、外观设计
微信页面整体为上-中-下结构
上部:显示栏背景为黑色,内有白色“微信”字样
中部:纯文本“这是××界面”和几行列表
下部:四个.png文件的图标以及对应板块的名字
2、内部联系
I.用一个main.xml文件将三个部分联系起来,使得三个部分可以在同一个页面进行展示
II.写一个Mainactivity.java文件来实现点击切换的功能:
(1)创建四个Fragment类及其对应的四个tab.xml文件,通过Fragmentxx类绑定板块对应的布局文件,将其联系起来;再用一个myadapter类将所有的单个文本Item.xml联系起来。
(2)在MainActivity类中创建Fragmentxx对象,通过Transaction将Fragmentxx对象添加到主布局中间的空板块,创建FragmentManager管理Fragment。
(3)初始化方法
(4)写监听方法
(5)设置控件被点击后的响应事件
(6)展示页面的方法
四、技术说明及关键代码(含详细步骤)
在这之前先了解一下各方面功能:
android:id="@+id/top",为组件设置资源id,top为命名,在java文件中通过findViewById(id)被找到。
android:layout_width=“wrap_content”,布局的宽度
android:layout_height=“wrap_content”,布局的高度
android:layout_weight=“1”,用来等比例地划分区域。
android:gravity=“center”,对齐方式。
android:text=“微信”,显示的文本。
android:textColor="@color/white",设置文字的颜色。
android:textSize=“28dp” />,设置文字的大小。
1.实现外观设计
I.上部
找到res下的layout文件夹,并在该文件夹下右键—>new—>XML—>Layout XML File创建一个weixin.xml文件;点击下图右上角的Design,将TextView拖一个到LinearLayout下面,再点击code查看代码,进行修改
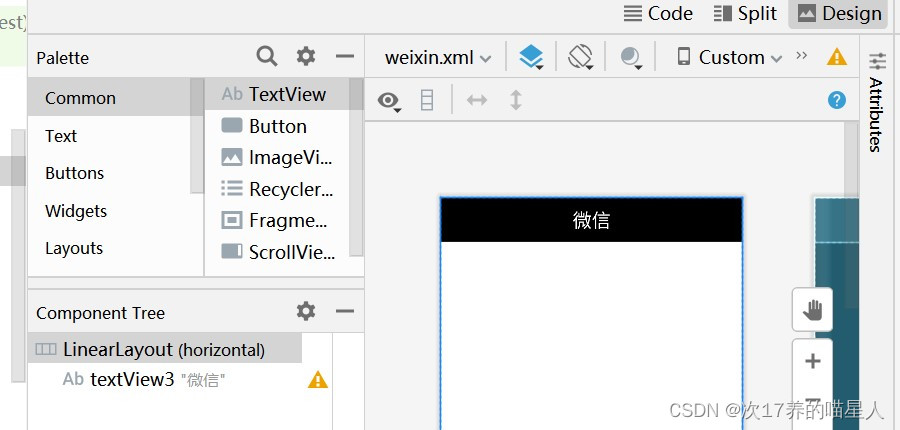
点击code显示的代码即为weixin.xml的代码:
II.中部
在layout下继续右键创建一个tab1.xml文件,点击code查看代码,修改文本为“这是聊天界面”,并调整大小。
这时候,由于共有四个界面,所以你可以选择:
(1) 将tab1.xml直接复制,粘贴到layout下,改名为tab2.xml,tab3.xml,tab4.xml(记得把文本和code里面 android:id="@+id/textView8" 这一句TextView后的数字改成不同值);
(2)重复三次创建tab1.xml的操作。
这里只展示tab1.xml的代码:
III.下部
首先去网上下载四个适合用来当底部导航的.png类型的图标
然后,在layout下创建一个名为bottom.xml的文件
点击Design—>layout—>目Linearlayout(纵向),拖一个放到横向的LinearLayout下面;
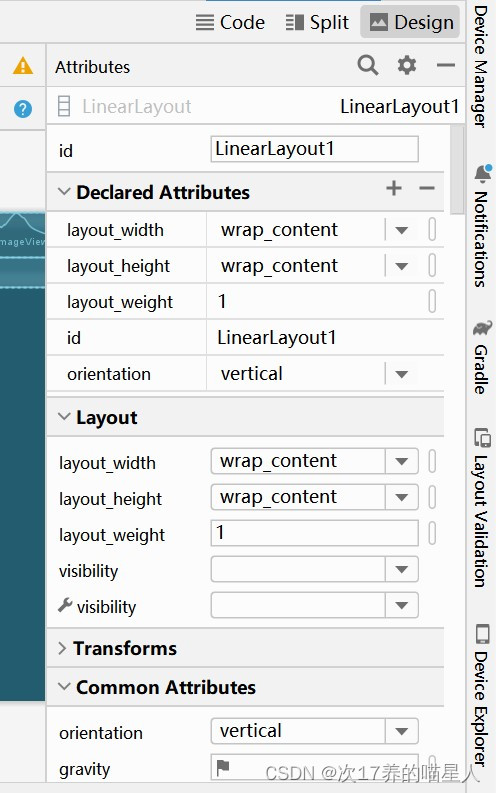
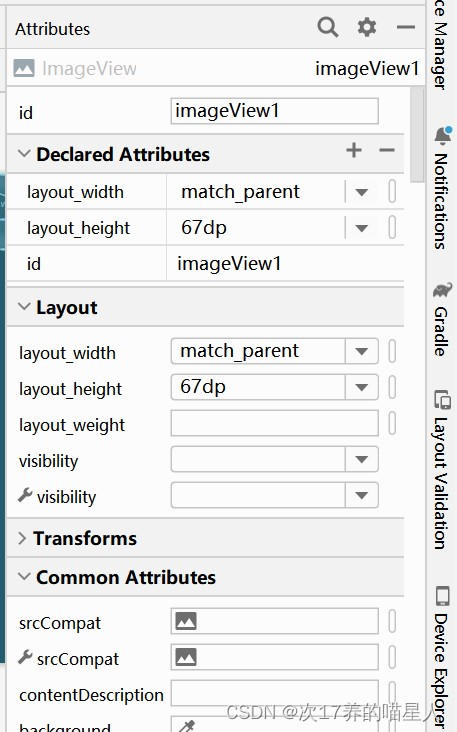
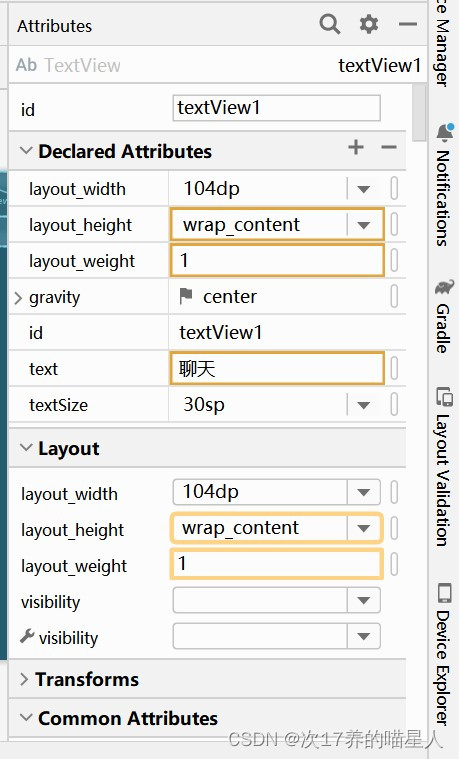
点击common—>Imageview,拖一个放到纵向的LinearLayout下,再把TextView也放一个到纵向的LinearLayout下面,修改参数如下图一、二(上右)、三,完成一个图标的创建。
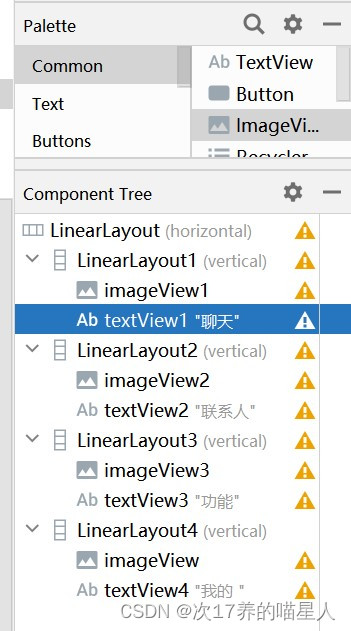
把纵向的LinearLayout复制,在横向的LinearLayout下粘贴三次,并改名四个纵向的LinearLayout、ImageView、TextView分别编号为1,2,3,4,如图四(下右)。
bottom.xml的代码:
注意:选择的ImageView图标不能直接使用,所以要把之前下载的四个.png图标直接复制粘贴到res—>drawable文件下,code中的android:src="@drawable/moon3" />这一句是自己的.png路径,四个都要修改。
2.实现联系和切换功能
I.整合页面
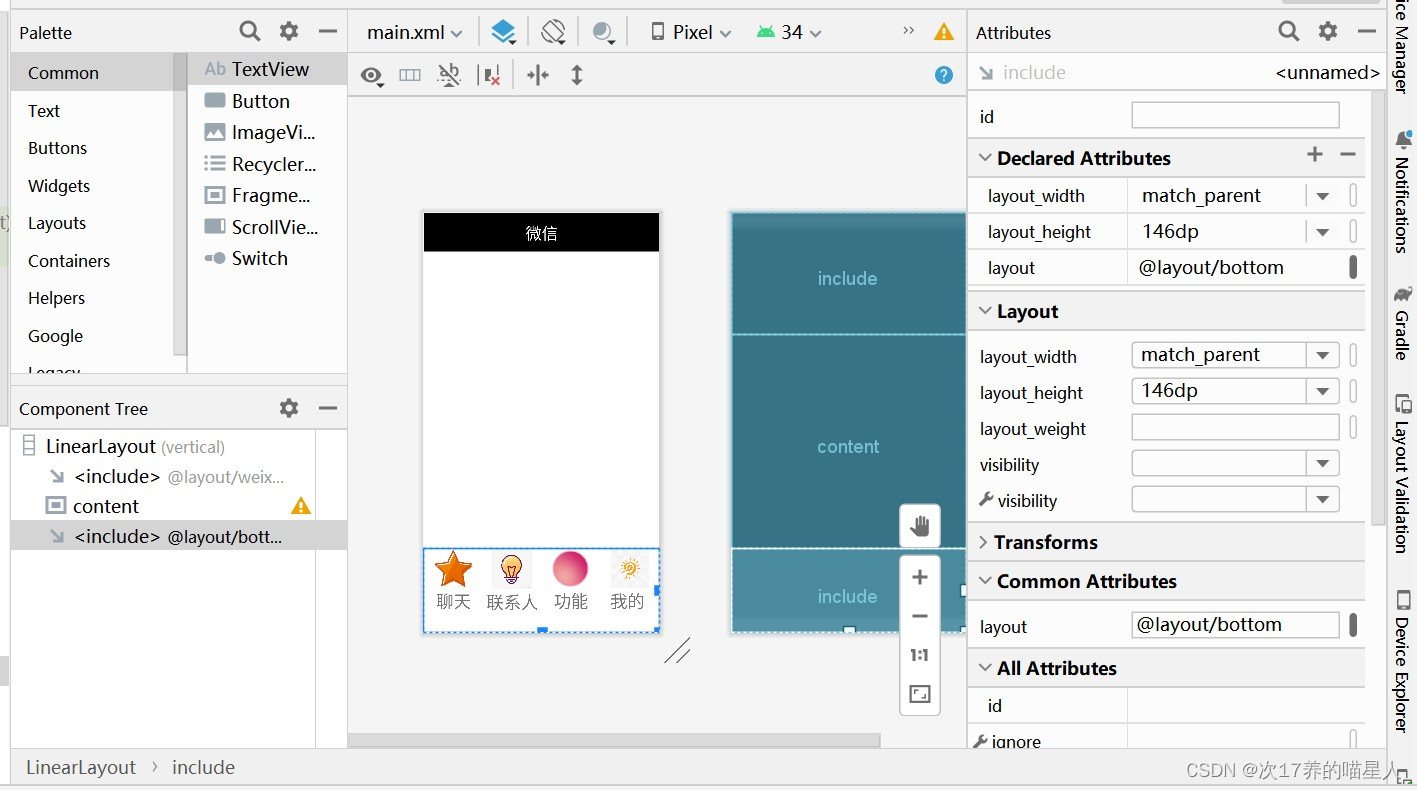
先在layout下创建一个main.xml文件,点击code修改代码,把上-中-下三个部分包括在内,再点击design,调整三块的占比,使得顶部、图标和文本都能显露出来。
注意:如果不把大小调整合适,最后运行可能会导致显示不完整的。
main.xml代码:
可以看到layout="@layout/weixin",layout="@layout/content",layout="@layout/bottom"说明包含了这三个部分
II.切换功能
要实现切换功能,就需要
(1)在java—>ui下创建四个Fragment类(.java),将其分别与之前创建的tab1,2,3,4四个.xml文件联系起来(可创建一个后复制粘贴,修改名称和tab)。
(2)在MainActivity类(.java)中创建四个Fragment对象,四个LinearLayout对象,创建FragmentManager管理Fragment。
(3)在MainActivity.Java中写对应的方法进行实现:
initial();用来初始化;
fragmenthide();是为了点每点击一个界面,将其他三个界面隐藏起来;
fragmentshow(fragment1);默认展示第一个界面;
onClick(View view);是将用户的点击进行传达,通过监听获取组件id,根据获取得到的id,展示对应的板块。
四个Fragment类只有tab的序号需要更改,这里展示Fragment1:
package com.example.myapplication;
import android.os.Bundle;
import android.view.LayoutInflater;
import android.view.View;
import android.view.ViewGroup;
import androidx.fragment.app.Fragment;
public class Fragment1 extends Fragment
{
    @Override
    public View onCreateView(LayoutInflater inflater,ViewGroup container, Bundle savedInstanceState) {

        View view1 = new View(getContext());

        return inflater.inflate(R.layout.tab1, container, false);
    }
}
MainActivity.java的代码:
LinearLayout对象,对应的id是bottom.xml文件中的第二层LinearLayout的id
linearLayout1=findViewById(R.id.LinearLayout1);
linearLayout2=findViewById(R.id.LinearLayout2);
linearLayout3=findViewById(R.id.LinearLayout3);
linearLayout4=findViewById(R.id.LinearLayout4);
隐藏其他项
private void fragmenthide() {
FragmentTransaction ft=fm.beginTransaction()
.hide(fragment1)
.hide(fragment2)
.hide(fragment3)
.hide(fragment4);
ft.commit();
}
初始化,将所有fragment都添加到界面中部板块,对应的id是Activitymain.xml中的Fragment的id
private void initial() {
fm=getSupportFragmentManager();
用content是因为main.xml用的名字是content(android:id="@+id/content")
FragmentTransaction ft=fm.beginTransaction()
.add(R.id.content,fragment1)
.add(R.id.content,fragment2)
.add(R.id.content,fragment3)
.add(R.id.content,fragment4);
ft.commit();
}
点击触发通过监听获取组件id,根据获取得到的id,展示对应的板块
@Override
public void onClick(View view){
fragmenthide();
int id=view.getId();
if(id==R.id.LinearLayout1)
fragmentshow(fragment1);
if(id==R.id.LinearLayout2)
fragmentshow(fragment2);
if(id==R.id.LinearLayout3)
fragmentshow(fragment3);
if(id==R.id.LinearLayout4)
fragmentshow(fragment4);
}
完整代码:
package com.example.myapplication;
import android.os.Bundle;
import android.view.View;
import android.widget.LinearLayout;
import com.google.android.material.bottomnavigation.BottomNavigationView;
import androidx.appcompat.app.AppCompatActivity;
import androidx.fragment.app.Fragment;
import androidx.fragment.app.FragmentManager;
import androidx.fragment.app.FragmentTransaction;
import androidx.navigation.NavController;
import androidx.navigation.Navigation;
import androidx.navigation.ui.AppBarConfiguration;
import androidx.navigation.ui.NavigationUI;
import com.example.myapplication.databinding.ActivityMainBinding;
public class MainActivity extends AppCompatActivity implements View.OnClickListener {
    Fragment fragment1,fragment2,fragment3,fragment4;
    FragmentManager fm;
    LinearLayout linearLayout1,linearLayout2,linearLayout3,linearLayout4;
    @Override
    protected void onCreate(Bundle savedInstanceState) {
        super.onCreate(savedInstanceState);
        setContentView(R.layout.main);
        fragment1=new Fragment1();
        fragment2=new Fragment2();
        fragment3=new Fragment3();
        fragment4=new Fragment4();
        // LinearLayout对象,对应的id是bottom.xml文件中的第二层LinearLayout的id
        linearLayout1=findViewById(R.id.LinearLayout1);
        linearLayout2=findViewById(R.id.LinearLayout2);
        linearLayout3=findViewById(R.id.LinearLayout3);
        linearLayout4=findViewById(R.id.LinearLayout4);
        fm=getSupportFragmentManager();
        initial();
        fragmenthide();
        fragmentshow(fragment1);
        linearLayout1.setOnClickListener(this);
        linearLayout2.setOnClickListener(this);
        linearLayout3.setOnClickListener(this);
        linearLayout4.setOnClickListener(this);
    }
    //隐藏其他项
    private void fragmenthide() {
        FragmentTransaction ft=fm.beginTransaction()
                .hide(fragment1)
                .hide(fragment2)
                .hide(fragment3)
                .hide(fragment4);
        ft.commit();
    }
    //初始化,将所有fragment都添加到界面中部板块
    //对应的id是Activitymain.xml中的Fragment的id
    private void initial() {
        fm=getSupportFragmentManager();
 //用content是因为main.xml用的名字是content(android:id="@+id/content")
        FragmentTransaction ft=fm.beginTransaction()
                .add(R.id.content,fragment1)
                .add(R.id.content,fragment2)
                .add(R.id.content,fragment3)
                .add(R.id.content,fragment4);
        ft.commit();
    }
    //点击触发通过监听获取组件id,根据获取得到的id,展示对应的板块
    @Override
    public void onClick(View view){
        fragmenthide();
        int id=view.getId();
        if(id==R.id.LinearLayout1)
            fragmentshow(fragment1);
        if(id==R.id.LinearLayout2)
            fragmentshow(fragment2);
        if(id==R.id.LinearLayout3)
            fragmentshow(fragment3);
        if(id==R.id.LinearLayout4)
            fragmentshow(fragment4);
    }
    //展示
    private void fragmentshow(Fragment fragment){
        FragmentTransaction transaction=fm.beginTransaction()
                .show(fragment);
        transaction.commit();
    }
}
注意:onClick()方法下需要用if()语句,switch()不行。
3.增加列表效果
由于多了列表,首先想到要更改的就是tab1.xml,以及类Fragment1。故:
(1)、再创建一个新的item.xml文件存放单个文本;
(2)、 类Fragnent1展示tab1的内容,用到recyclerView对象,修改文本内容,同时使用myadapter类和队列,让它们呈现时排列起来。
package com.example.myapplication;
import android.content.Context;
import android.os.Bundle;
import androidx.fragment.app.Fragment;
import android.view.LayoutInflater;
import android.view.View;
import android.view.ViewGroup;
import androidx.appcompat.app.AppCompatActivity;
import androidx.recyclerview.widget.LinearLayoutManager;
import androidx.recyclerview.widget.RecyclerView;
import java.util.ArrayList;
import java.util.List;
public class Fragment1 extends Fragment {
RecyclerView recyclerView;
List list;
Myadapter myadapter;
Context context;
@Override
public View onCreateView(LayoutInflater inflater, ViewGroup container,
Bundle savedInstanceState) {
View view = inflater.inflate(R.layout.tab1, container, false);
context = view.getContext();
recyclerView = view.findViewById(R.id.recyclerView);
list = new ArrayList();
for (int i = 0; i
(3)、对tab1进行修改,由于tab1.xml的android:id="@+id/recyclerView",被Fragment类调用后进行了修改和整合,故展示的是整体文本效果;
(4)、 Myadapter类是适配器,作用就是看到的tab1.xml的界面与数据之间的桥梁,当列表里的每一项显示到页面时,都会调用myadapter的方法返回一个View,而这里是获取view的个数,将整体展示。
package com.example.myapplication;
import android.content.Context;
import android.view.LayoutInflater;
import android.view.View;
import android.view.ViewGroup;
import android.widget.TextView;
import androidx.annotation.NonNull;
import androidx.recyclerview.widget.RecyclerView;
import java.util.List;
public class Myadapter extends RecyclerView.Adapter{
Context context1;
List list1;
public Myadapter(Context context, List list){
context1 = context;
list1 = list;
}
@NonNull
@Override
public Myholder onCreateViewHolder(@NonNull ViewGroup parent, int viewType) {
View view = LayoutInflater.from(context1).inflate(R.layout.item,parent,false);
Myholder holder=new Myholder(view);
return holder;
}
@Override
public void onBindViewHolder(@NonNull Myholder holder, int position) {
holder.textView.setText(list1.get(position));
}
@Override
public int getItemCount() {
return list1.size();
}
public class Myholder extends RecyclerView.ViewHolder {
TextView textView;
public Myholder(@NonNull View itemView) {
super(itemView);
textView = itemView.findViewById(R.id.item);
}
}
}
四、结果展示
五、其他报错原因
1.当你写了多个mainactivity时,APP—>mainifests—>Androidmainifests的code会有两个activity,这时候你需要把另一个的android:exported改为"false"。
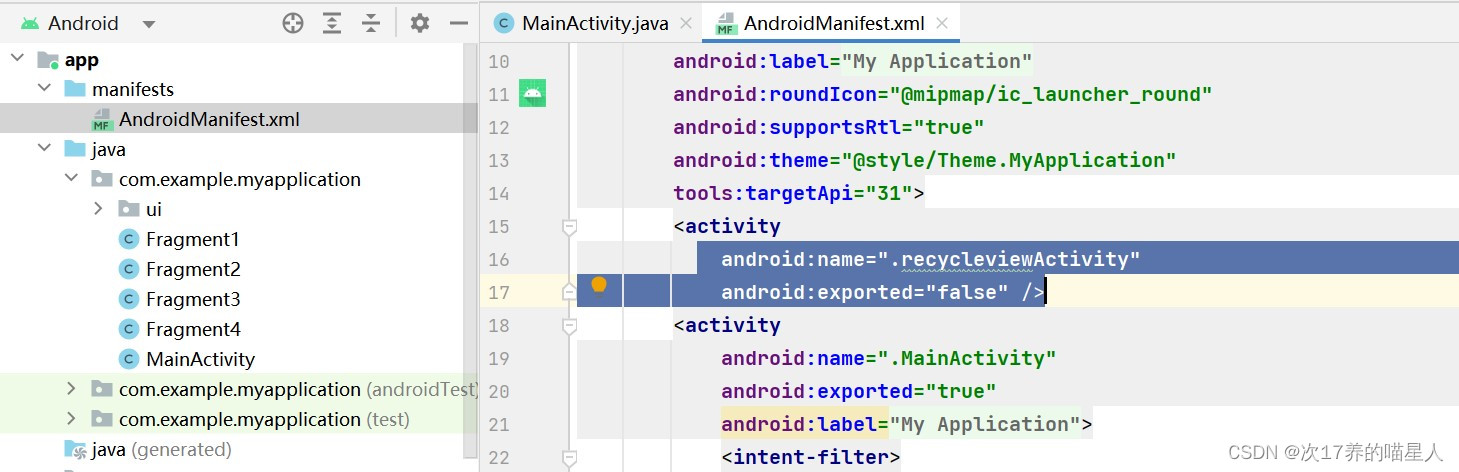
注意:增加列表效果后,也需要修改这个文件下半部分,只留下一个activity,上半部分不变:
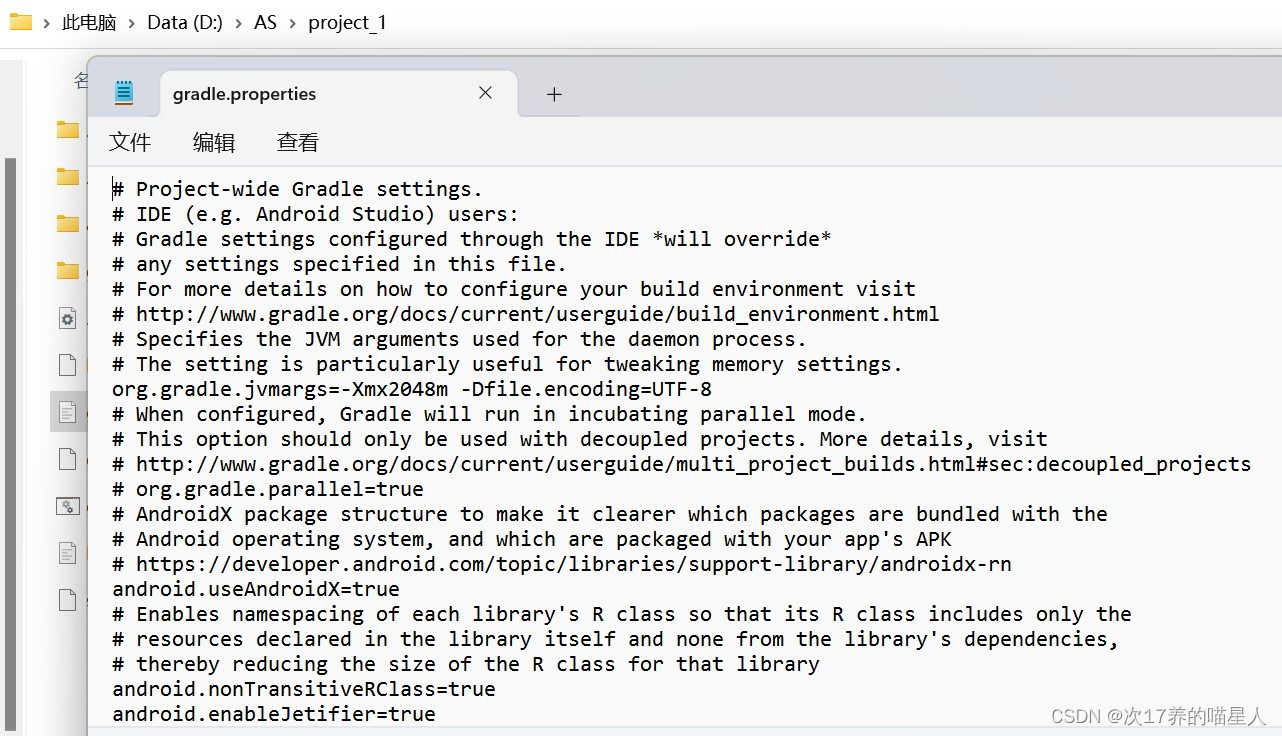
2、作为新手,第一次编写并运行该项目,好像需要修改文件,我运行的时候朋友帮我改了一个,我自己改了一个。在自己的这个项目的文件夹—>APP—>build.gradle.kts可以找到这个文件,可以看看是不是是不是少了这一句。
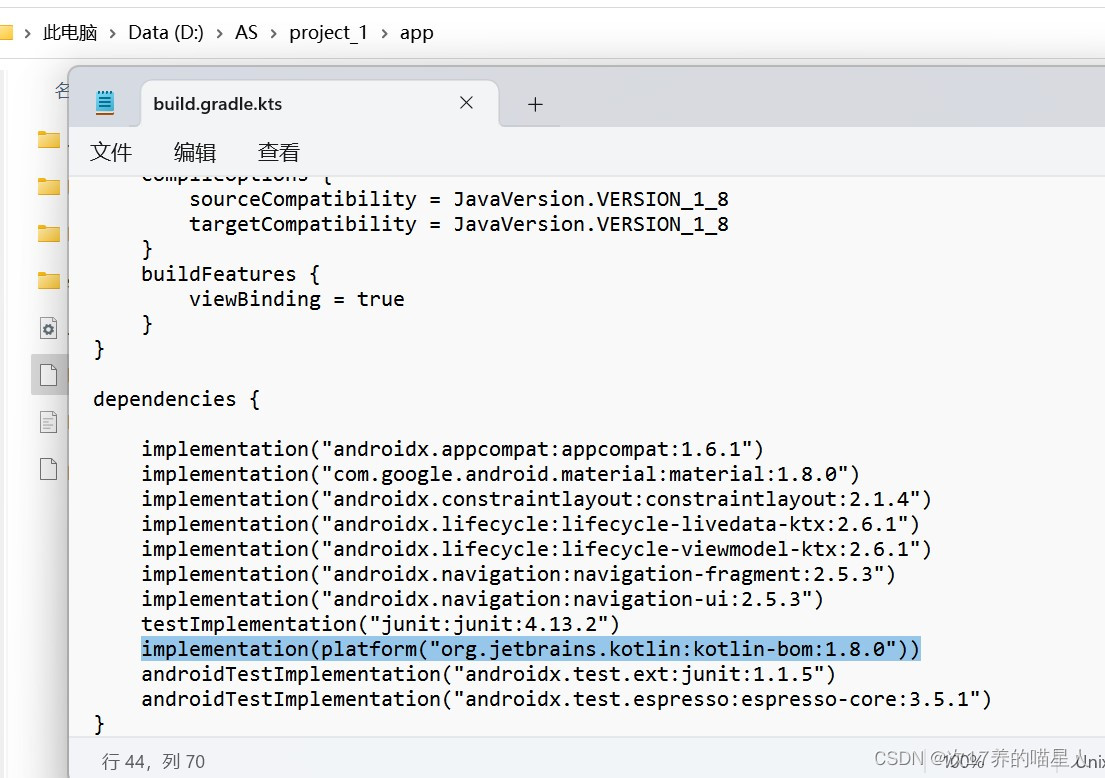
还有这个文件的最下面那两句应该是加上去的
3.system-image文件要直接能被file->settings->Android SDK直接找到,也就是说那个路径要在system-image文件的上一层
六、线上仓库地址(gitee)
luo17_world: 学习移动开发技术课程时创建 (gitee.com)
下载与安装:git下载与安装教程_git-scm.com download-CSDN博客下载与安装:
hint: Updates were rejected because the remote contains work that you do hint: not have locally.-CSDN博客


