
SpringBoot实战(三十四)集成 spring-security-oauth2(OAuth2的4个角色、5种认证方式、demo集成)

目录
- 一、简介
- 1.1 什么是 OAuth2 协议?
- 1.2 OAuth2 的4个角色
- 1.3 OAuth2 的3种令牌
- 1.4 OAuth2 的5种认证方式
- 1.5 OAuth2 内置接口地址
- 二、项目集成过程
- 2.1 Maven依赖
- 2.2 springboot-oauth2-server 授权服务器模块搭建和配置
- 1)目录结构
- 2)SecurityConfig——授权服务器的 Security 配置
- 3)AuthorizationConfig——授权服务器的 Authorize 配置
- 4)yml配置
- 5)授权服务器验证
- 获取token方式一:授权码模式
- 获取token方式二:密码模式
- 2.3 springboot-oauth2-client 资源服务器模块搭建和配置
- 1)目录结构
- 2)ResourceConfig——资源服务器配置
- 3)yml配置
- 4)DemoController——模拟接口资源
- 5)资源服务器验证
一、简介
1.1 什么是 OAuth2 协议?
OAuth2(Open Authorization 2.0) 协议是 RFC 6749 文件,是一种 用于授权的开放标准协议,用于通过第三方应用程序访问用户在某个服务提供商上存储的资源,而无需共享用户的凭证(例如用户名和密码)。
OAuth 引入了一个授权层,用来分离两种不同的角色:客户端和资源所有者。…资源所有者同意以后,资源服务器可以向客户端颁发令牌。客户端通过令牌,去请求数据。
OAuth2.0 的运行流程如下图所示:

(A)用户打开客户端以后,客户端要求用户给予授权。
(B)用户同意给予客户端授权。
(C)客户端使用上一步获得的授权,向认证服务器申请令牌。
(D)认证服务器对客户端进行认证以后,确认无误,同意发放令牌。
(E)客户端使用令牌,向资源服务器申请获取资源。
(F)资源服务器确认令牌无误,同意向客户端开放资源。
简而言之:你要获取我(资源服务器)的资源的话,得先找他(授权服务器)授权。
1.2 OAuth2 的4个角色
OAuth2.0 认证过程中,涉及到的四个角色如下 :
- 客户端(Client):代表资源所有者与授权服务器进行交互的应用程序。可以是Web应用程序、移动应用程序或第三方服务。
- 资源所有者(Resource Owner):即用户或系统的代表,拥有受保护资源的所有权。
- 授权服务器(Authorization Server):负责验证资源所有者的身份并颁发访问令牌(Access Token)给客户端。它通常是一个独立的服务器,可以与资源服务器分离或合并。
- 资源服务器(Resource Server):存储受保护的资源,并根据令牌的有效性进行访问控制。资源服务器可以是一个或多个服务,可以授权服务器分离或合并。
1.3 OAuth2 的3种令牌
- 授权许可(Authorization Grant):资源所有者授权客户端访问受保护资源的凭证,如:授权码、隐式授权、密码授权、客户端凭证等。
- 令牌(Access Token):用于标识授权许可的凭证,包括访问令牌、刷新令牌和身份令牌等。
- 令牌端点(Token Endpoint):客户端与授权服务器交互以获取或刷新令牌的API端点。
1.4 OAuth2 的5种认证方式
OAuth2.0 提供了五种认证方式:
授权类型 grant_type 值 适用场景 安全性 授权码模式 authorization_code 有后端的 Web 应用 高 简化模式 implicit 纯前端应用(如 SPA) 中 密码模式 password 高度信任的客户端(如第一方应用) 低 客户端凭证模式 client_credentials 客户端访问自己的资源(M2M) 中 刷新令牌模式 refresh_token 获取新的访问令牌 高 这里我们举例的是 授权码模式,篇幅有限,没有集成数据库。如果需要支持其他模式,需要对 AuthorizationConfig.java 中的内容进行改造。
1.5 OAuth2 内置接口地址
OAuth2.0 内置了6个接口地址,如下所示:
- /oauth/authorize:授权端点(核心)
- /oauth/token:获取令牌端点(核心)
- /oauth/confirm_access:用户确认授权提交端点
- /oauth/error:授权服务错误信息端点
- /oauth/check_token:用于资源服务访问的令牌解析端点
- /oauth/token_key:提供公有密匙的端点,如果你使用JWT令牌的话
二、项目集成过程
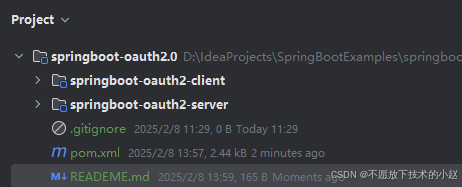
在示例项目中,包含两个部分:
- springboot-oauth2-server:授权服务器
- springboot-oauth2-client:资源服务器
整体项目目录结构如下:
2.1 Maven依赖
    org.springframework.boot
    spring-boot-starter-security


    org.springframework.security.oauth
    spring-security-oauth2
    2.2.1.RELEASE


    io.jsonwebtoken
    jjwt
    0.6.0
2.2 springboot-oauth2-server 授权服务器模块搭建和配置
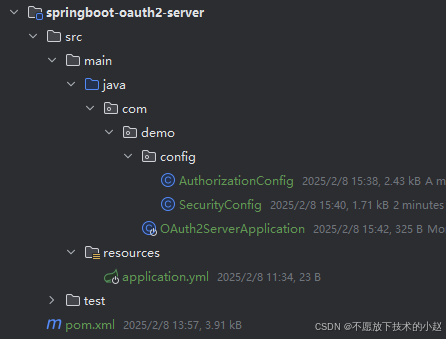
1)目录结构
授权服务器目录结构如下:
2)SecurityConfig——授权服务器的 Security 配置
授权服务器的 Spring Security 配置代码如下:
import org.springframework.context.annotation.Bean;
import org.springframework.context.annotation.Configuration;
import org.springframework.security.config.annotation.authentication.builders.AuthenticationManagerBuilder;
import org.springframework.security.config.annotation.web.builders.HttpSecurity;
import org.springframework.security.config.annotation.web.configuration.EnableWebSecurity;
import org.springframework.security.config.annotation.web.configuration.WebSecurityConfigurerAdapter;
import org.springframework.security.crypto.bcrypt.BCryptPasswordEncoder;
import org.springframework.security.crypto.password.PasswordEncoder;
/**
 * Spring Security 配置
 */
@Configuration
@EnableWebSecurity
public class SecurityConfig extends WebSecurityConfigurerAdapter {
    @Bean
    public PasswordEncoder passwordEncoder() {
        return new BCryptPasswordEncoder();
    }
    @Override
    protected void configure(AuthenticationManagerBuilder auth) throws Exception {
        auth.inMemoryAuthentication()
                .withUser("zhangsan")
                .password(passwordEncoder().encode("123456"))
                .authorities("/*");
    }
    @Override
    public void configure(HttpSecurity http) throws Exception {
        http.authorizeRequests()
                .anyRequest().authenticated()
                .and()
                .httpBasic()
                .and()
                .csrf()
                .disable();
    }
}
3)AuthorizationConfig——授权服务器的 Authorize 配置
授权服务器的 Authorize 相关配置如下:
(@EnableAuthorizationService 注解切记需要配置哈。)
import org.springframework.beans.factory.annotation.Autowired;
import org.springframework.security.crypto.password.PasswordEncoder;
import org.springframework.security.oauth2.config.annotation.configurers.ClientDetailsServiceConfigurer;
import org.springframework.security.oauth2.config.annotation.web.configuration.AuthorizationServerConfigurerAdapter;
import org.springframework.security.oauth2.config.annotation.web.configuration.EnableAuthorizationServer;
import org.springframework.security.oauth2.config.annotation.web.configurers.AuthorizationServerSecurityConfigurer;
import org.springframework.stereotype.Component;
/**
 * Spring OAuth2 配置
 */
@Component
@EnableAuthorizationServer
public class AuthorizationConfig extends AuthorizationServerConfigurerAdapter {
    @Autowired
    private PasswordEncoder passwordEncoder;
    /**
     * 对应于配置AuthorizationServer安全认证的相关信息,创建ClientCredentialsTokenEndpointFilter核心过滤器
     */
    @Override
    public void configure(AuthorizationServerSecurityConfigurer security) throws Exception {
        security.allowFormAuthenticationForClients()
                .checkTokenAccess("permitAll()");
    }
    /**
     * 配置客户端详情(Client Details)
     * @param clients 用于配置客户端信息的工具类
     */
    @Override
    public void configure(ClientDetailsServiceConfigurer clients) throws Exception {
        clients.inMemory()
                .withClient("security_appid")
                .secret(passwordEncoder.encode("security_secret"))
                .authorizedGrantTypes("authorization_code")
                .scopes("all")
                .resourceIds("security_resource")
                .redirectUris("https://www.baidu.com/callback");
    }
}
4)yml配置
server:
	port: 8110
5)授权服务器验证
这里我们采用两种模式进行验证:授权码模式、密码模式。
获取token方式一:授权码模式
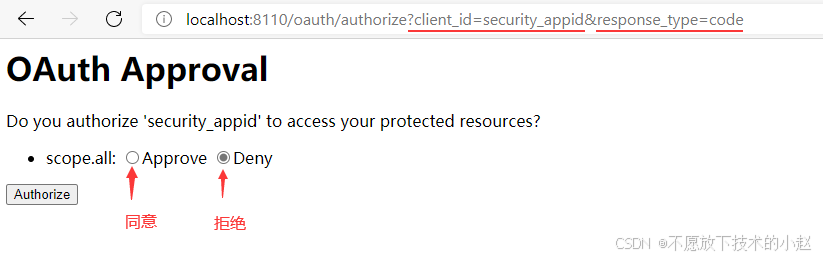
启动授权服务器后,请求如下地址:
- http://localhost:8110/oauth/authorize?client_id=security_appid&response_type=code
/oauth/authorize 是 OAuth 框架封装的请求,网络请求路径必须像上面这样。其中 client_id 必须是我们在 Authorize 中 withClient 配置的数据,否则会报错。
输入上面的请求后,会被 Security 框架资源拦截,需要先进行登录。输入我们在 Security 中配置的账号密码:zhangsan/123456。

这是登录后的结果:
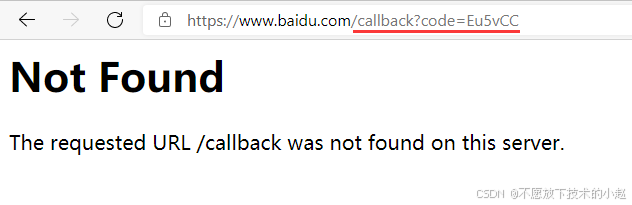
选择 同意 后,会出现跳转到 https://www.baidu.com/callback 目录并且会进行数据回调,如下所示:(注意这里在地址栏生成的 code,下一步会用到)
接下来,我们使用 PostMan 请求 /oauth/token 接口来获取 Token 令牌。下面这些请求参数很重要,注意是 POST 请求方式。

获取token方式二:密码模式
不同的认证方式我们需要设置不同的 grant_type 值,具体参数如下所示:

可以看到,两种方式都成功获取了 access_token,这样授权服务器就结束了。
2.3 springboot-oauth2-client 资源服务器模块搭建和配置
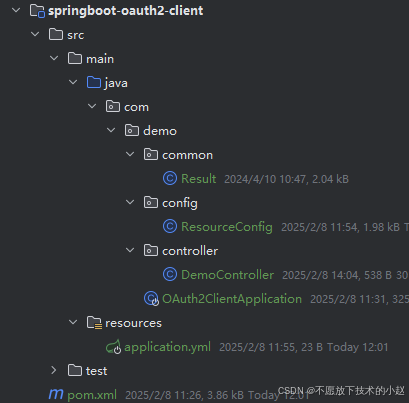
1)目录结构
资源服务器目录结构如下:
2)ResourceConfig——资源服务器配置
代码如下:
(注意,这里的 setCheckTokenEndpointUrl() 需要和授权服务器的配置相匹配才行。)
import org.springframework.context.annotation.Bean;
import org.springframework.context.annotation.Configuration;
import org.springframework.context.annotation.Primary;
import org.springframework.security.config.annotation.web.builders.HttpSecurity;
import org.springframework.security.config.http.SessionCreationPolicy;
import org.springframework.security.crypto.bcrypt.BCryptPasswordEncoder;
import org.springframework.security.crypto.password.PasswordEncoder;
import org.springframework.security.oauth2.config.annotation.web.configuration.EnableResourceServer;
import org.springframework.security.oauth2.config.annotation.web.configuration.ResourceServerConfigurerAdapter;
import org.springframework.security.oauth2.config.annotation.web.configurers.ResourceServerSecurityConfigurer;
import org.springframework.security.oauth2.provider.token.RemoteTokenServices;
/**
 * 资源服务器配置
 */
@Configuration
@EnableResourceServer
public class ResourceConfig extends ResourceServerConfigurerAdapter {
    @Bean
    public PasswordEncoder passwordEncoder() {
        return new BCryptPasswordEncoder();
    }
    @Bean
    @Primary
    public RemoteTokenServices remoteTokenServices() {
        RemoteTokenServices remoteTokenServices = new RemoteTokenServices();
        remoteTokenServices.setCheckTokenEndpointUrl("http://localhost:8110/oauth/check_token");
        remoteTokenServices.setClientId("security_appid");
        remoteTokenServices.setClientSecret("security_secret");
        return remoteTokenServices;
    }
    @Override
    public void configure(ResourceServerSecurityConfigurer resources) throws Exception {
        resources.resourceId("security_resource").stateless(true);
    }
    @Override
    public void configure(HttpSecurity http) throws Exception {
        http.sessionManagement().sessionCreationPolicy(SessionCreationPolicy.IF_REQUIRED);
        http.authorizeRequests().anyRequest().authenticated();
    }
}
3)yml配置
server:
	port: 8111
4)DemoController——模拟接口资源
import com.demo.common.Result;
import org.springframework.web.bind.annotation.RequestMapping;
import org.springframework.web.bind.annotation.ResponseBody;
import org.springframework.web.bind.annotation.RestController;
/**
 *  @Title DemoController
 *  @Description 测试Controller
 *
 * @author ACGkaka
 * @date 2025/2/7 11:46
 */
@RestController
public class DemoController {
    @RequestMapping("test")
    @ResponseBody
    public Result test() {
        return Result.succeed();
    }
}
5)资源服务器验证
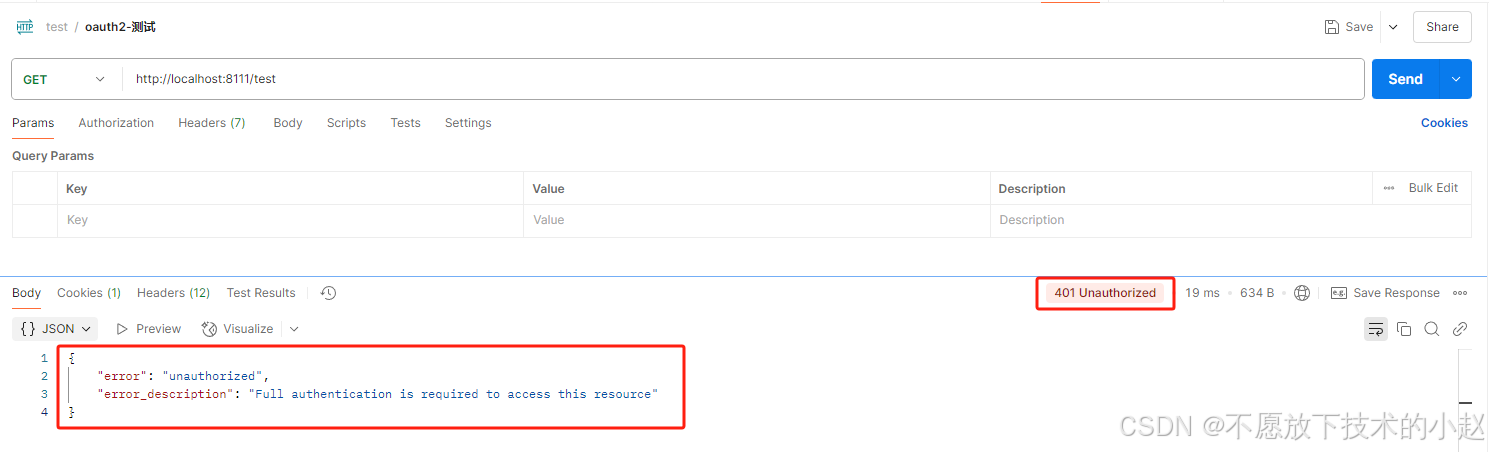
资源服务器启动之后,我们请求上面创建的接口地址:
- http://localhost:8111/demo
可以看到,请求失败,在没有携带token的情况下会被鉴权拦截,返回 401 状态码,如下所示:
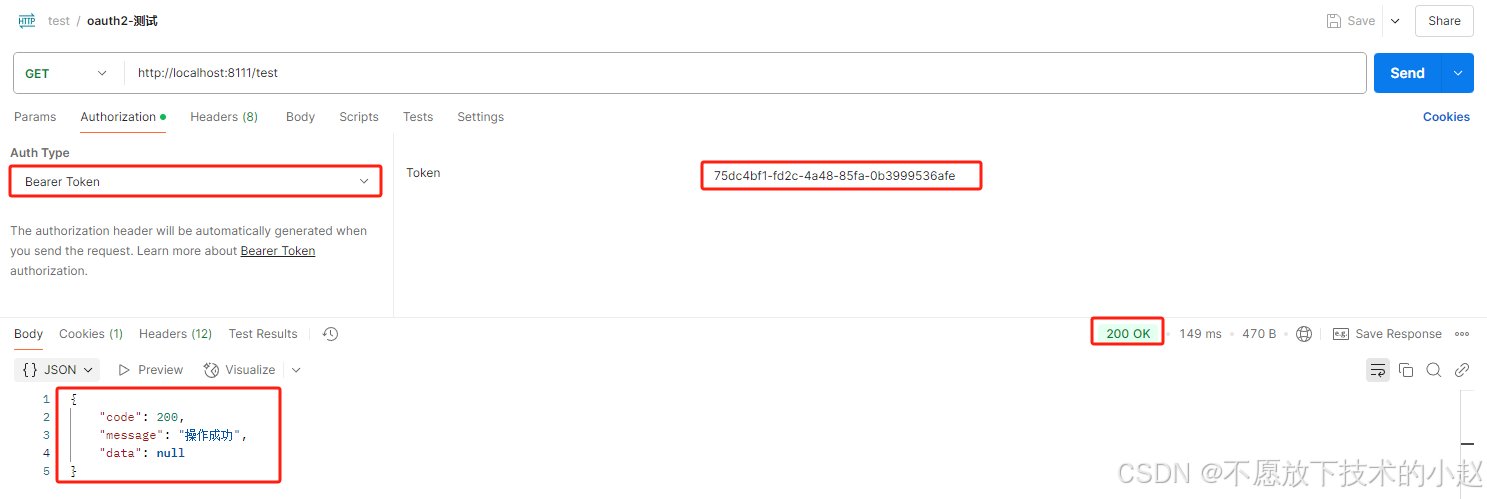
我们在请求头中加入上面在授权服务器中获取的token,就可以 成功访问资源 了,如下所示:
整理完毕,完结撒花~🌻
参考地址:
1.【Spring底层原理高级进阶】【SpringCloud整合Spring Security OAuth2】深入了解 Spring Security OAuth2:底层解析+使用方法+实战,https://cloud.tencent.com/developer/article/2392742
2.Oauth2详解-介绍(一),https://www.jianshu.com/p/84a4b4a1e833
3.SpringBoot整合Oauth2快速入门(入坑),https://blog.csdn.net/weixin_45982841/article/details/114378146
4.Spring Cloud Security OAuth2 中实现密码模式,https://cloud.tencent.com/developer/article/2264281
5.OAuth 2.0 的四种方式,http://www.ruanyifeng.com/blog/2019/04/oauth-grant-types.html
6.SpringBoot整合spring-security-oauth2完整实现例子,https://cloud.tencent.com/developer/article/1786077
- http://localhost:8111/demo


