Nginx 下载 安装 配置 新手入门教程

Nginx 简介
Nginx 是一个高性能的 HTTP 和反向代理服务器,具有高并发、低资源占用等特点,被广泛应用于 Web 服务器、反向代理、负载均衡等场景。
Nginx 的主要特点包括:
- 高性能:采用异步非阻塞的事件驱动架构,能够高效地处理大量并发连接。
- 低资源占用:在处理大量请求时,资源占用率低,具有较高的性能稳定性。
- 丰富的功能模块:支持多种功能模块,如反向代理、负载均衡、缓存、压缩等,满足不同场景下的需求。
- 易于配置和管理:配置文件简单明了,易于理解和修改,方便用户进行个性化配置和管理。
- 跨平台支持:可以在多种操作系统上运行,包括 Linux、Windows、macOS 等。
- 稳定性:经过多年的广泛使用和测试,Nginx 在各种复杂的生产环境中表现出色,具有较高的可靠性和稳定性。
Nginx 下载
可以从 Nginx 官网的下载页面获取不同版本的 Nginx 安装包,根据您的操作系统和需求选择合适的版本:
Nginx 官网下载地址:nginx: download
1. 官网下载
以下是常见的官网下载命令:
# 下载稳定版
wget -c http://nginx.org/download/nginx-1.24.0.tar.gz
2. Ubuntu 系统极速下载
# 添加 Nginx 源
sudo add-apt-repository ppa:nginx/stable
sudo apt-get update
# 安装 Nginx
sudo apt-get install nginx
3. CentOS 系统极速下载
# 安装 EPEL 仓库
sudo yum install epel-release
# 安装 Nginx
sudo yum install nginx
4. Windows 系统极速下载
Windows 系统上通常使用 WSL(Windows Subsystem for Linux)来运行 Nginx。以 Ubuntu on WSL 为例:
# 在 Ubuntu WSL 中安装 Nginx
sudo apt update
sudo apt install nginx
5. 源码编译极速下载
# 安装依赖包
sudo apt update
sudo apt install gcc-c++ wget ntpdate vim-enhanced autoconf automake openssl-devel pcre-devel
6. 在 Debian 系统上下载
# 更新软件包列表
sudo apt update
# 安装 Nginx
sudo apt install nginx
7. 在 ARM 系统上下载(如树莓派)
# 更新软件包列表
sudo apt update
# 安装 Nginx
sudo apt install nginx
8. 在 Alpine Linux 系统上下载
# 更新软件包列表
sudo apk update
# 安装 Nginx
sudo apk add nginx
9. 在 Arch Linux 系统上下载
# 更新软件包列表
sudo pacman -Syu
# 安装 Nginx
sudo pacman -S nginx
10. 在 macOS 系统上下载
# 安装 Homebrew
/bin/bash -c "$(curl -fsSL https://raw.githubusercontent.com/Homebrew/install/HEAD/install.sh)"
# 安装 Nginx
brew install nginx
Nginx 安装
以下是在不同系统上安装 Nginx 的方法:
1. 在 Ubuntu 系统上安装
# 添加 Nginx 源
sudo add-apt-repository ppa:nginx/stable
sudo apt-get update
# 安装 Nginx
sudo apt-get install nginx
2. 在 CentOS 系统上安装
# 安装 EPEL 仓库
sudo yum install epel-release
# 安装 Nginx
sudo yum install nginx
3. 在 Windows 系统上安装
Windows 系统上通常使用 WSL(Windows Subsystem for Linux)来运行 Nginx。以 Ubuntu on WSL 为例:
# 安装 Nginx
sudo apt update
sudo apt install nginx
4. 通过源码编译安装
# 安装依赖包
sudo apt update
sudo apt install gcc-c++ wget ntpdate vim-enhanced autoconf automake openssl-devel pcre-devel
# 下载 Nginx 源码
wget http://nginx.org/download/nginx-1.24.0.tar.gz
tar -zxvf nginx-1.24.0.tar.gz
cd nginx-1.24.0
# 配置编译选项
./configure --prefix=/usr/local/nginx
# 编译安装
make && sudo make install
5. 在 Debian 系统上安装(大部分 Linux 系统通用)
# 更新软件包列表
sudo apt update
# 安装 Nginx
sudo apt install nginx
6. 在 ARMBIAN 系统上安装(如树莓派)
# 更新软件包列表
sudo apt update
# 安装 Nginx
sudo apt install nginx
7. 在 Alpine Linux 系统上安装
# 更新软件包列表
sudo apk update
# 安装 Nginx
sudo apk add nginx
8. 在 Arch Linux 系统上安装
# 更新软件包列表
sudo pacman -Syu
# 安装 Nginx
sudo pacman -S nginx
9. 在 macOS 系统上安装
# 安装 Homebrew
/bin/bash -c "$(curl -fsSL https://raw.githubusercontent.com/Homebrew/install/HEAD/install.sh)"
# 安装 Nginx
brew install nginx
Nginx 配置
查看配置文件位置
Nginx 的配置文件通常位于以下位置:
- 源码安装:默认配置文件位置为 /usr/local/nginx/conf/nginx.conf
- 包管理器安装:配置文件通常位于 /etc/nginx/nginx.conf 或 /etc/nginx/conf.d/
可以使用以下命令查看 Nginx 的配置文件位置:
nginx -t
该命令会输出 Nginx 的配置文件路径,例如:
nginx: the configuration file /usr/local/nginx/conf/nginx.conf syntax is ok
配置文件示例
以下是一个简单的 Nginx 配置文件示例:
worker_processes  auto;
events {
    use epoll;
    worker_connections  1024;
}
http {
    include       mime.types;
    default_type  application/octet-stream;
    sendfile        on;
    keepalive_timeout  65;
    server {
        listen       80;
        server_name  localhost;
        location / {
            root   html;
            index  index.html index.htm;
        }
        error_page   500 502 503 504  /50x.html;
        location = /50x.html {
            root   html;
        }
    }
}
配置完成后,可以使用以下命令测试配置文件是否正确:
nginx -t
若配置正确,可以使用以下命令重新加载 Nginx:
nginx -s reload
使用 Vim 编辑配置文件
vim /usr/local/nginx/conf/nginx.conf
在 Vim 中,你可以按 i 进入插入模式进行编辑,编辑完成后按 Esc,然后输入 :wq 保存并退出。
使用 Nano 编辑配置文件
nano /usr/local/nginx/conf/nginx.conf
在 Nano 中,你可以直接使用键盘进行编辑,编辑完成后按 Ctrl + O 保存,按 Ctrl + X 退出。
使用 VS Code 编辑配置文件
如果你已经安装了 VS Code,可以使用以下命令打开配置文件:
code /usr/local/nginx/conf/nginx.conf
在 VS Code 中,你可以利用其丰富的功能进行编辑,并享受语法高亮和自动补全等特性。
网站上线
将开发好的网站部署到安装了 Nginx 的服务器上:
- 将网站的 HTML 文件、图片、CSS 文件等放置在 Nginx 的网站根目录下,默认为 /usr/local/nginx/html。
- 修改 Nginx 的配置文件,设置 server_name 为您的域名,root 指向网站根目录。
- 配置域名解析,将域名解析到服务器的 IP 地址。
- 确保服务器的防火墙允许外部访问网站的端口,默认为 80。
- 启动 Nginx 服务:
nginx
6.在浏览器中输入您的域名,即可访问上线的网站。
常见问题
Q1:Nginx 无法启动,怎么办?
A1:可能的原因及解决方法:
- 端口被占用:使用 netstat -tulnp | grep 80 命令检查端口 80 是否被占用,如有其他进程占用,请先停止该进程。
- 配置文件错误:使用 nginx -t 命令检查配置文件是否正确。
- 权限问题:确保 Nginx 进程有权限访问相关文件和目录。
Q2:如何配置 Nginx 作为反向代理?
A2:以下是一个简单的反向代理配置示例:
server {
    listen 80;
    server_name www.example.com;
    location / {
        proxy_pass http://backend_server;
        proxy_set_header Host $host;
        proxy_set_header X-Real-IP $remote_addr;
        proxy_set_header X-Forwarded-For $proxy_add_x_forwarded_for;
    }
}
upstream backend_server {
    server 192.168.1.101:8080;
    server 192.168.1.102:8080;
    server 192.168.1.103:8080;
}
高级应用
Nginx 不仅仅是一个简单的 Web 服务器,它在实际应用中具有许多高级功能和应用场景。
1. 反向代理与负载均衡
通过配置 Nginx 的 upstream 模块,可以实现对多个后端服务器的负载均衡:
upstream backend_servers {
    server 192.168.1.101:8080;
    server 192.168.1.102:8080;
    server 192.168.1.103:8080;
}
server {
    listen 80;
    server_name www.example.com;
    location / {
        proxy_pass http://backend_servers;
        proxy_set_header Host $host;
        proxy_set_header X-Real-IP $remote_addr;
        proxy_set_header X-Forwarded-For $proxy_add_x_forwarded_for;
    }
}
2. 动静分离
将静态资源和动态请求分离,提高网站性能:
server {
    listen 80;
    server_name www.example.com;
    location ~* \.(html|css|js|jpg|jpeg|png|gif)$ {
        root /data/static;
        expires 30d;
    }
    location / {
        proxy_pass http://backend_servers;
        proxy_set_header Host $host;
        proxy_set_header X-Real-IP $remote_addr;
        proxy_set_header X-Forwarded-For $proxy_add_x_forwarded_for;
    }
}
3. HTTPS 配置
配置 Nginx 支持 HTTPS,提高网站的安全性:
server {
    listen 443 ssl;
    server_name www.example.com;
    ssl_certificate /etc/nginx/ssl/server.crt;
    ssl_certificate_key /etc/nginx/ssl/server.key;
    ssl_protocols TLSv1.2 TLSv1.3;
    ssl_ciphers EECDH+CHACHA20:EECDH+AES128:RSA+AES128:EECDH+AES256:RSA+AES256:EECDH+3DES:RSA+3DES:!MD5;
    ssl_prefer_server_ciphers on;
    location / {
        proxy_pass http://backend_servers;
        proxy_set_header Host $host;
        proxy_set_header X-Real-IP $remote_addr;
        proxy_set_header X-Forwarded-For $proxy_add_x_forwarded_for;
    }
}
网站示例
当然了,我也将上面的教程制作成了网站,以下是整站源码
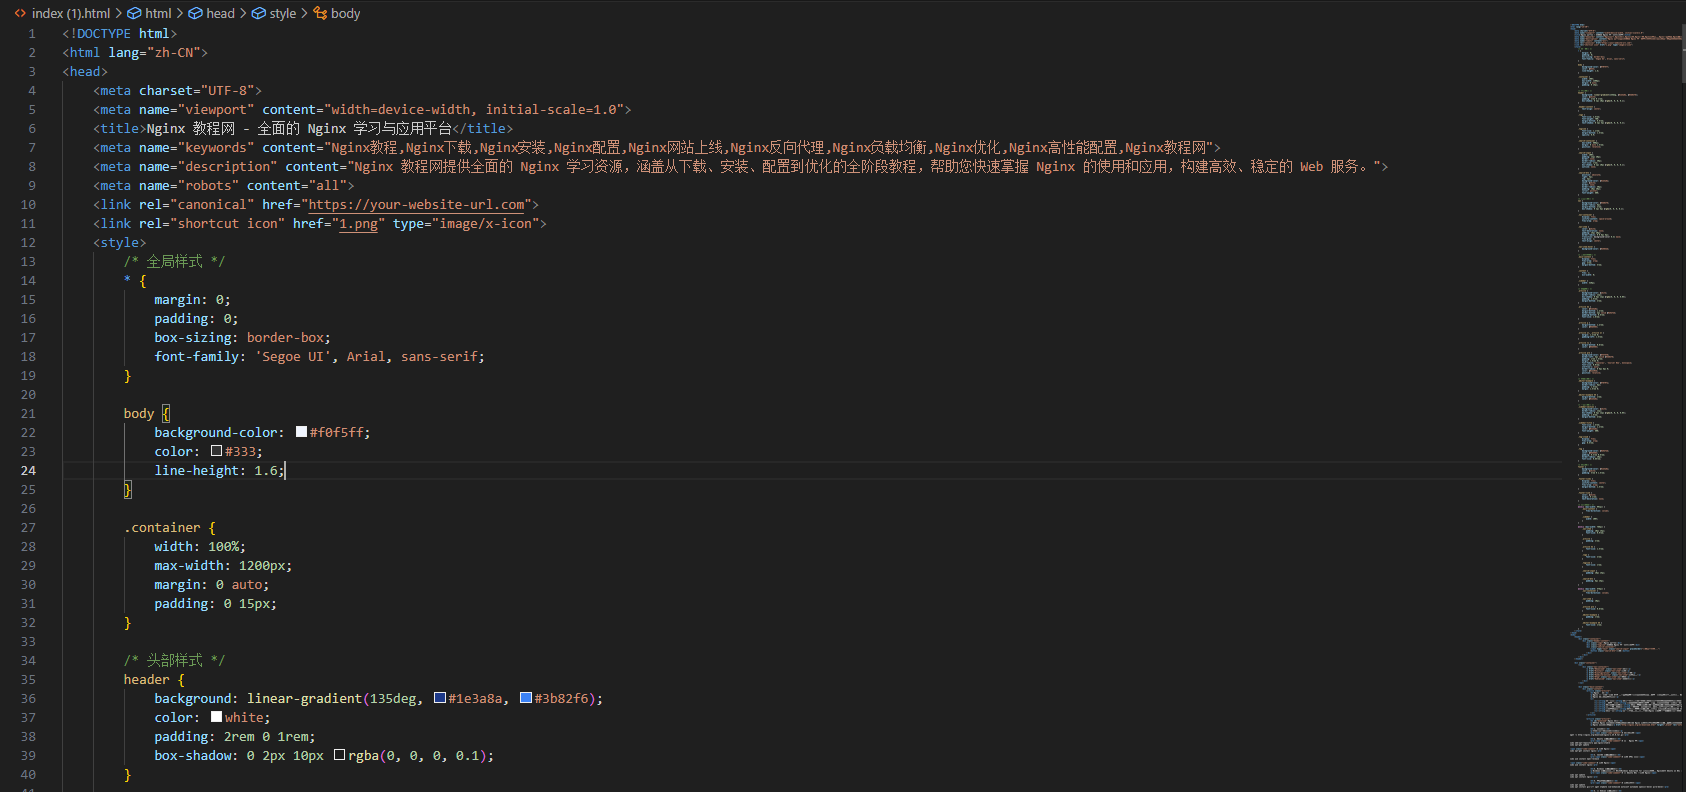
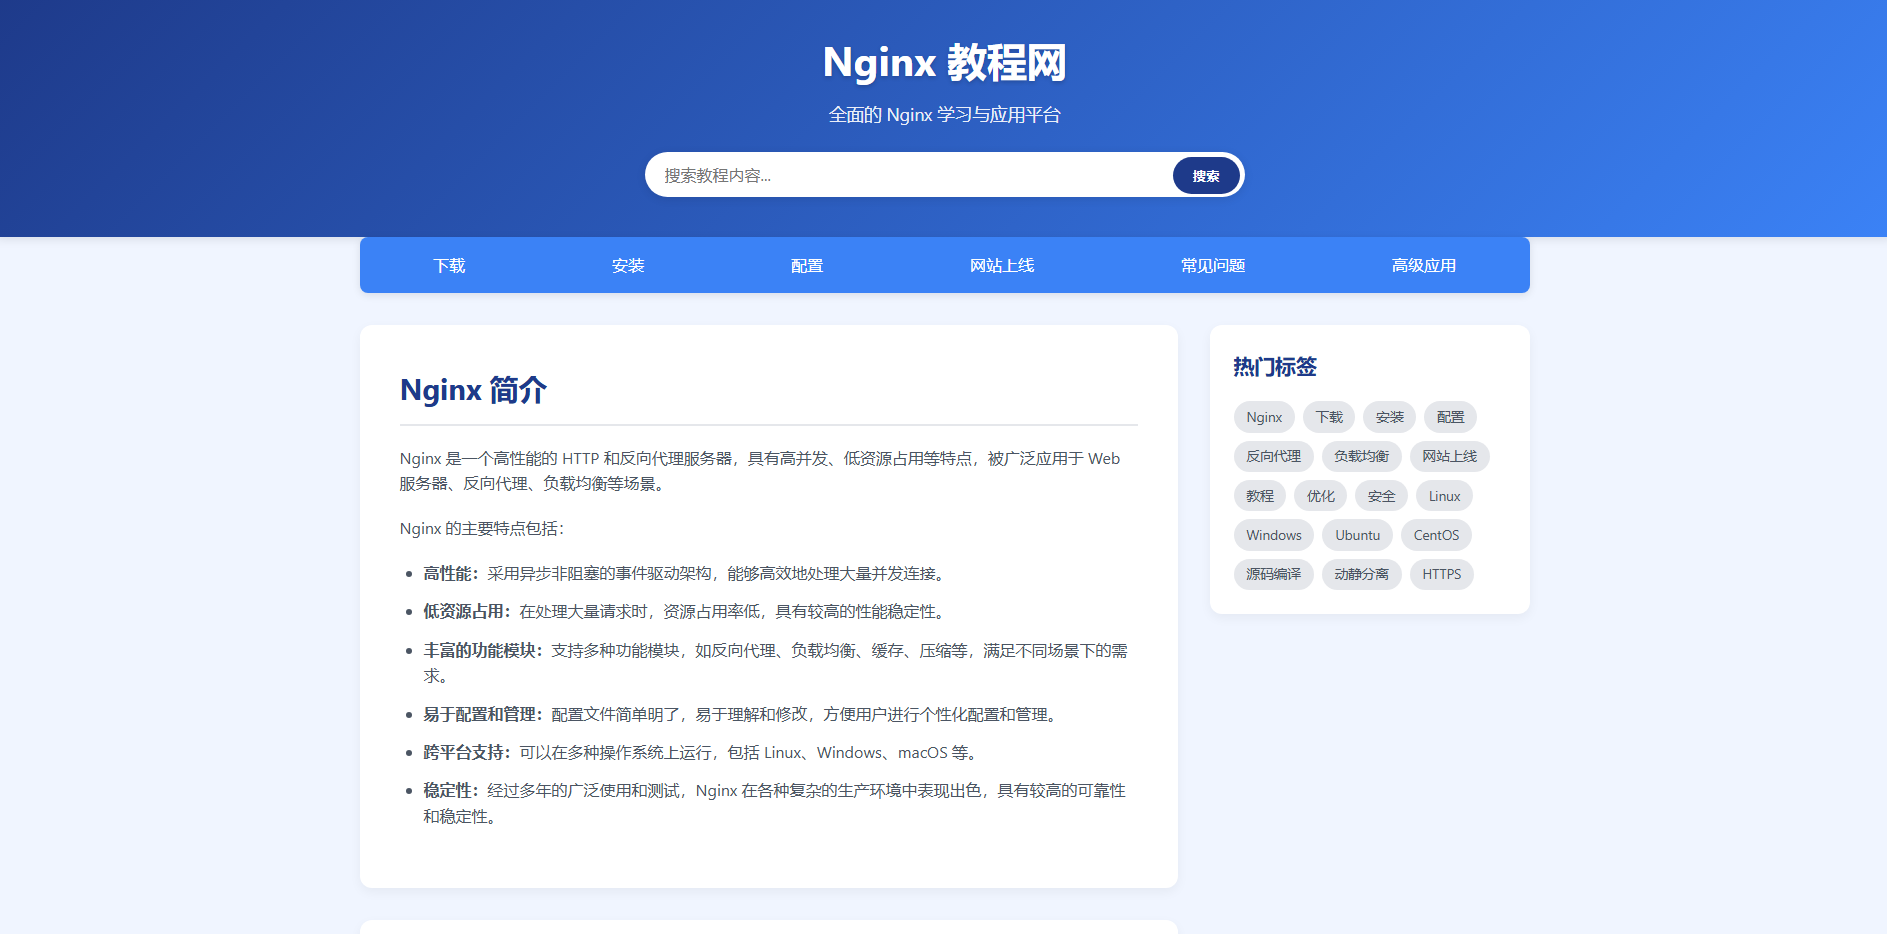
Nginx 教程网 - 全面的 Nginx 学习与应用平台 /* 全局样式 */ * { margin: 0; padding: 0; box-sizing: border-box; font-family: 'Segoe UI', Arial, sans-serif; } body { background-color: #f0f5ff; color: #333; line-height: 1.6; } .container { width: 100%; max-width: 1200px; margin: 0 auto; padding: 0 15px; } /* 头部样式 */ header { background: linear-gradient(135deg, #1e3a8a, #3b82f6); color: white; padding: 2rem 0 1rem; box-shadow: 0 2px 10px rgba(0, 0, 0, 0.1); } .header-content { text-align: center; } .logo { font-size: 2.5rem; font-weight: 700; margin-bottom: 0.5rem; text-shadow: 0 2px 4px rgba(0, 0, 0, 0.2); } .tagline { font-size: 1.1rem; margin-bottom: 1.5rem; opacity: 0.9; } .search-container { max-width: 600px; margin: 0 auto 1.5rem; position: relative; } .search-input { width: 100%; padding: 12px 20px; border: none; border-radius: 30px; font-size: 1rem; box-shadow: 0 2px 10px rgba(0, 0, 0, 0.1); outline: none; } .search-btn { position: absolute; right: 5px; top: 5px; background-color: #1e3a8a; color: white; border: none; border-radius: 30px; padding: 10px 20px; cursor: pointer; font-weight: 600; } /* 导航栏样式 */ nav { background-color: #3b82f6; border-radius: 8px; margin-bottom: 2rem; box-shadow: 0 2px 8px rgba(0, 0, 0, 0.1); } .nav-container { display: flex; justify-content: space-around; flex-wrap: wrap; } .nav-item { color: white; text-decoration: none; padding: 15px 20px; border-radius: 0 0 8px 8px; transition: background-color 0.3s ease; flex-grow: 1; text-align: center; } .nav-item:hover { background-color: #2563eb; } /* 主要内容样式 */ .main-content { display: flex; flex-wrap: wrap; gap: 2rem; margin-bottom: 3rem; } .content { flex: 1; min-width: 0; } .sidebar { width: 320px; } /* 文章样式 */ .article { background-color: white; border-radius: 12px; box-shadow: 0 4px 12px rgba(0, 0, 0, 0.05); padding: 2.5rem; margin-bottom: 2rem; } .article h2 { color: #1e3a8a; margin-bottom: 1.2rem; border-bottom: 2px solid #e5e7eb; padding-bottom: 0.8rem; font-size: 1.8rem; } .article p { margin-bottom: 1.2rem; color: #4b5563; } .article ul, .article ol { margin: 1.2rem 0; padding-left: 1.5rem; } .article li { margin-bottom: 0.8rem; color: #4b5563; } .article pre { background-color: #f3f4f6; border-left: 4px solid #3b82f6; padding: 1rem 1.5rem; margin: 1.5rem 0; font-family: 'Consolas', 'Courier New', monospace; font-size: 0.9rem; overflow-x: auto; border-radius: 0 8px 8px 0; color: #1e293b; position: relative; } /* 编辑器样式 */ .editor-example { background-color: #f8f9fa; border-radius: 8px; padding: 1.5rem; margin: 1.5rem 0; } .editor-example h4 { margin-bottom: 1rem; color: #1e3a8a; } /* 侧边栏样式 */ .sidebar-section { background-color: white; border-radius: 12px; box-shadow: 0 4px 12px rgba(0, 0, 0, 0.05); padding: 1.5rem; margin-bottom: 2rem; } .sidebar-title { font-size: 1.3rem; margin-bottom: 1.2rem; color: #1e3a8a; font-weight: 600; } .tag-cloud { display: flex; flex-wrap: wrap; gap: 0.5rem; } .tag { background-color: #e5e7eb; color: #4b5563; padding: 0.3rem 0.8rem; border-radius: 20px; font-size: 0.85rem; } /* 页脚样式 */ footer { background-color: #1e3a8a; color: white; padding: 3rem 0 1.5rem; } .footer-links { display: flex; justify-content: center; flex-wrap: wrap; margin-bottom: 1.5rem; } .footer-link { color: white; margin: 0 1rem; text-decoration: none; } /* 移动端适配 */ @media (max-width: 992px) { .main-content { flex-direction: column; } .sidebar { width: 100%; } } @media (max-width: 768px) { .nav-item { padding: 10px 15px; font-size: 0.9rem; } .article { padding: 2rem; } .article h2 { font-size: 1.5rem; } .logo { font-size: 2rem; } .tagline { font-size: 1rem; } .search-input { padding: 10px 15px; } .search-btn { padding: 8px 15px; } } @media (max-width: 576px) { .nav-container { flex-direction: column; } .nav-item { padding: 10px; } .article pre { font-size: 0.8rem; } .editor-example { padding: 1rem; } .editor-example h4 { font-size: 1rem; } } Nginx 教程网 全面的 Nginx 学习与应用平台 搜索 下载 安装 配置 网站上线 常见问题 高级应用Nginx 简介
Nginx 是一个高性能的 HTTP 和反向代理服务器,具有高并发、低资源占用等特点,被广泛应用于 Web 服务器、反向代理、负载均衡等场景。
Nginx 的主要特点包括:
- 高性能:采用异步非阻塞的事件驱动架构,能够高效地处理大量并发连接。
- 低资源占用:在处理大量请求时,资源占用率低,具有较高的性能稳定性。
- 丰富的功能模块:支持多种功能模块,如反向代理、负载均衡、缓存、压缩等,满足不同场景下的需求。
- 易于配置和管理:配置文件简单明了,易于理解和修改,方便用户进行个性化配置和管理。
- 跨平台支持:可以在多种操作系统上运行,包括 Linux、Windows、macOS 等。
- 稳定性:经过多年的广泛使用和测试,Nginx 在各种复杂的生产环境中表现出色,具有较高的可靠性和稳定性。
Nginx 下载
可以从 Nginx 官网的下载页面获取不同版本的 Nginx 安装包,根据您的操作系统和需求选择合适的版本:
Nginx 官网下载地址:http://nginx.org/en/download.html
1. 官网下载
以下是常见的官网下载命令:
# 下载稳定版
wget -c http://nginx.org/download/nginx-1.24.0.tar.gz
2. Ubuntu 系统极速下载
# 添加 Nginx 源
sudo add-apt-repository ppa:nginx/stable
sudo apt-get update
# 安装 Nginx
sudo apt-get install nginx
3. CentOS 系统极速下载
# 安装 EPEL 仓库
sudo yum install epel-release
# 安装 Nginx
sudo yum install nginx
4. Windows 系统极速下载
Windows 系统上通常使用 WSL(Windows Subsystem for Linux)来运行 Nginx。以 Ubuntu on WSL 为例:
# 在 Ubuntu WSL 中安装 Nginx
sudo apt update
sudo apt install nginx
5. 源码编译极速下载
# 安装依赖包
sudo apt update
sudo apt install gcc-c++ wget ntpdate vim-enhanced autoconf automake openssl-devel pcre-devel
6. 在 Debian 系统上下载
# 更新软件包列表
sudo apt update
# 安装 Nginx
sudo apt install nginx
7. 在 ARM 系统上下载(如树莓派)
# 更新软件包列表
sudo apt update
# 安装 Nginx
sudo apt install nginx
8. 在 Alpine Linux 系统上下载
# 更新软件包列表
sudo apk update
# 安装 Nginx
sudo apk add nginx
9. 在 Arch Linux 系统上下载
# 更新软件包列表
sudo pacman -Syu
# 安装 Nginx
sudo pacman -S nginx
10. 在 macOS 系统上下载
# 安装 Homebrew
/bin/bash -c "$(curl -fsSL https://raw.githubusercontent.com/Homebrew/install/HEAD/install.sh)"
# 安装 Nginx
brew install nginx
Nginx 安装
以下是在不同系统上安装 Nginx 的方法:
1. 在 Ubuntu 系统上安装
# 添加 Nginx 源
sudo add-apt-repository ppa:nginx/stable
sudo apt-get update
# 安装 Nginx
sudo apt-get install nginx
2. 在 CentOS 系统上安装
# 安装 EPEL 仓库
sudo yum install epel-release
# 安装 Nginx
sudo yum install nginx
3. 在 Windows 系统上安装
Windows 系统上通常使用 WSL(Windows Subsystem for Linux)来运行 Nginx。以 Ubuntu on WSL 为例:
# 安装 Nginx
sudo apt update
sudo apt install nginx
4. 通过源码编译安装
# 安装依赖包
sudo apt update
sudo apt install gcc-c++ wget ntpdate vim-enhanced autoconf automake openssl-devel pcre-devel
# 下载 Nginx 源码
wget http://nginx.org/download/nginx-1.24.0.tar.gz
tar -zxvf nginx-1.24.0.tar.gz
cd nginx-1.24.0
# 配置编译选项
./configure --prefix=/usr/local/nginx
# 编译安装
make && sudo make install
5. 在 Debian 系统上安装(大部分 Linux 系统通用)
# 更新软件包列表
sudo apt update
# 安装 Nginx
sudo apt install nginx
6. 在 ARM 系统上安装(如树莓派)
# 更新软件包列表
sudo apt update
# 安装 Nginx
sudo apt install nginx
7. 在 Alpine Linux 系统上安装
# 更新软件包列表
sudo apk update
# 安装 Nginx
sudo apk add nginx
8. 在 Arch Linux 系统上安装
# 更新软件包列表
sudo pacman -Syu
# 安装 Nginx
sudo pacman -S nginx
9. 在 macOS 系统上安装
# 安装 Homebrew
/bin/bash -c "$(curl -fsSL https://raw.githubusercontent.com/Homebrew/install/HEAD/install.sh)"
# 安装 Nginx
brew install nginx
Nginx 配置
查看配置文件位置
Nginx 的配置文件通常位于以下位置:
- 源码安装:默认配置文件位置为 /usr/local/nginx/conf/nginx.conf
- 包管理器安装:配置文件通常位于 /etc/nginx/nginx.conf 或 /etc/nginx/conf.d/
可以使用以下命令查看 Nginx 的配置文件位置:
nginx -t
该命令会输出 Nginx 的配置文件路径,例如:
nginx: the configuration file /usr/local/nginx/conf/nginx.conf syntax is ok
配置文件示例
以下是一个简单的 Nginx 配置文件示例:
worker_processes  auto;
events {
    use epoll;
    worker_connections  1024;
}
http {
    include       mime.types;
    default_type  application/octet-stream;
    sendfile        on;
    keepalive_timeout  65;
    server {
        listen       80;
        server_name  localhost;
        location / {
            root   html;
            index  index.html index.htm;
        }
        error_page   500 502 503 504  /50x.html;
        location = /50x.html {
            root   html;
        }
    }
}
配置完成后,可以使用以下命令测试配置文件是否正确:
nginx -t
若配置正确,可以使用以下命令重新加载 Nginx:
nginx -s reload
使用 Vim 编辑配置文件
vim /usr/local/nginx/conf/nginx.conf
在 Vim 中,你可以按 i 进入插入模式进行编辑,编辑完成后按 Esc,然后输入 :wq 保存并退出。
使用 Nano 编辑配置文件
nano /usr/local/nginx/conf/nginx.conf
在 Nano 中,你可以直接使用键盘进行编辑,编辑完成后按 Ctrl + O 保存,按 Ctrl + X 退出。
使用 VS Code 编辑配置文件
如果你已经安装了 VS Code,可以使用以下命令打开配置文件:
code /usr/local/nginx/conf/nginx.conf
在 VS Code 中,你可以利用其丰富的功能进行编辑,并享受语法高亮和自动补全等特性。
网站上线
将开发好的网站部署到安装了 Nginx 的服务器上:
- 将网站的 HTML 文件、图片、CSS 文件等放置在 Nginx 的网站根目录下,默认为 /usr/local/nginx/html。
- 修改 Nginx 的配置文件,设置 server_name 为您的域名,root 指向网站根目录。
- 配置域名解析,将域名解析到服务器的 IP 地址。
- 确保服务器的防火墙允许外部访问网站的端口,默认为 80。
- 启动 Nginx 服务:
nginx
- 在浏览器中输入您的域名,即可访问上线的网站。
常见问题
Q1:Nginx 无法启动,怎么办?
A1:可能的原因及解决方法:
- 端口被占用:使用 netstat -tulnp | grep 80 命令检查端口 80 是否被占用,如有其他进程占用,请先停止该进程。
- 配置文件错误:使用 nginx -t 命令检查配置文件是否正确。
- 权限问题:确保 Nginx 进程有权限访问相关文件和目录。
Q2:如何配置 Nginx 作为反向代理?
A2:以下是一个简单的反向代理配置示例:
server {
    listen 80;
    server_name www.example.com;
    location / {
        proxy_pass http://backend_server;
        proxy_set_header Host $host;
        proxy_set_header X-Real-IP $remote_addr;
        proxy_set_header X-Forwarded-For $proxy_add_x_forwarded_for;
    }
}
upstream backend_server {
    server 192.168.1.101:8080;
    server 192.168.1.102:8080;
    server 192.168.1.103:8080;
}
高级应用
Nginx 不仅仅是一个简单的 Web 服务器,它在实际应用中具有许多高级功能和应用场景。
1. 反向代理与负载均衡
通过配置 Nginx 的 upstream 模块,可以实现对多个后端服务器的负载均衡:
upstream backend_servers {
    server 192.168.1.101:8080;
    server 192.168.1.102:8080;
    server 192.168.1.103:8080;
}
server {
    listen 80;
    server_name www.example.com;
    location / {
        proxy_pass http://backend_servers;
        proxy_set_header Host $host;
        proxy_set_header X-Real-IP $remote_addr;
        proxy_set_header X-Forwarded-For $proxy_add_x_forwarded_for;
    }
}
2. 动静分离
将静态资源和动态请求分离,提高网站性能:
server {
    listen 80;
    server_name www.example.com;
    location ~* \.(html|css|js|jpg|jpeg|png|gif)$ {
        root /data/static;
        expires 30d;
    }
    location / {
        proxy_pass http://backend_servers;
        proxy_set_header Host $host;
        proxy_set_header X-Real-IP $remote_addr;
        proxy_set_header X-Forwarded-For $proxy_add_x_forwarded_for;
    }
}
3. HTTPS 配置
配置 Nginx 支持 HTTPS,提高网站的安全性:
server {
    listen 443 ssl;
    server_name www.example.com;
    ssl_certificate /etc/nginx/ssl/server.crt;
    ssl_certificate_key /etc/nginx/ssl/server.key;
    ssl_protocols TLSv1.2 TLSv1.3;
    ssl_ciphers EECDH+CHACHA20:EECDH+AES128:RSA+AES128:EECDH+AES256:RSA+AES256:EECDH+3DES:RSA+3DES:!MD5;
    ssl_prefer_server_ciphers on;
    location / {
        proxy_pass http://backend_servers;
        proxy_set_header Host $host;
        proxy_set_header X-Real-IP $remote_addr;
        proxy_set_header X-Forwarded-For $proxy_add_x_forwarded_for;
    }
}
热门标签
Nginx 下载 安装 配置 反向代理 负载均衡 网站上线 教程 优化 安全 Linux Windows Ubuntu CentOS 源码编译 动静分离 HTTPS ChmlFrp内网穿透 chmlfrp第三方启动器联盟 © 2025 Nginx教程 蓝天资源网 // 搜索框功能 document.querySelector('.search-btn').addEventListener('click', function() { const searchTerm = document.querySelector('.search-input').value.toLowerCase(); if (searchTerm.trim() === '') { alert('请输入搜索关键词'); return; } alert('搜索功能正在开发中,您搜索的关键词是:' + searchTerm); }); // 平滑滚动到锚点 document.querySelectorAll('a[href^="#"]').forEach(anchor => { anchor.addEventListener('click', function (e) { e.preventDefault(); const targetId = this.getAttribute('href'); if (targetId === '#') return; const targetElement = document.querySelector(targetId); if (targetElement) { targetElement.scrollIntoView({ behavior: 'smooth' }); } }); }); // 代码块复制功能 document.querySelectorAll('pre').forEach(pre => { const copyBtn = document.createElement('button'); copyBtn.textContent = '复制'; copyBtn.style.position = 'absolute'; copyBtn.style.top = '10px'; copyBtn.style.right = '10px'; copyBtn.style.padding = '4px 8px'; copyBtn.style.border = 'none'; copyBtn.style.borderRadius = '4px'; copyBtn.style.backgroundColor = '#3b82f6'; copyBtn.style.color = 'white'; copyBtn.style.fontSize = '12px'; copyBtn.style.cursor = 'pointer'; copyBtn.title = '复制代码'; pre.style.position = 'relative'; pre.prepend(copyBtn); copyBtn.addEventListener('click', function() { const code = pre.textContent; navigator.clipboard.writeText(code).then(() => { copyBtn.textContent = '已复制'; setTimeout(() => { copyBtn.textContent = '复制'; }, 2000); }); }); });站点链接:Nginx 教程网 - 全面的 Nginx 学习与应用平台